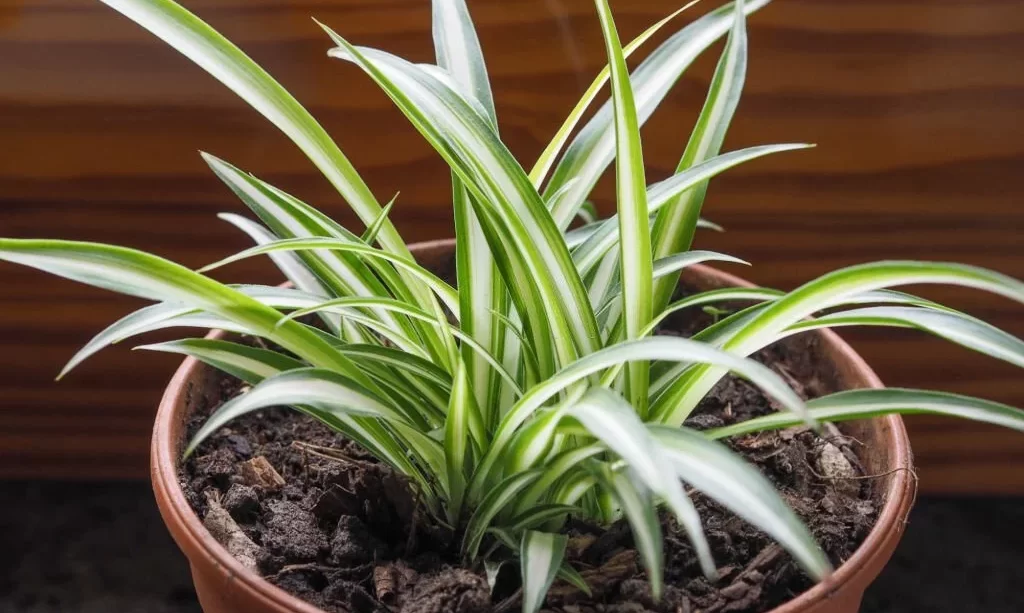
Spider plants, with their graceful arching leaves and air-purifying qualities, are beloved additions to many homes. To ensure your spider plant thrives and continues to grace your space with its beauty, it’s important to know how to trim it correctly. In this straightforward guide, we’ll walk you through the process of trimming your spider plant, step by step. By the end, you’ll have the knowledge and confidence to keep your spider plant healthy and looking its best.
- Drop forged body and handles.
- Quality blade made of Premium Titanium steel with Ultra-fine Polishing Technology.
- Ergonomically designed non-slip handles are strong,lightweight,and comfortable.
- Sap groove design to help keep pruning shears from sticking by channeling off sap.
- Pruners can cut up to 3/4″ diameter size tree branches.This may vary depending on tree species.
Tools and Materials
You won’t need a vast array of tools and materials for this simple task. Here’s what you’ll need:
- Scissors or Pruning Shears: These will be your main tools for trimming the plant.
- Container or Bag: Have a container or bag ready to collect the trimmings. That’s it! With these basic tools and materials at your disposal, you’ll be well-prepared to give your spider plant the care it deserves.
Step 1: Assess Your Spider Plant
Before you begin trimming, take a moment to assess the condition of your spider plant:
- Inspect the Leaves: Look closely at the leaves and identify any that are yellowing, browning, or dead. These are the ones that need trimming.
- Check for Spiderettes: If your spider plant has produced baby plants (spiderettes), decide if you want to keep them or remove them for propagation.
- Overall Health: Consider the overall health of your plant. If it looks overcrowded or unruly, trimming can help it thrive.
Step 2: Gather Your Tools
Now that you know what needs attention, gather the tools you’ll need for the job:
- Scissors or Pruning Shears: Use a clean and sharp pair of scissors or pruning shears to make precise cuts.
- Container or Bag: Prepare a container or a bag to collect the trimmings. This makes cleanup easy and keeps your space tidy. With your spider plant assessed and your tools ready, you’re all set to begin the trimming process, which will help your plant flourish and stay vibrant.
Step 3: Trimming Dead or Yellowing Leaves
Now it’s time to give your spider plant a fresh start by removing any dead or yellowing leaves:
- Identify Problem Leaves: Carefully locate the leaves that are discolored, wilted, or dead. These are the ones to trim.
- Trimming Technique: Using your scissors or pruning shears, make clean cuts at the base of each problematic leaf. Ensure you don’t damage nearby healthy leaves.
- Dispose of Trimmings: Place the trimmed leaves in your container or bag for easy disposal.
Step 4: Pruning Brown Tips
To enhance the appearance of your spider plant, it’s important to prune any brown tips from the leaves:
- Identify Brown Tips: Examine the leaves for brown or crispy tips. These can be due to dryness or environmental factors.
- Pruning Method: With your scissors or pruning shears, trim the affected leaf tips, making a neat, diagonal cut to remove the damaged portion.
- Collect Trimmings: Place the pruned tips in your container or bag along with the previously trimmed leaves.
By completing these steps, you’ll not only improve the overall health of your spider plant but also give it a more appealing and well-groomed appearance.
Step 5: Remove Offshoots (Optional)
If your spider plant has produced offshoots or “spiderettes” that you’d like to propagate into new plants, here’s what you can do:
- Identify Offshoots: Locate the baby plants growing near the base of the main plant. They often have small roots.
- Separation Technique: Gently separate the offshoots from the main plant, ensuring you have some roots attached to each one.
- Plant in Soil: Plant these separated offshoots in small pots with fresh potting soil. Water them lightly and place them in a bright, indirect light location. They will grow into new spider plants over time.
- SUPERIOR WATER MANAGEMENT- Quickly drain away excess moisture after each watering to protect roots and grow a happy plant
- PERFECT FOR ALL SNAKE PLANT TYPES- Specially blended substrate for all snake plants such as Sansevieria trifasciata, Laurentii, Black Coral, and Cylindrica
- ALL-NATURAL INGREDIENTS- Made from all-natural horticultural materials such as coconut coir, pine bark chips, perlite, and sand for added drainage; contains no slow release fertilizer
- PROFESSIONALLY MIXED IN THE USA- Each bag of snake plant soil is packaged with love on our family farm right in the USA; perfect for potted and outdoor snake plants
- REPOTTING MADE SIMPLE- Available in heavy-duty, resealable bags in 4 or 8 quart sizes; perfect for any size houseplant garden
Step 6: Clean Up
After trimming and potentially propagating your spider plant, it’s essential to tidy up your work area:
- Dispose of Trimmings: Discard the trimmed leaves and any other plant material you collected during the process.
- Clean Your Tools: Wipe your scissors or pruning shears clean and store them for future use.
- Neaten the Plant: Adjust the remaining leaves to create a balanced and visually appealing look.
With your spider plant looking refreshed and tidy, it will continue to thrive and bring a touch of green elegance to your home.
Step 7: Care After Trimming
Once you’ve completed the trimming process, it’s crucial to provide proper care for your spider plant to ensure it continues to thrive:
- Watering: Maintain regular, moderate watering. Allow the soil to dry slightly between watering sessions but avoid letting it become bone dry.
- Light: Spider plants prefer bright, indirect sunlight. Avoid direct sunlight, as it can scorch the leaves.
- Fertilization: Feed your plant with a balanced, diluted liquid fertilizer every two to four weeks during the growing season (spring and summer).
- Repotting: If your spider plant becomes root-bound or outgrows its pot, consider repotting it into a slightly larger container with fresh potting soil.
Conclusion
Trimming your spider plant is a straightforward yet essential part of its care routine. By removing dead or yellowing leaves and tidying up its appearance, you’re not only helping it look better but also promoting its overall health and vitality. With the right care and attention, your spider plant will continue to thrive, purify your indoor air, and bring a touch of nature’s beauty into your home. Happy gardening!


