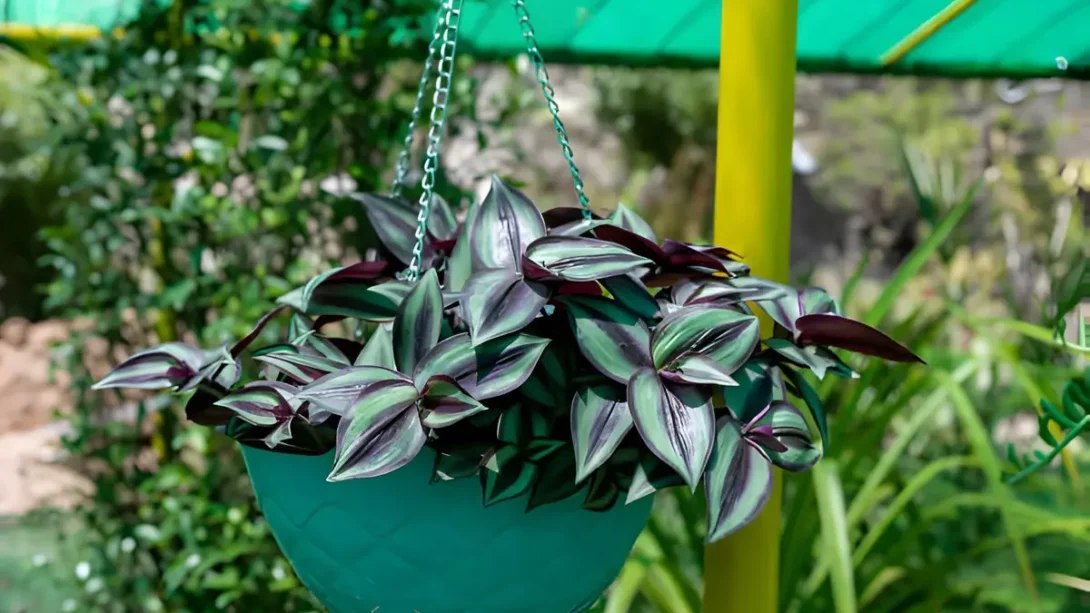
The Wandering Jew, belonging to the Tradescantia genus, is a vibrant and fast-growing plant known for its striking leaves and ease of care. Propagation, the process of creating new plants from the parent, is not just a practical method for expanding your collection but also essential for maintaining the health and vigor of these beautiful plants. This guide will delve into various propagation methods, ensuring gardeners of all levels can successfully increase their Wandering Jew plants.
Wandering Jew
Wandering Jew plants are cherished for their colorful foliage, which can vary dramatically between species. Common types include Tradescantia zebrina, with its distinctive silver and purple stripes, and Tradescantia fluminensis, known for its glossy green leaves. These plants thrive under bright, indirect light and prefer moist, well-drained soil, showcasing their versatility and resilience in various indoor environments. Propagation plays a crucial role in the plant’s life cycle, allowing gardeners to rejuvenate older plants and share their growth with friends and family.
Preparation for Propagation
The best time to propagate Wandering Jew plants is during the spring and early summer, when they’re in their active growth phase. This timing ensures the cuttings have the best chance of rooting successfully. You’ll need a few basic tools and materials, including sharp scissors or pruning shears, pots with drainage holes, fresh potting mix, and water. Choosing a healthy parent plant is crucial; look for one with robust growth, free of pests and diseases, to ensure the highest success rate in propagation.
Propagation Methods
Propagation can be achieved through several methods, with soil and water being the most popular and accessible. Each method has its benefits, and choosing one may depend on your available resources and personal preference.
Soil Propagation
Propagating Wandering Jew in soil is straightforward and efficient. Begin by selecting healthy stem cuttings from the parent plant, ensuring each cutting is about 4-6 inches long and has several leaf nodes. Leaf nodes are crucial as they are where new roots will emerge. Here’s how to proceed:
- Prepare the Pot: Fill a pot with a well-draining potting mix, slightly moistening the soil before planting.
- Cut and Plant: Use sharp scissors to make a clean cut just below a leaf node. Remove the leaves from the lower half of the cutting to prevent rot and insert the stem into the prepared potting mix.
- Position and Care: Place the pot in a location with bright, indirect light and maintain the soil’s moisture without overwatering. A plastic bag can be gently placed over the plant to create a greenhouse effect, promoting humidity and encouraging root growth.
Water Propagation
Water propagation offers the delight of watching roots develop in real time. This method involves placing stem cuttings in a container of water and is especially appealing for its simplicity and effectiveness.
- Prepare Cuttings: Similar to soil propagation, select healthy stem cuttings. However, remove all leaves that would be submerged to prevent decay.
- Submerge in Water: Place the cuttings in a glass or jar of water, ensuring at least one leaf node is submerged. Change the water every few days to keep it fresh and oxygenated.
- Rooting: Keep the container in a location with bright, indirect light. Roots typically begin to appear within a few weeks. Once they’re about an inch long, the cuttings are ready to be transferred to soil.
Aftercare for Propagated Plants
Once your Wandering Jew cuttings have rooted, whether in soil or water, they will require attentive care to develop into robust, healthy plants. Here’s how to ensure your newly propagated plants thrive:
- Watering Needs: Newly propagated plants need consistent moisture but should not be waterlogged. Allow the top inch of soil to dry out before watering again. Over-watering can lead to root rot, while under-watering can stress the young plants, impeding their growth.
- Light, Temperature, and Humidity: Wandering Jew plants prefer bright, indirect sunlight. Too much direct sunlight can scorch their leaves, whereas too little light can cause leggy growth and diminish leaf coloration. Aim to keep the temperature around 65-75°F (18-24°C) for optimal growth. These plants enjoy high humidity, so consider using a humidifier or placing the pot on a water-filled pebble tray to increase moisture in the air.
- Fertilization: Once your cuttings have established roots and show new growth, begin to fertilize lightly with a balanced, water-soluble fertilizer diluted to half the recommended strength. Fertilizing monthly during the growing season (spring and summer) will support their development. Avoid over-fertilizing, which can damage the delicate roots of young plants.
- Transplanting and Potting Up: When your propagated plants have outgrown their initial pots, it’s time to pot them up. Choose a pot that is one size larger than the current one to prevent over-potting, which can lead to water retention and root rot. Use a fresh potting mix that drains well to give your plants a good start in their new containers.
Troubleshooting Common Issues
Even with careful attention, you may encounter some issues during the propagation process. Here are solutions to common problems:
- Root Rot: If roots appear brown and mushy, the cutting may be suffering from root rot, often due to overwatering. To save the plant, trim away the rotted roots and repot in fresh, well-draining soil, adjusting your watering habits.
- Slow Rooting: Some cuttings take longer to root, especially in cooler temperatures. Ensure they are kept in a warm, bright spot and consider using a rooting hormone to encourage growth.
- Fungal Issues: White, fuzzy mold can sometimes appear on the soil surface or the plant itself, usually due to excessive moisture. Improve air circulation around the plant, reduce watering, and remove any affected parts of the plant. For soil mold, scraping off the top layer of soil and replacing it with fresh, dry soil can help.
By addressing these common issues promptly, you can prevent minor problems from becoming major setbacks in your propagation journey.
Conclusion
Propagating Wandering Jew plants is a rewarding endeavor that enhances your indoor garden and shares the beauty of these vibrant plants with friends and family. By following the methods and care tips outlined in this guide, you can successfully propagate and nurture your Wandering Jew cuttings into thriving plants.
Propagation not only contributes to the health and longevity of your plants but also deepens your connection to gardening as a nurturing and creative activity. Each new plant that you propagate carries with it the story of its origin, making it a meaningful addition to your home or a thoughtful gift for a fellow plant lover.
As you gain experience with propagating Wandering Jew plants, don’t hesitate to experiment with different methods and share your discoveries with the gardening community. Whether through soil or water propagation, the journey from cutting to full-grown plant is filled with learning opportunities and the joy of watching new life flourish.
Remember, gardening is a practice of patience and care. Some cuttings may not root as expected, and others may face challenges like root rot or fungal issues. These experiences, though initially disappointing, are valuable lessons that refine your gardening skills and knowledge. With each propagation attempt, you become more attuned to the subtle needs of your plants and more adept at fostering their growth.
In closing, we encourage you to embrace the art of propagation with enthusiasm and curiosity. The Wandering Jew, with its fast growth and striking appearance, is an excellent plant for both novice and experienced gardeners to expand their indoor gardens. Share your success and inspire others to start their propagation journey, spreading the lush beauty of Wandering Jew plants far and wide.


