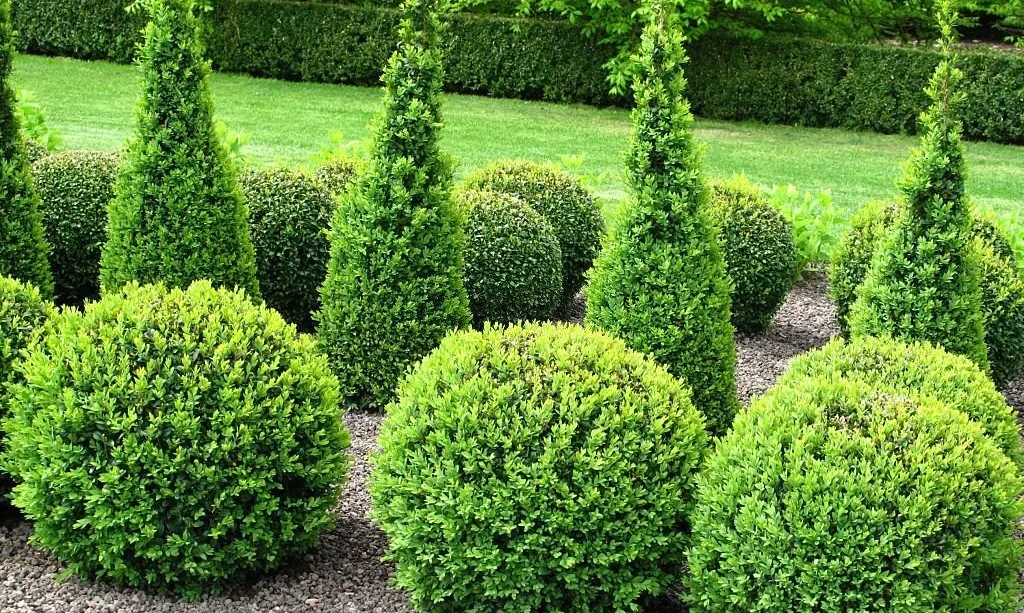
Welcome to the world of boxwood hedges, a classic and elegant addition to any landscape! If you’re looking to create a beautiful and structured outdoor space, planting a boxwood hedge is a fantastic choice. In this article, we’ll guide you through the step-by-step process of planting a boxwood hedge, ensuring its success and longevity. Let’s get started and transform your landscape with the timeless beauty of a boxwood hedge!
- USDA Prohibits Shipping Live Plants to: TN.
- Brand Name: Southern Living Plant Collection
- This petite-leafed evergreen lives up to its name, producing smooth, glossy dark-green leaves while simultaneously achieving an easily manageable size of 3 feet tall and wide.
- The Baby Gem Boxwood works tremendously well in smaller gardens due to its compact dwarf size, and is ideal in low shrub borders, formal hedges, natural hedges, container gardens, and numerous other applications.
- The slow to moderate rate of growth makes these boxwoods remarkably easy to maintain, with pruning being optional during the spring. Once established, these plants are drought, heat, and deer tolerant, making it one of the hardiest shrubs available.
Selecting Boxwood Varieties and Preparing the Site
Choosing Boxwood Varieties
There are several boxwood varieties to choose from, each with its unique characteristics. Consider factors such as your climate, sunlight availability, and the desired height and shape of your hedge. Common boxwood varieties include American boxwood (Buxus sempervirens), English boxwood (Buxus sempervirens ‘Suffruticosa’), and Japanese boxwood (Buxus microphylla).
Site Preparation
Before planting your boxwood hedge, it’s important to prepare the site to ensure optimal growing conditions for the plants.
- Clearing the Area: Remove any existing vegetation, weeds, or debris from the planting area. This helps reduce competition for resources and gives your boxwood hedge a fresh start.
- Soil Improvement: Boxwoods thrive in well-draining soil that is rich in organic matter. Test the soil pH and make necessary adjustments to achieve a slightly acidic to neutral pH range (around 6.0 to 7.0). Amend the soil with compost or aged manure to improve its fertility and drainage. Break up any compacted soil to promote healthy root growth.
- Sunlight Considerations: Boxwoods prefer partial shade to full sun. Choose a planting location that receives at least 4 to 6 hours of direct sunlight per day. However, some varieties can tolerate more shade, so select the appropriate variety based on the sunlight availability in your landscape.
- Spacing and Hedge Line: Determine the desired spacing between boxwood plants based on the variety and the desired density of your hedge. For a formal hedge, plant boxwoods closer together, while a more informal hedge may allow for slightly wider spacing. Use stakes, string, or a garden hose to mark the hedge line and ensure a straight and even row.
Preparing the site properly and selecting the right boxwood varieties are crucial steps in establishing a healthy and thriving boxwood hedge. Stay tuned as we delve into the next steps of planting and caring for your boxwood hedge, turning your landscape into a captivating and elegant haven!
Measuring and Marking the Hedge Line
Now that you’ve chosen your boxwood varieties and prepared the site, it’s time to measure and mark the hedge line. This step ensures that your boxwood hedge will have a straight and uniform appearance.
- Determine the Length and Height: Measure the length of the area where you want to plant the hedge. Decide on the desired height of the hedge, keeping in mind the mature height of your chosen boxwood variety.
- Marking the Hedge Line: Use stakes, string, or a garden hose to mark the hedge line. Drive stakes into the ground at each end of the hedge, then stretch the string taut between them. Alternatively, lay a garden hose along the desired hedge line, bending it to match the desired shape.
- Ensuring Even Spacing: If you want a uniformly spaced hedge, measure and mark the spacing between each boxwood plant along the hedge line. This ensures that the plants will be evenly distributed and create a cohesive look.
Digging the Trench and Amending the Soil
With the hedge line marked, it’s time to dig the trench and prepare the soil for your boxwood plants.
- Digging the Trench: Using a shovel or spade, dig a trench along the marked hedge line. The width and depth of the trench should be slightly larger than the rootball of your boxwood plants. Aim for a depth that allows the top of the rootball to be level with the ground surface.
- Soil Amendment: While the trench is open, take the opportunity to amend the soil. Mix in organic matter, such as compost or aged manure, to improve the soil’s fertility, structure, and drainage. This will provide a nutrient-rich environment for your boxwood plants to thrive.
- Backfilling the Trench: Gently place each boxwood plant into the trench, making sure the top of the rootball is level with the ground. Fill the trench with the amended soil, firming it gently around the roots to eliminate air pockets. Avoid compacting the soil too tightly, as it may impede root growth.
By measuring and marking the hedge line accurately and properly digging and amending the soil, you’re setting the foundation for a beautiful boxwood hedge. Stay tuned as we explore the next steps, including planting the boxwood shrubs, watering, and maintenance, to ensure your hedge flourishes and becomes a stunning focal point in your landscape!
- Fortified with phosphorus and iron
- Moisture Control protects against over- or under-watering
- Feeds up to 3 months
- Builds strong roots
- For in-ground use only
Planting the Boxwood Shrubs
Now that you have your trench prepared, it’s time to plant your boxwood shrubs and bring your hedge to life!
- Gently Remove the Plants: Carefully remove each boxwood shrub from its container, taking care not to damage the roots. If the roots are tightly packed, gently loosen them to encourage healthy root growth.
- Positioning the Shrubs: Place each boxwood shrub in the trench, spacing them according to the desired density of your hedge. Ensure that they are evenly distributed along the hedge line, creating a balanced and attractive appearance.
- Backfill and Firm the Soil: Once the shrubs are in place, backfill the trench with the soil mixture, ensuring that the soil covers the roots completely. Gently firm the soil around the base of each shrub to provide stability and support.
Watering and Mulching
Proper watering and mulching are vital for the establishment and growth of your boxwood hedge.
- Watering: After planting, thoroughly water the boxwood shrubs to settle the soil around the roots. Provide enough water to moisten the entire root zone. Going forward, water your boxwood hedge regularly, keeping the soil consistently moist but not waterlogged. Adjust the watering frequency based on weather conditions, ensuring the soil doesn’t dry out completely.
- Mulching: Apply a layer of organic mulch, such as wood chips or shredded bark, around the base of each shrub. Mulching helps retain soil moisture, suppress weed growth, and regulate soil temperature. Keep the mulch a few inches away from the stems to prevent excessive moisture retention, which can lead to stem rot.
Remember, maintaining adequate soil moisture is crucial, especially during the first year of establishment. Regular watering and mulching help provide the ideal growing conditions for your boxwood shrubs, ensuring they establish strong root systems and promote healthy growth.
Stay tuned as we explore the next steps of pruning and maintenance, which will help shape your boxwood hedge into a stunning landscape feature that you can enjoy for years to come!
- MIGHTY109 Espresso Brown Wood Chip Mulch
- Beautiful brown colored wood chips add a great finishing touch to any landscape.
- Great for use around flowers, plants, flower beds, gardens, landscapes and more.
- Helps to maintain soil temperature and moisture. Helps to reduce weed growth.
- 42 quarts.
Pruning and Maintenance
To keep your boxwood hedge looking tidy and well-maintained, regular pruning and maintenance are essential. Here’s what you need to know:
- Pruning Techniques: Prune your boxwood hedge in late winter or early spring before new growth begins. Use sharp pruning shears or hedge trimmers to shape the hedge and remove any dead, damaged, or overgrown branches. Aim for a slightly tapered shape, with the top slightly narrower than the bottom, to allow sunlight to reach all parts of the hedge.
- Maintenance Trimming: Throughout the growing season, perform light maintenance trimming to maintain the desired shape and density of the hedge. This can involve removing any stray or unruly branches to keep the hedge neat and compact.
- Fertilization: Apply a balanced slow-release fertilizer in early spring to provide necessary nutrients for healthy growth. Follow the manufacturer’s instructions for application rates and frequency.
- Regular Watering: Maintain consistent soil moisture by watering your boxwood hedge during dry spells or when the top inch of soil feels dry. Deep watering is preferable to encourage deep root growth.
- TOPBUXUS Boxwood Restore & Protect Mix is a foliar feed which contains all necessary nutrients for optimal Boxwood care, it strengthens your Boxwood and produces healthy green and shiny leaves
- Easy to use effervescent tablets – TOPBUXUS Boxwood Restore & Protect Mix is a leaf fertilizer in the form of an easy to use effervescent tablet
- Professional quantity sufficient for 4,000 square feet of Boxwood – the tub contains 40 individually packaged tablets, each tablet covers 100 square feet of Boxwood – Simply put 1 tablet in 1 quart of water, allow 10 minutes for the tablet to dissolve itself, then apply to 100 square feet of Boxwood foliage by using a pressure sprayer, make sure you cover the entire Boxwood
- TOPBUXUS Boxwood Restore & Protect is a 8-0-10 leaf fertilizer with secondary nutrients of 100% natural base
- Developed by TOPBUXUS – TOPBUXUS Boxwood Restore & Protect was scientifically developed, tested and used over a number of years by TOPBUXUS on their nursery in the Netherlands – TOPBUXUS are the world’s largest boxwood grower – Do what the grower does!
Conclusion
By following these simple steps for pruning and maintenance, you can ensure that your boxwood hedge remains healthy, vibrant, and visually appealing. Regular pruning helps maintain its shape, promotes denser growth, and encourages longevity.
Remember, a well-maintained boxwood hedge enhances the beauty of your landscape, providing structure, privacy, and a touch of elegance. With proper care and attention, your boxwood hedge will flourish and become a focal point in your garden for years to come.
So, grab your pruning shears and get ready to sculpt your boxwood hedge into a stunning masterpiece that will impress both you and your neighbors.


