Lily of the Valley, with its delicate, bell-shaped flowers and enchanting fragrance, adds a touch of elegance to shaded gardens. Whether you’re looking to rearrange your garden or share the beauty of these perennial favorites with friends, knowing when to transplant Lily of the Valley is key to ensuring a seamless relocation. In this guide, we’ll explore the nuances of Lily of the Valley, the optimal conditions for successful transplantation, and the best practices to preserve the health and charm of this beloved woodland plant.
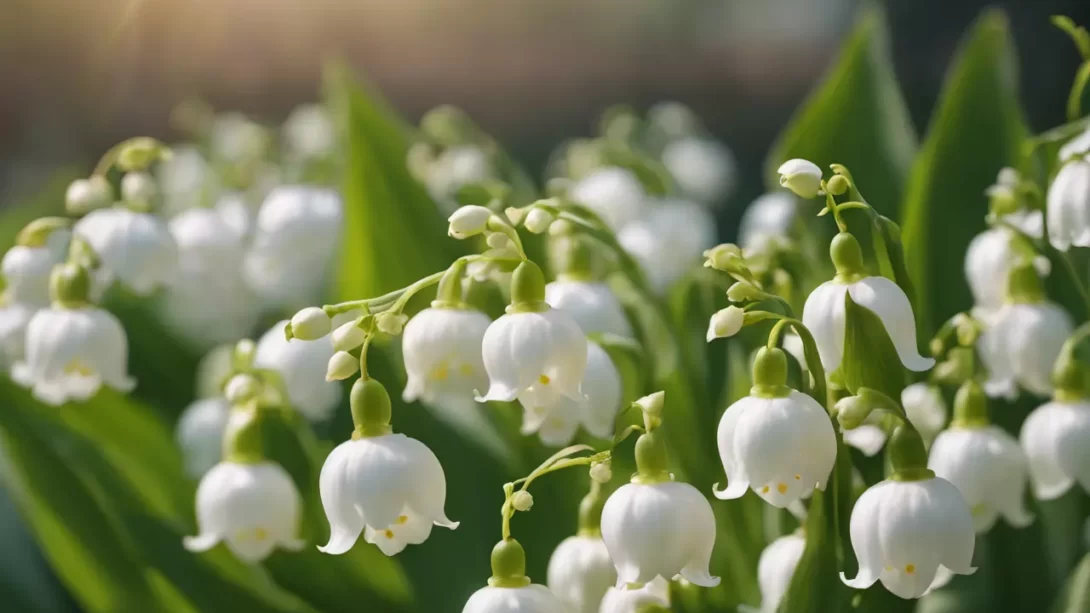
Lily of the Valley
Before delving into the art of transplantation, it’s essential to understand the unique characteristics of Lily of the Valley. This perennial plant, known scientifically as Convallaria majalis, boasts arching stems adorned with glossy, lance-shaped leaves and dainty, fragrant flowers that bloom in late spring. Lily of the Valley thrives in shaded areas with well-draining soil, creating lush, green carpets under trees and in woodland settings. Its resilience and adaptability make it a popular choice for gardeners seeking a low-maintenance yet captivating addition to their landscape.

- 100% NATURAL: Potting blend for Spathiphyllum (Peace Lily Plant), no chemicals or artificial fertilizers
- USES: Specially formulated for growing healthy Peace Lilies, for indoor / outdoor container gardening
- BENEFITS: Nutrient retention, aeration to roots, pH balance, and organic matter
- Ingredients: Pine bark, peat moss, perlite, sand, and lime
- Size: 8 quarts
Best Time for Transplanting
Timing is crucial when it comes to transplanting Lily of the Valley, as it directly impacts the plant’s ability to establish itself in its new surroundings. The two optimal periods for transplantation are the early fall and late spring. These seasons offer favorable conditions for Lily of the Valley to adapt and thrive:
Early Fall (Late September to Early October)
- As temperatures begin to cool after the heat of summer, early fall provides a more moderate climate, reducing stress on the transplanted Lily of the Valley.
- The soil is still warm enough for the plant to establish its roots before winter sets in, ensuring a strong foundation for the following spring.
Late Spring (Mid to Late May)
- Late spring, just after the plant has finished flowering, is another excellent time for transplantation.
- With milder temperatures and increased moisture availability, Lily of the Valley can recover from the transplant process more effectively, allowing for robust growth throughout the growing season.
By understanding these preferred transplanting windows, gardeners can maximize the chances of a successful Lily of the Valley relocation, fostering the continued beauty and fragrance of this timeless woodland gem.
Preparing for Transplantation
Before embarking on the transplantation journey for Lily of the Valley, proper preparation is key to ensuring a smooth transition for this delicate woodland plant. Follow these essential steps to get both the plant and the new site ready:
- Watering Prior to Transplantation: A day or two before the planned transplant date, thoroughly water the Lily of the Valley. Adequate moisture helps the plant withstand the stress of transplantation and promotes healthy root retention.
- Selecting a New Planting Site: Choose a new location that mirrors the original growing conditions, providing similar levels of shade and well-draining soil. This ensures that Lily of the Valley can seamlessly adapt to its new environment.
Transplantation Process
Executing the transplantation process with care and precision is crucial for Lily of the Valley’s successful relocation. Follow these steps to ensure the plant’s roots remain intact, fostering a healthy establishment in its new home:
- Digging Up the Entire Plant: Use a shovel or garden fork to carefully dig up the entire Lily of the Valley clump. Take care to dig deeply and widely to capture the full root system.
- Preserving the Roots: Gently shake off excess soil from the roots, taking care not to damage them. Lily of the Valley has a delicate root system, and preserving its integrity is vital for successful transplantation.
- Replanting at the Same Depth: In the new location, dig a hole of the same depth as the Lily of the Valley clump. Place the plant in the hole, ensuring it sits at the same level as it did in its original spot. Proper planting depth supports healthy growth.
- Spacing Considerations: If transplanting multiple Lily of the Valley clumps, space them appropriately to allow for future growth. Adequate spacing promotes good air circulation, reducing the risk of diseases.
Watering and Aftercare
After Lily of the Valley has been transplanted, thoughtful watering and ongoing care are essential to support its adjustment to the new surroundings:
- Consistent Watering: Immediately after transplantation, provide a thorough watering to help settle the soil and reduce transplant shock. Continue to water consistently in the following weeks, especially during dry spells.
- Monitoring for Stress Signs: Keep a close eye on the Lily of the Valley for signs of stress, such as wilting or yellowing leaves. Adjust watering practices accordingly to ensure the plant receives adequate moisture.
- Mulching for Moisture Retention: Apply a layer of organic mulch around the base of the transplanted Lily of the Valley to conserve moisture, suppress weeds, and regulate soil temperature. Mulching provides a protective environment during the critical establishment period.
By meticulously following these steps, gardeners can increase the likelihood of a successful Lily of the Valley transplantation, allowing this charming woodland plant to thrive in its new home.
Dealing with Established Plants
Transplanting well-established Lily of the Valley requires a strategic approach to ensure the health and vitality of the divided clumps. Here are considerations and steps for dealing with established plants:
- Dividing the Clumps: Carefully divide the mature Lily of the Valley clumps into smaller sections. Ensure that each section has a sufficient number of healthy roots and viable shoots. Dividing helps rejuvenate the plant and promotes continued vigorous growth.
- Selecting Healthy Sections: Choose sections with robust rhizomes and green shoots. Avoid using sections that show signs of disease or distress. Healthy divisions are more likely to adapt successfully to their new locations.
- Replanting Divisions: Follow the standard transplantation process for each divided section, maintaining consistent planting depth and spacing. Adequate care during the division and replanting process enhances the chances of a successful outcome.
Potential Challenges and Solutions
Transplanting Lily of the Valley, like any gardening endeavor, may present challenges. Being aware of potential issues and having solutions at hand can contribute to a smoother transplantation process:
- Transplant Shock: Lily of the Valley may experience transplant shock, resulting in temporary wilting or yellowing of leaves. To mitigate shock, provide shade for a few days after transplantation, reduce water loss by mulching, and ensure consistent watering.
- Inadequate Establishment: If the plant struggles to establish itself in its new location, consider supplementing with a balanced, slow-release fertilizer. This can provide essential nutrients to support root development and overall growth.
- Crowded Patches: Over time, Lily of the Valley patches can become crowded, leading to reduced vigor and blooming. To address this, divide and transplant overcrowded sections, creating more space for individual plants to thrive.
- Pest and Disease Management: Keep an eye out for common pests like aphids or potential diseases. Early detection allows for prompt intervention, whether through natural remedies or targeted treatments, preserving the health of the transplanted Lily of the Valley.
Conclusion
Successfully transplanting Lily of the Valley is a rewarding endeavor that allows gardeners to rejuvenate their landscapes and share the beauty of this timeless woodland plant. By understanding the nuances of preparation, the transplant process, and ongoing care, gardeners can ensure the seamless relocation of these delicate, fragrant blooms. Whether dividing established clumps or moving individual plants, the careful consideration of timing and environmental conditions plays a crucial role. As you witness Lily of the Valley adapting to its new surroundings and gracing your garden with its charming presence, take pride in the thoughtful efforts that contribute to a flourishing and fragrant outdoor haven. Happy gardening!