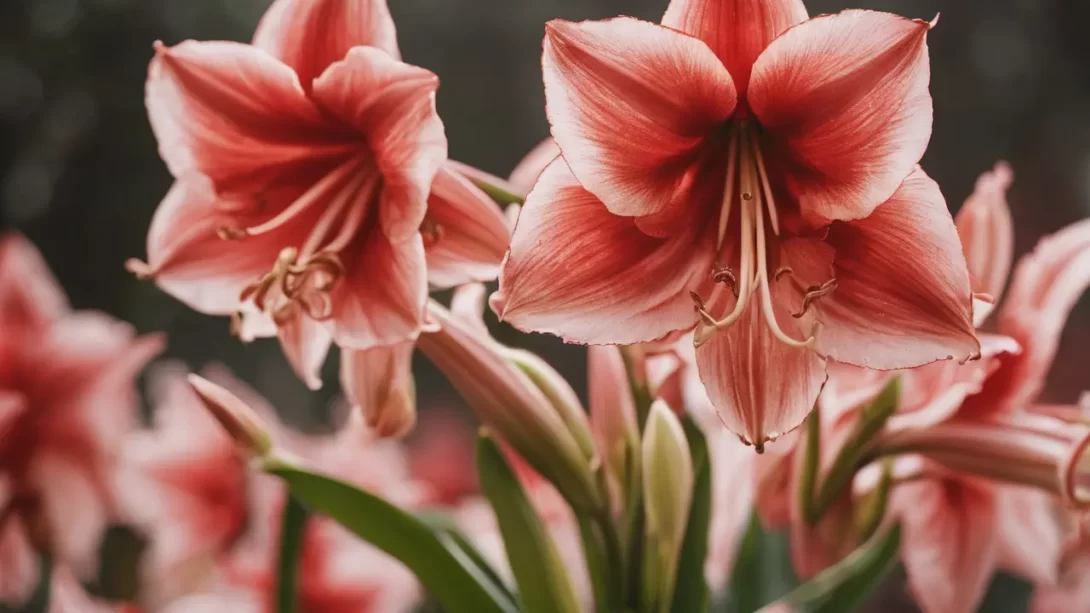
The amaryllis, renowned for its spectacular, trumpet-shaped flowers, is a favorite in many gardens and homes. Proper care of this plant, particularly its foliage, is essential for ensuring its continued beauty and health. This guide focuses on the critical aspect of leaf maintenance, specifically when and how to cut back amaryllis leaves to promote robust growth and vibrant blooms in the following season.
The Amaryllis Growth Cycle
Amaryllis plants follow a distinctive growth cycle that impacts when their leaves should be cut back. This cycle includes:
- Flowering Period: Typically in late winter or early spring, the plant produces its striking blooms.
- Foliage Growth: After flowering, the plant grows long, strap-like leaves that continue through the spring and summer. This period is crucial for photosynthesis, helping the plant store energy in its bulb for the next blooming cycle.
- Dormancy Period: In late summer or early fall, the plant begins to enter a dormant state, during which leaf growth slows and eventually ceases.
Understanding this cycle is crucial for timing the cutting back of the leaves to ensure the plant’s energy is optimally used for future blooming.
Importance of Leaves in Amaryllis Health
The leaves of an amaryllis play a vital role in the health and blooming capacity of the plant:
- Energy Storage: Through photosynthesis, the leaves produce and store energy in the bulb, which is critical for the development of the next season’s flowers.
- Overall Health: Healthy leaves indicate a healthy plant. They are essential for the amaryllis’s overall vigor and ability to produce flowers year after year.
Therefore, it’s important to maintain the leaves properly and only cut them back at the appropriate time to not hinder the plant’s health and blooming potential.
When to Cut Back Amaryllis Leaves
The timing of cutting back amaryllis leaves is crucial:
- Natural Yellowing: The best time to cut back the leaves is when they begin to yellow and wither naturally, typically in late summer or early fall.
- Dependent on Conditions: The exact timing can vary depending on the plant’s growing conditions, such as light exposure and climate. Indoor plants may have a slightly different timeline than those grown outdoors.
Waiting until the leaves start to die back naturally ensures that the plant has had sufficient time to store enough energy for the next flowering period.
Steps for Cutting Back Amaryllis Leaves
Proper technique is essential when trimming amaryllis leaves to avoid harming the plant. Here are the steps to follow:
- Prepare the Right Tools: Use a pair of sharp scissors or pruning shears. Ensure they are clean to prevent the spread of disease.
- Trimming Technique: Cut the leaves back to about 1 to 2 inches above the bulb. Make clean cuts without tearing the leaves.
- Disposing of Trimmed Leaves: Remove and dispose of the cut leaves to prevent any potential disease or pest issues.
Being cautious and precise during this process helps in preventing damage to the bulb and ensures the plant remains healthy.
Post-Trimming Care
After cutting back the leaves, the care you provide to your amaryllis will help it rejuvenate for the next season:
- Watering: Reduce watering significantly after trimming the leaves. The bulb requires less water during its dormant period.
- Sunlight Exposure: If the plant is indoors, move it to a cooler, darker area. For outdoor plants, consider moving the pot to a shaded area or covering the soil to protect the bulb.
- Fertilization: Fertilization is not necessary during dormancy. Resume feeding the plant when new growth appears in the next growing season.
This post-trimming care is crucial for helping the amaryllis bulb to rest and conserve energy for future growth.
Common Mistakes to Avoid
When cutting back amaryllis leaves, avoid these common mistakes:
- Trimming Too Early: Cutting the leaves back before they yellow naturally can deprive the bulb of necessary nutrients.
- Cutting Too Close to the Bulb: Avoid cutting the leaves too close to the bulb to prevent damage that could hinder growth.
- Neglecting Cleanliness: Using dirty tools can introduce diseases to the plant. Always use clean, sterilized cutting instruments.
Awareness of these common errors can help in maintaining the health and vitality of your amaryllis plant.
Conclusion
Properly cutting back the leaves of an amaryllis plant is a crucial step in its annual care cycle. By understanding the plant’s growth pattern and recognizing the right time for trimming – typically when the leaves naturally yellow and wither – you can ensure your amaryllis has the best chance for vibrant growth and blossoming in the next season. Remember to use clean, sharp tools for trimming, and avoid common mistakes like cutting too early or too close to the bulb. Post-trimming care, such as reduced watering and proper positioning, is essential to guide the plant into a healthy dormant period. With these guidelines, your amaryllis will be well-prepared to delight you with its stunning blooms year after year. Whether you’re a seasoned gardener or a beginner, these steps will help you maintain the beauty and health of your amaryllis plants, making them a lasting and striking part of your gardening collection.