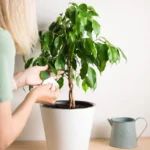
Hello there, plant lover! Today, we’re taking a magical journey into the world of ferns. These enchanting green beauties are more than just an attractive touch to any space. They’re a living testament to the resilience and persistence of life. After all, they’ve been around for about 360 million years! But like any other plant, ferns need a bit of tender, loving care – especially when it comes to transplanting them.
- Optimal aeration and drainage for healthy fern roots.
- Specifically formulated for ferns to support robust growth.
- Nutrient-rich composition promotes vibrant foliage.
- Versatile mix suitable for both indoor and outdoor ferns.
- Convenient 4-quart packaging for various potting or repotting projects.
Ferns: Quick Facts
Before we delve into the nitty-gritty of transplanting, let’s spend a moment to appreciate these marvelous plants. Ferns belong to an ancient plant family that once covered much of the earth’s surface. They’re different from other plants because they reproduce through spores instead of seeds. Ferns love shade and moisture, and they’re found all over the world, except in extreme conditions like deserts and the Arctic.
The Importance of Transplanting Ferns
But why talk about transplanting? Well, like many other plants, ferns sometimes outgrow their pots. They might become root-bound, or their environment might no longer meet their needs. Sometimes, you might just want to propagate them, starting a new fern from an old one. Whatever the reason, transplanting is an essential skill for any fern lover. And don’t worry – while it may sound a bit daunting, with the right guidance and a gentle touch, you’ll have your fern moved to its new home in no time.
The Best Time to Transplant Ferns
Timing is everything, isn’t it? When it comes to transplanting ferns, this couldn’t be more true. The best time to give your fern a new home is in the early spring. Why spring, you ask? Well, this is when your fern is starting to wake up from its winter rest and begins to put out new growth. Transplanting during this time gives your fern the whole growing season to settle into its new home and develop a strong root system.
Selecting the Right Location for Transplanted Ferns
Location, location, location! This real estate mantra applies to ferns, too. Ferns love shady spots protected from harsh afternoon sun. They thrive in well-drained soil that’s rich in organic matter. In the wild, you’ll often find them in woodland settings or along stream banks. When choosing a spot in your garden, try to mimic these conditions. If you’re keeping your fern indoors, pick a place that gets lots of indirect light, away from drying heaters or chilly drafts.

- 【Ideal home décor】 Engage a modern minimalist style to match home decors and to display your plants. Adorn your outdoor and indoor areas: porch, patio, balcony, living room, study room, etc.
- 【Indoor/Outdoor Use】 Designed with your gardening needs in mind, these hanging planters come with 2 drainage holes and 2 plugs to ease the concern of overwatering for your indoor and outdoor plants. Your ferns, pothos, ivy, and spider plants will thrive in these porous, breathable hanging planters.
- 【Weather Resistant and Durable 】 Allow you to enjoy these hanging plant pots for outdoor plants in all types of weather. Built to withstand intense sun and harsh winter temperatures, they are free from fade, frost, crack and peel damage.
- 【Lightweight materials and Adjustable Hanger 】 13 inch 2Pack Large Hanging Planters are made from durable brand new plastic, these planters are light enough to hang anywhere indoors and outdoors. Feel free to adjust the height to your liking with its sturdy heavy-duty triple chains hanger.
- 【Really Nice Gift】Ideal to decorate pathways and indoors. It will be a great and practical gift for plant lovers. They’ll love the freedom to display their plants wherever they want. It’s perfect for birthdays and festival gifts.
Gathering the Necessary Tools for Transplanting
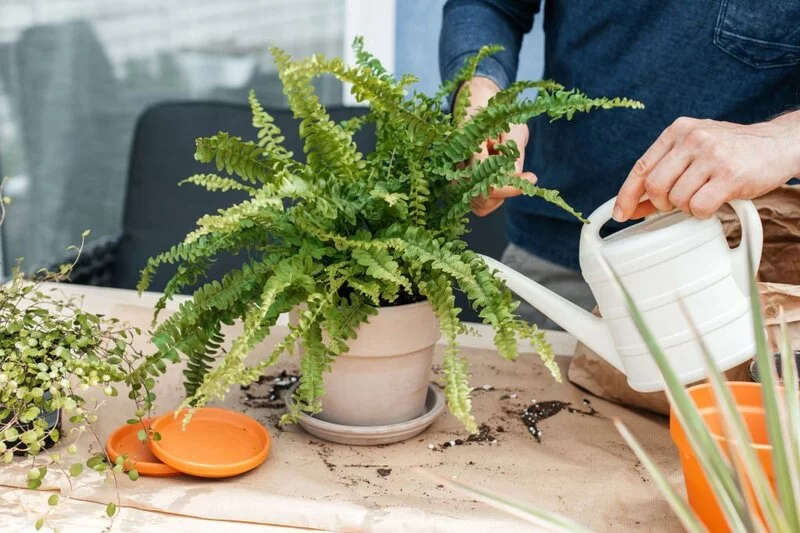
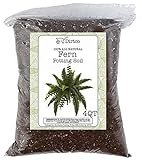
Now, let’s get down to business. Before you start, you’ll need to gather a few essential tools. These include a sharp, clean spade or garden trowel for digging, a pot or garden space that’s large enough for your fern’s roots to spread out, and some high-quality potting soil that’s suitable for ferns. A pair of gardening gloves wouldn’t hurt either – ferns aren’t prickly, but keeping your hands clean and protected is always a good idea! With these tools at the ready, you’re all set to start transplanting your fern.
Step-by-Step Guide on How to Transplant Ferns
Are you ready to give your fern a new home? Great! Let’s do it step-by-step, nice and easy.
- Water your fern well a day before you plan to transplant it. This will ensure the root ball stays together during the process.
- Now, gently dig around the fern with your spade or trowel, taking care not to damage the roots. Lift the fern out of the ground, keeping as much soil around the roots as possible.
- Prepare the new spot or pot with your potting soil. Make sure the hole is wide and deep enough for the fern’s root system.
- Place your fern in the hole. The top of the root ball should be level with or slightly above the surrounding soil.
- Fill in the hole with soil, pressing gently to remove any air pockets.
- Water the fern generously after transplanting, and add more soil if needed after the water settles.

- Package contains 30 fertilizer spikes for palm trees, plants, and ferns and is produced to avoid wasteful runoff, mess, hazards and smells
- Plant fertilizer is formulated with a 16-2-6 NPK to provide palm plants and ferns the nutrients they need to create healthy, lush, and vibrant foliage
- Application is simple and should be done every 60 days
- Jobe’s fertilizer spikes are pre-measured to provide the right amount of nutrients for palm trees and plants without the risk of over fertilizing
- Jobe’s fertilizer spikes come in a variety of formulas and pack sizes to help provide lush foliage and vibrant color to your lawn and garden
Aftercare: Taking Care of Transplanted Ferns
Good job on the transplant! Now, how do you take care of your newly moved fern? Here’s how:
- Water the fern regularly, especially during the first few weeks after transplanting. However, avoid overwatering as ferns don’t like soggy soil.
- Protect the fern from strong sunlight and harsh weather conditions until it’s established.
- Apply a slow-release fertilizer in the spring to give your fern the nutrients it needs to thrive.
- Keep an eye out for pests and diseases. If you notice any changes in your fern, act quickly to identify and address the issue.
Conclusion
Transplanting ferns might seem like a daunting task, but it’s actually quite straightforward when you know the steps. With the right timing, location, tools, and aftercare, you can successfully move your fern to its new home. Remember, ferns are hardy plants that can handle a little disturbance. So, don’t stress too much and enjoy the process. Happy gardening!