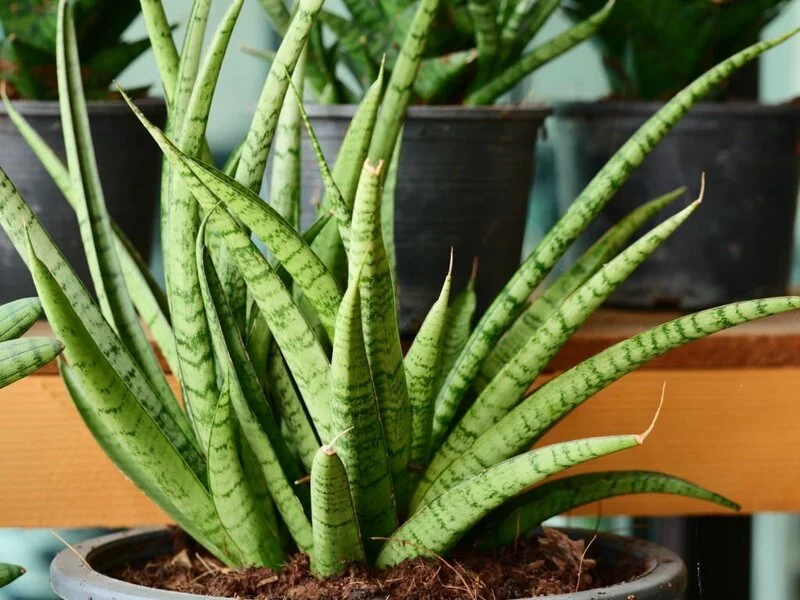
Who doesn’t love a snake plant? With their tall, sturdy leaves and ability to survive in almost any indoor conditions, they make an excellent choice for both new and experienced plant parents. But what do you do when your snake plant starts getting a little crowded and seems to outgrow its pot? That’s when it’s time for a plant version of moving day! Yes, we’re talking about separating your snake plant. It might sound complicated, but don’t worry. This guide will walk you through the process, making it as smooth as a snake’s slither!
- Set of 4 medium 5.5 x 4.7 inch white ceramic cylinder planters with attached saucers for drainage
- Suitable for small snake plants, succulents, herbs, and other small houseplants
- Attached saucer design helps minimize water runoff
- Drainage hole in bottom with mesh filter prevents soil blockage
- Made from durable kaolin clay; hand wash recommended
Knowing When to Separate Your Snake Plant
Before you pull out your gardening gloves, it’s important to know when your snake plant needs a little extra space. Snake plants grow by sending out rhizomes under the soil that pop up as new plants, affectionately known as ‘pups’. These pups grow around the mother plant and can cause the pot to get a little congested over time.
So, how do you know when it’s time to separate your snake plant? Look for these signs:
- The pot is crowded: Your snake plant looks like it’s bursting out of the pot. You can barely see the soil because of all the leaf clusters.
- You see roots poking out: Roots are escaping through the pot’s drainage holes. This usually means the plant has used up all available space inside the pot.
- The plant looks unhealthy: If your snake plant is drooping, yellowing, or showing signs of distress, it might be due to overcrowding.
The best time to separate your snake plant is usually in the spring or early summer, which is its active growing season. However, as snake plants are pretty hardy, they can be separated at any time of the year with the right care. So, if your snake plant is showing these signs, get ready for some plant parent action!
- SPECIFICALLY FORMULATED FOR SNAKE PLANTS – A premium blend of all natural peat moss, perlite, lime, and earthworm castings formulated to provide the most optimal growth environment for Snake Plants of all variety. This blend promotes a faster quality plant growth for your snake plants.
- GROW HEALTHY AND VIBRANT SNAKE PLANTS – Our soil blend provides exceptional drainage properties that prevents water logged soil and root problems. Store bought soils may leave your snake plant with droopy and mushy leaves. Our aerated and fast draining blend will allow your snake plant to thrive and grow lush and vibrant.
- READY TO USE PRE-MIXED BLEND: Simplify your gardening hobby with our pre-mixed soil blends for a hassle free potting and replanting experience. Simply transplant your snake plants into their container and add our soil mix.
- RESEALABLE BAG: Packaged in a 8×10 Inch 2 Quart Sized resealable bag. The perfect amount of soil for planting or repotting 1-2 small to medium sized plants.
Gathering the Necessary Supplies
Alright, plant heroes, before we dive into the separation process, let’s assemble our toolkit. Here’s what you’ll need:
- A clean, sharp knife or pruners: These will help you separate the pups from the mother plant. Make sure they’re clean and sharp to avoid damaging the plant or spreading diseases.
- Fresh potting mix: A well-draining soil is crucial for snake plants. Look for a mix designed for succulents or cacti, or make your own with regular potting soil and some coarse sand or perlite.
- New pots with drainage holes: These will be the new homes for your separated snake plants. The size depends on the size of the pups, but generally, a pot a few inches larger than the pup should do the trick.
- Gloves (optional): While not essential, gloves can protect your hands during the process, especially if you’re dealing with a large, heavy plant.
Preparing Your Snake Plant for Separation
Now that you’ve got your supplies ready, it’s time to prep your snake plant for the big move. Start by gently removing it from its current pot. If the plant seems stuck, tap the sides of the pot to loosen the soil and carefully slide the plant out.
Once out of the pot, gently shake off excess soil from the roots. This will give you a clearer view of where the pups are connected to the mother plant. It’s important to handle the plant and its roots gently to minimize damage. Remember, these are living things, and we want to cause as little stress as possible during this process.
And don’t worry if this all sounds a bit scary. Your snake plant is tougher than it looks, and it’s going to love the extra room to grow!
The Separation Process
With your snake plant out of its pot and roots exposed, you’re ready to start the separation process. Find the spots where the pups are attached to the mother plant. You’re looking for a thick, fleshy rhizome that connects them. Once you’ve identified these, take your clean, sharp knife or pruners and cut the pup away. Aim to make a clean, quick cut to minimize damage. Repeat this process with each pup.
Now you should have several individual plants, each with its own root system. Give yourself a pat on the back – you’ve just successfully separated your snake plant!
- 🌱 PERFECT BLEND OF NUTRIENTS – Give your snake plants everything they need to grow up healthy! Our 3-1-2 liquid concentrate has all of the essential nutrients that your plants crave.
- 🌱 MIX WITH WATER – Designed to blend with water to provide a single application to use every other watering cycle. 1-2 tsp per 8 cups water.
- 🌱 SUITABLE FOR ALL VARIETIES – You can use our fertilizer on just about any kind of snake plants. It’s great for seedlings and mature plants alike.
- 🌱 SPECIALLY DESIGNED PREMIUM FORMULA – Special blend enables maximum absorption for plant growth and vitality.
- 🌱 DURABLE PACKAGING – This liquid concentrate comes in a sturdy, 8 oz foil sealed bottle. Store it in a safe, dry place and you can count on it to stay in great condition for a long time to come.
Aftercare for Your Separated Snake Plants
Great job! But your work isn’t quite over yet. It’s time to pot your newly separated snake plants. Fill your new pots halfway with fresh potting mix, then place each plant in its pot, making sure the roots are well spread out. Fill in around the plant with more soil until it’s secure, but avoid packing the soil too tightly.
Water the newly potted plants lightly, just enough to moisten the soil. Then, place them in a bright spot with indirect light. For the first few weeks, keep an eye on your new plants and water sparingly. They need some time to recover from the separation process, but they’ll soon start showing new growth.
Conclusion
And there you have it, your step-by-step guide to separating a snake plant! While it might seem daunting, separating your snake plant is an essential part of plant care. It gives each part of the plant the space it needs to thrive and can even help you multiply your collection. So, the next time your snake plant looks a bit crowded, don’t be afraid to pull out your gardening tools and give it some room to grow.


