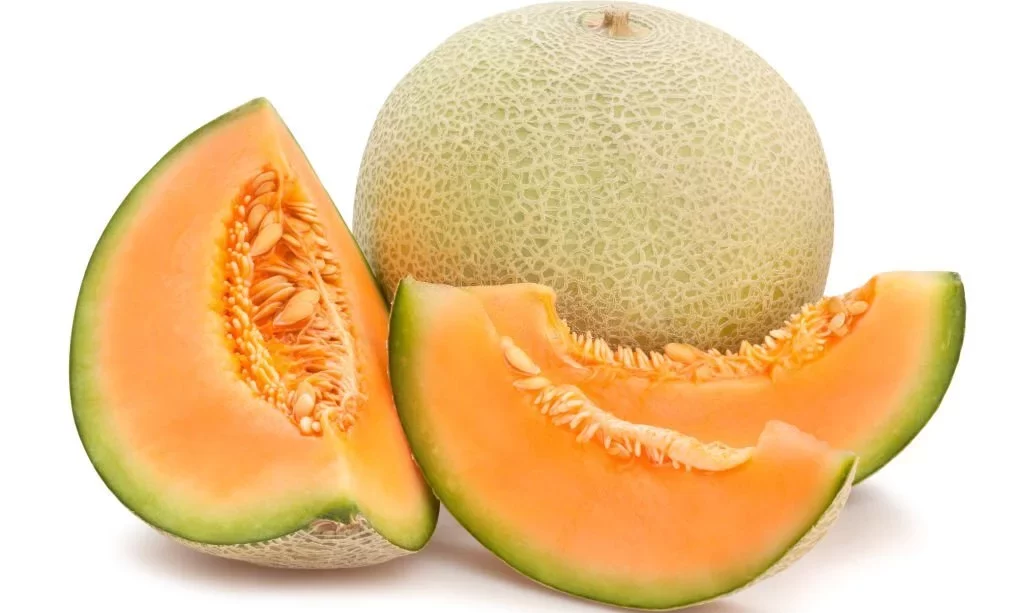
Saving cantaloupe seeds is a gratifying endeavor that allows you to preserve the delicious essence of this summertime favorite while creating opportunities for future bountiful harvests. In this guide, we will explore the art of harvesting and storing cantaloupe seeds, providing you with the knowledge and techniques to embark on your seed-saving journey. Whether you’re a seasoned gardener or a newcomer to the world of seed preservation, this process is both straightforward and rewarding, offering the promise of homegrown cantaloupes in the seasons to come.
- Our top-selling cantaloupe for over 20 years. The thick, firm, flesh is delicious right down to the rind. The 6″ melons average 5 lbs. Each
- Each packet contains 30 seeds
- Sow outdoors 4 weeks after the average last frost date and harvest in 86 days
- Plant Height is 15″. plant spread is 36″. yields 6″ fruit
- Annual for all growing zones from 1-11. Sunlight exposure = full-sun
Selecting Ripe Cantaloupes for Seed Harvesting
The first step in the journey to saving cantaloupe seeds is selecting the perfect melons for the task. Here’s how to identify ripe cantaloupes that are ideal for seed harvesting:
- Visual Clues: Ripe cantaloupes should have a golden hue with a slight blush of orange. Examine the skin for a net-like texture, which is a good indicator of ripeness.
- Aroma: A ripe cantaloupe emits a sweet, fragrant aroma from the stem end. If you can smell the delicious scent, it’s likely ready for harvesting seeds.
- Texture: Gently press the blossom end (opposite the stem) with your thumb. If it yields slightly and feels soft, it’s a sign that the cantaloupe is ripe.
- Weight: Ripe cantaloupes should feel heavy for their size. A lighter cantaloupe may indicate that it’s not yet fully mature.
Selecting ripe cantaloupes ensures that the seeds inside are mature and ready for harvesting, setting the stage for successful seed preservation.
Harvesting Cantaloupe Seeds
Harvesting cantaloupe seeds is a straightforward process, and it begins with the careful removal of the seeds from the fruit:
- Preparing the Work Area: Set up a clean and spacious work area with a cutting board, a large bowl, and a spoon. Ensure your hands are clean.
- Cutting the Cantaloupe: Slice the cantaloupe in half lengthwise using a sharp knife. Be cautious as you cut through the stem end.
- Scooping Out the Seeds: Use a spoon to scoop out the seeds and surrounding pulp from the cantaloupe’s cavity. Place the seeds and pulp into the bowl.
- Separating the Seeds: To separate the seeds from the pulp, you can use your fingers or a strainer. Gently squeeze the seeds to release them from the pulp.
- Rinsing the Seeds: Rinse the seeds under cold, running water, using your fingers to remove any remaining pulp. Ensure that the seeds are clean and free from pulp residue.
Now that you’ve successfully harvested cantaloupe seeds, the next steps involve cleaning, drying, and storing them for future planting.
Cleaning and Drying Cantaloupe Seeds
After you’ve harvested cantaloupe seeds, the next crucial steps involve cleaning and drying them. Properly cleaned and dried seeds have a better chance of staying viable for future planting:
- Cleaning the Seeds: Place the harvested seeds in a fine-mesh sieve or strainer. Under cold, running water, gently rinse the seeds while using your fingers to remove any remaining pulp. Continue rinsing until the seeds are entirely clean.
- Drying the Seeds: To ensure successful storage, spread the cleaned seeds in a single layer on a paper towel, a screen, or a plate. Allow them to air dry thoroughly. This process typically takes a few days, depending on humidity levels.
- Avoid Heat or Direct Sunlight: While drying, keep the seeds away from direct sunlight or heat sources, as excessive heat can damage them. Aim for a dry, well-ventilated area.
Storing Cantaloupe Seeds
Proper storage is vital for preserving the viability of cantaloupe seeds. Follow these guidelines to ensure your seeds remain healthy and ready for planting:
- Selecting Storage Containers: Choose storage containers that are airtight and moisture-resistant. Small envelopes, paper bags, or glass jars with tight-fitting lids are suitable options.
- Labeling: Label each storage container with the date of seed harvesting and the specific cantaloupe variety. This information helps you keep track of seed freshness and variety.
- Storage Location: Store the sealed containers in a cool, dry, and dark location, such as a pantry or a basement. Keep the seeds away from temperature fluctuations and direct sunlight, as these factors can reduce seed viability.
- Avoid Refrigeration or Freezing: Cantaloupe seeds do not require refrigeration or freezing for preservation. Storing them in a cool, dark cupboard is sufficient.
By adhering to these guidelines for cleaning and storing cantaloupe seeds, you’ll maximize their shelf life and maintain their potential for healthy germination when it’s time to plant them. Saving cantaloupe seeds allows you to enjoy homegrown melons year after year while reducing your reliance on store-bought seeds.
Testing Seed Viability
While it’s not mandatory, conducting a seed viability test can provide peace of mind and increase your chances of successful germination when you decide to plant your saved cantaloupe seeds. Here’s how to perform this optional test:
- Damp Paper Towel Test: Take a few of your cleaned and dried cantaloupe seeds and place them between damp paper towels.
- Seal in a Plastic Bag: Put the damp paper towels with the seeds inside a sealable plastic bag.
- Wait for Germination: Allow the seeds to remain in the sealed bag for about a week, keeping them in a warm location with indirect light.
- Check for Germination: After a week, carefully open the bag and inspect the seeds. Look for any signs of germination, such as tiny roots or sprouts.
- Interpreting the Results: If a significant portion of the tested seeds has germinated, it’s a positive indicator that the majority of your saved seeds are viable. If very few or none have germinated, you may want to consider using fresher seeds for planting.
Using Saved Cantaloupe Seeds
Once you’ve completed the process of saving, cleaning, and optionally testing your cantaloupe seeds, you’re ready to put them to use. Here’s how to make the most of your saved seeds:
- Planting Time: Cantaloupe seeds can be planted when the soil temperature is consistently warm, typically after the last frost in your area. Refer to your local gardening calendar for specific timing.
- Soil Preparation: Choose a sunny location in your garden with well-draining soil. Prepare the soil by incorporating organic matter to improve fertility and water retention.
- Planting Depth: Sow the cantaloupe seeds at a depth of about 1 inch (2.5 cm) in rows or hills, with spacing according to the variety’s recommendations.
- Watering: Keep the soil consistently moist but not waterlogged during the germination and growing stages.
- Caring for Seedlings: Once seedlings emerge, thin them if necessary to maintain proper spacing. Provide support for vining varieties by using trellises or supports.
- Harvesting: Harvest your homegrown cantaloupes when they’re fully ripe. The sweet aroma and slip of the fruit from the stem are good indicators of readiness.
Conclusion
Saving cantaloupe seeds is a delightful journey that not only allows you to enjoy the flavors of your favorite melons year after year but also promotes sustainability and self-sufficiency in your gardening endeavors. By carefully selecting ripe cantaloupes, harvesting and cleaning the seeds, and storing them properly, you can extend the joy of growing and sharing this delectable fruit with family and friends. Optional seed viability testing adds an extra layer of assurance, while planting and caring for your cantaloupe seedlings will reward you with a fruitful and satisfying gardening experience.


