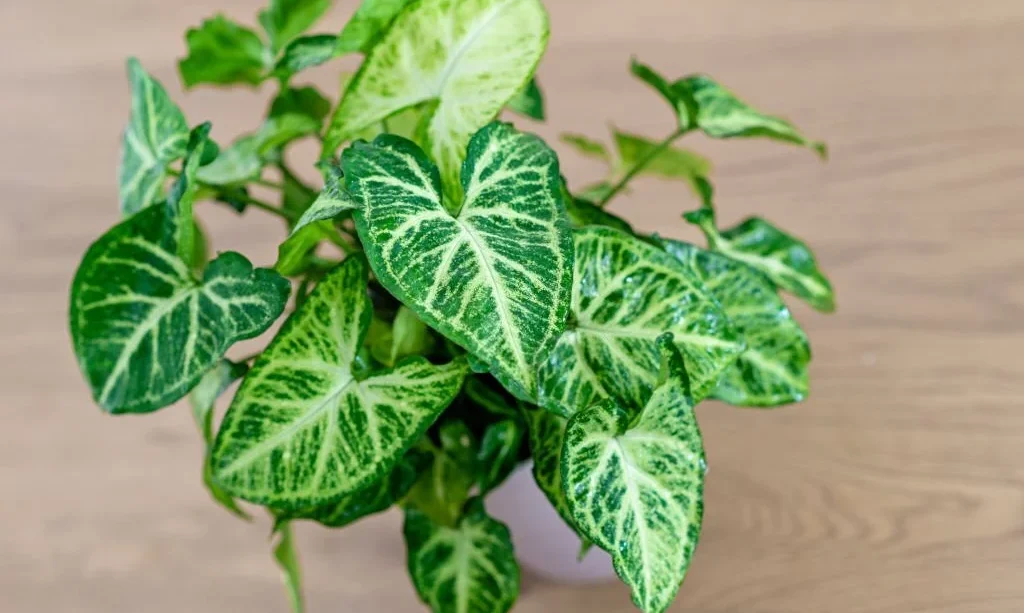
Hello plant lovers! Ever wanted to multiply your favorite Syngonium plant? You’re in luck! Today, we’re delving into the rewarding world of plant propagation. Whether you’re a seasoned horticulturist or a novice plant parent, you’ll soon see that with a little time and care, you can expand your indoor jungle with some fresh Syngonium sprouts. Excited? Let’s get started!
- Member of Colorful Foliage, Houseplants, Shade Plants
- Requires bright, indirect light
- Dimensions: 72.00in high, 2.00in high on delivery, spreads 15.00in
- USDA Hardiness Zone(s): 10-12
Syngonium Plants
Before we jump into the propagation process, let’s take a moment to get to know our star: the Syngonium plant.
- Meet the Syngonium: Also known as the Arrowhead Plant, the Syngonium is popular for its attractive, arrow-shaped leaves and its variety of beautiful colors. This tropical beauty can transform any room into a green paradise.
- Growing Conditions: The Syngonium loves indirect light and a humid environment. It thrives in well-draining soil and enjoys a drink of water once the top inch of its soil feels dry to the touch.
Understanding your plant’s natural growth habits and preferences will set the stage for a successful propagation. So, now that we’ve introduced our leafy star, it’s time to gather our tools and dive into the exciting world of plant propagation!
Materials Needed for Propagation
Alright, green thumbs, let’s gather our tools! Don’t worry, you won’t need anything fancy.
- Materials List: You’ll need a sharp, clean pair of pruning shears or scissors, a container filled with water, and a sunny windowsill or a warm spot in your home. And of course, you’ll need your Syngonium plant.
- Finding Materials: Most of these items can be found around your home. Remember, it’s important to clean your cutting tool before use to avoid any potential infection.
Preparing Your Syngonium for Propagation
The stage is set, tools are ready, and it’s time for action!
- Choosing the Mother Plant: Look for a healthy, mature Syngonium plant. A good mother plant should have vibrant foliage and show no signs of disease or stress.
- Taking Cuttings: Find a healthy stem and make a cut below a node (the bumpy bit where leaves or branches grow). Your cutting should have at least one or two leaves, and be about 4-6 inches long.
Rooting Your Cuttings
Now, let’s turn this little cutting into a new plant!
- Water Rooting: Place your cutting into the container with water, ensuring the node is submerged but the leaves aren’t touching the water. Remember, water is where the magic happens – new roots will sprout from the node.
- Caring for Your Cuttings: Place your container in a warm spot with plenty of indirect sunlight. Change the water every few days to keep it fresh.
In a few weeks, your cuttings will start to develop roots. It’s like watching a baby plant take its first steps – truly magical! So let’s move on to the next step and find a new home for our baby plant.
- Ultimate potting soil that has everything your plants need in one bag
- Ocean Forest is pH adjusted at 6.3 to 6.8 to allow for optimum fertilizer uptake
- Ocean Forest has a light, aerated texture that’s perfect for indoor and outdoor plants
- Designed for containers and ready to use right out of the bag
- The date imprinted on the bag signifies the product’s manufacturing date
Transplanting Rooted Cuttings
Congrats, your cutting has roots! It’s time for it to graduate to a pot with soil.
- Pot and Soil Prep: Choose a pot with drainage holes and fill it with well-draining potting mix. A mix of regular potting soil and perlite works great for Syngoniums.
- The Big Move: Make a hole in the center of the soil, place your rooted cutting in it, and gently cover the roots with soil.
- Aftercare: Water the soil thoroughly and place the pot in a warm spot with bright, indirect light.
Troubleshooting Common Propagation Issues
Sometimes, despite our best efforts, things don’t go as planned. Don’t worry, it’s part of the learning process!
- No Roots: If your cutting isn’t rooting, it might not be getting enough light or the water might need changing more frequently.
- Yellow Leaves: This can be a sign of too much sunlight. Try moving your plant to a spot with less direct light.
- Root Rot: If the roots look mushy and brown, they may be rotting. This often happens if the water isn’t changed regularly or the plant is overwatered after being potted.
Conclusion
And there you have it – your very own homegrown Syngonium plant! Propagating your plants can feel like a journey, but it’s an adventure well worth undertaking. With these steps, you’ll not only have a lush and vibrant Syngonium but also the rewarding experience of having propagated it yourself. So, go ahead, embrace your green thumb and start propagating. Your indoor jungle awaits!


