Dracaena plants, with their vibrant foliage and air-purifying qualities, have become cherished houseplants in many homes. One of the most rewarding aspects of owning a Dracaena is the ability to propagate new plants from an existing one. In this guide, we will delve into the art of propagating Dracaena, unlocking the secrets to nurturing young plants from the comfort of your home. Whether you’re a seasoned gardener or a budding enthusiast, propagating Dracaena can be a fulfilling and cost-effective way to expand your indoor jungle.

- Greendigs Dracaena Marginata Plants are easy to maintain if conditions are kept consistent
- Dracaena prefers water about once per week when the soil feel dry
- These plants love to have their leaves misted every few days while kept at average room temperature
- Our nursery plants arrive in a grower’s pot, allowing you to plant in a container of your choice and include a package of Miracle-Gro Indoor Plant Food Spikes and care card
- Greendigs live plants will arrive boxed in durable packaging with wood fibers surrounding the base of the plant; weather may affect the transit so orders should be placed when temps are above 32°F, if not ideal, there could be a shipping delay
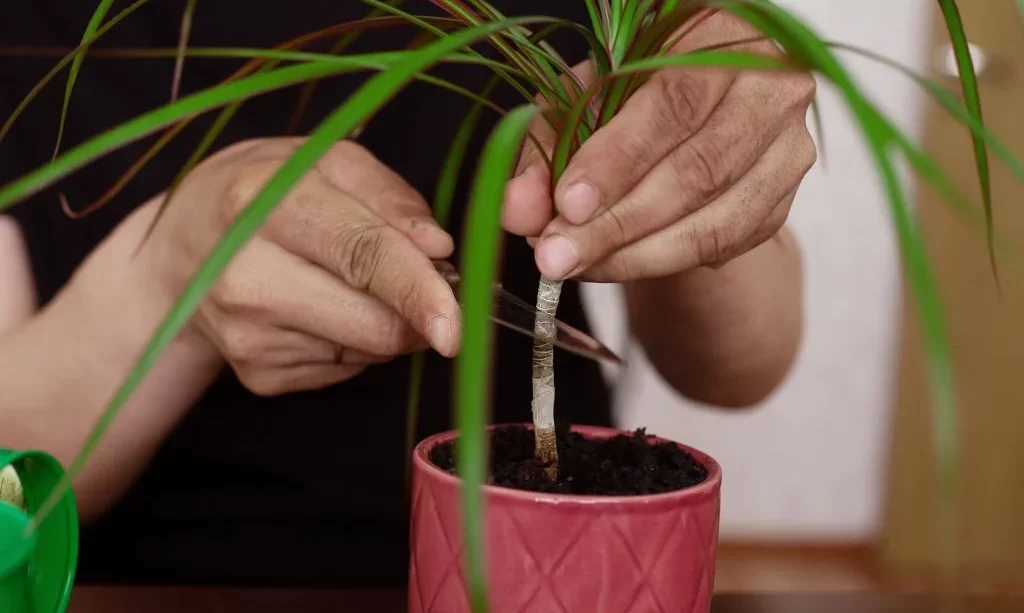
Propagation by Stem Cuttings
Propagating Dracaena through stem cuttings is one of the most common and straightforward methods. Here’s how it’s done:
- Selecting a Healthy Parent Plant: Begin by choosing a mature Dracaena plant with vibrant, disease-free foliage. Healthy parent plants yield the best cuttings.
- Taking Cuttings: Using clean and sharp pruning shears, cut a stem section that is around 4-6 inches in length. Ensure that the cutting has at least a few leaves and nodes (the areas where leaves and branches emerge).
- Rooting in Water: Place the stem cutting in a container of water, submerging the nodes but keeping the leaves above the waterline. Change the water regularly to prevent rot.
- Rooting in Soil: Alternatively, you can plant the cutting directly in a well-draining potting mix. Ensure that at least one node is buried in the soil. Keep the soil consistently moist but not waterlogged.
- Root Development: Over several weeks, roots will develop from the nodes of the cutting. Once the roots are several inches long, your new Dracaena plant is ready to be potted into its own container.
Propagation by stem cuttings is an excellent way to create new Dracaena plants with the same characteristics as the parent plant, ensuring a continued supply of this stunning houseplant.
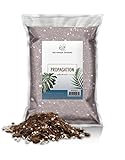
- Optimal Root Development: Our soilless mix encourages robust root systems, promoting strong and healthy plant growth from the start.
- Versatile Use: Suitable for various plant types, from house plants to other propagated varieties, making it a versatile addition to your gardening toolkit.
- Lightweight Composition: The blend’s lightweight nature ensures ease of use and handling during the delicate stages of plant propagation.
- Well-Aerated Environment: The mix provides excellent aeration, preventing issues related to waterlogging and supporting the development of vigorous roots.
- Hand-Blended Quality: Carefully crafted by hand, this planting mix is a testament to quality and precision, ensuring consistent results with each use.
Propagation by Air Layering
Air layering is another effective method for propagating Dracaena, particularly when you want to maintain the parent plant’s size and shape:
- Selecting a Suitable Section: Identify a healthy section of the parent plant’s stem that you wish to propagate. This should be a segment with a good number of leaves.
- Making Incisions: Make two parallel cuts around the stem, a few inches apart. Connect these cuts with a vertical incision. Gently peel away the bark to expose the inner layer of the stem.
- Applying Rooting Hormone: Dust the exposed stem with rooting hormone to encourage root development.
- Moistening Sphagnum Moss: Soak sphagnum moss in water and then squeeze out the excess moisture until it’s damp but not dripping.
- Wrapping in Moss: Wrap the damp sphagnum moss around the exposed stem, ensuring it covers the incised area. Then, encase the moss in plastic wrap to keep it in place.
- Encouraging Root Growth: Over several weeks, roots will form within the moss. Once there is a sufficient root system, carefully cut below the moss, ensuring you have a rooted section.
- Planting the Rooted Section: Pot the rooted section in a container with well-draining soil and provide appropriate care as it continues to grow.
Air layering can be an excellent choice when you want to create new Dracaena plants that share the same characteristics as the parent, making it an ideal method for preserving the unique features of your beloved houseplant.

- Most convenient, effective rooting compound
- No measuring or mixing required
- Dip the cuttings into the powder, tap off the excess and plant
- Contains 0.8% active ingredient for propagating the more difficult to root varieties (including many evergreens and dormant leafless cuttings)
- 1/2 lb. jug – 17,500 cuttings
Propagation by Offsets (Division)
Another method for propagating Dracaena involves dividing the plant’s offsets, also known as “pups”. Here’s how to do it:
- Identifying Offsets: Examine your mature Dracaena plant for offsets or small shoots that have developed at the base. These are essentially baby plants growing alongside the main plant.
- Separating Offsets: Carefully remove the offsets from the parent plant using a clean, sharp knife or pruning shears. Ensure that each offset has roots attached.
- Potting the Offsets: Plant each offset in a separate container with well-draining potting mix. Ensure that the roots are adequately covered with soil.
- Watering and Care: Water the newly potted offsets thoroughly, and then keep the soil consistently moist, but not waterlogged. Place them in a location with bright, indirect sunlight.
- Monitoring Growth: As the offsets continue to grow, provide regular care and adjust their environment as needed to promote healthy development.
Propagation by offsets is an efficient way to expand your Dracaena collection, and it often results in plants that are identical to the parent plant.
Propagation by Seeds (Advanced)
While less common, propagating Dracaena from seeds can be a fascinating endeavor for experienced gardeners:
- Seed Collection: Collect mature Dracaena seeds from the parent plant. These seeds are typically found in the flower clusters of older Dracaena plants.
- Germination: Sow the seeds in a seed tray or small pots filled with a well-draining seed-starting mix. Lightly cover the seeds with a thin layer of soil.
- Moisture and Temperature: Keep the soil consistently moist, and maintain a warm temperature (around 70-75°F or 21-24°C) to encourage germination.
- Light Requirements: Place the seed trays or pots in a location with bright, indirect light. Avoid direct sunlight, as it can be too harsh for young seedlings.
- Transplanting: Once the seedlings have developed several true leaves and are large enough to handle, transplant them into individual pots with standard potting soil.
- Caring for Seedlings: Continue to provide care for the seedlings, including regular watering, humidity maintenance, and protection from drafts.
Propagation by seeds offers the opportunity to grow Dracaena plants with unique characteristics, but it requires patience and more advanced gardening skills.
Caring for Young Dracaena Plants
Regardless of the propagation method used, caring for young Dracaena plants is crucial for their healthy development:
- Light: Provide bright, indirect light for your young Dracaena plants. Avoid placing them in direct sunlight, as this can scorch their leaves.
- Watering: Keep the soil consistently moist but not soggy. Allow the top inch of soil to dry out between waterings. Adjust the watering frequency based on the specific needs of your Dracaena variety.
- Humidity: Maintain moderate humidity levels around your plants. Placing a tray of water near the plants or using a humidity tray can help create the ideal environment.
- Temperature: Keep your Dracaena plants in a room with temperatures between 65-80°F (18-27°C). Avoid exposing them to cold drafts or extreme temperature fluctuations.
- Fertilization: Feed your young Dracaena plants with a balanced liquid fertilizer diluted to half strength every 4-6 weeks during the growing season (spring and summer).
- Repotting: As your Dracaena plants grow, they may require repotting into slightly larger containers. Typically, this is done every 2-3 years.
By providing proper care to your young Dracaena plants, you’ll ensure their growth and vitality, resulting in thriving additions to your indoor greenery.
Troubleshooting Common Issues
Even with careful propagation and care, issues may occasionally arise. Here are some common problems you might encounter when propagating Dracaena and how to address them:
- Root Rot: If you notice yellowing or wilting leaves and soggy soil, it may indicate root rot. Trim away affected roots and allow the plant to dry out before repotting in fresh, well-draining soil.
- Leaf Browning or Yellowing: This can be caused by overwatering, underwatering, or exposure to direct sunlight. Adjust your watering routine and move the plant to a suitable location with filtered light.
- Slow Growth: Slow growth may result from insufficient light, inadequate nutrients, or improper temperature. Ensure your young Dracaena receives the right conditions and consider fertilizing during the growing season.
- Pest Infestations: Keep an eye out for common indoor plant pests like spider mites or mealybugs. Treat infestations promptly with neem oil or insecticidal soap.
- Fungus Gnats: These tiny flies can be a nuisance. Use yellow sticky traps and let the soil surface dry between waterings to deter them.
Enjoying Your Propagated Dracaena
As your propagated Dracaena plants mature and flourish, you can take pleasure in various aspects of their growth:
- Aesthetic Beauty: Dracaena’s stunning foliage adds visual appeal to your indoor spaces. Enjoy the vibrant colors and unique patterns of their leaves.
- Air Purification: Dracaena plants are known for their air-purifying qualities, helping to improve the air quality in your home.
- Personal Satisfaction: Take pride in the fact that you’ve successfully propagated new plants from your existing Dracaena. This accomplishment reflects your green thumb skills.
- Sharing with Others: Consider gifting propagated Dracaena plants to friends and family, spreading the joy of indoor gardening.
Conclusion
Propagating Dracaena can be a rewarding journey, allowing you to expand your plant collection while enjoying the beauty of these versatile houseplants. Whether you choose stem cuttings, air layering, offsets, or seeds, the process of nurturing and caring for young Dracaena plants is an enriching experience for both seasoned gardeners and beginners.
As you troubleshoot any challenges that may arise and watch your propagated Dracaena thrive, you’ll find joy in the lush greenery and the sense of accomplishment that comes with growing new life. So, embark on your propagation adventure and relish the beauty and serenity these plants bring to your indoor spaces.