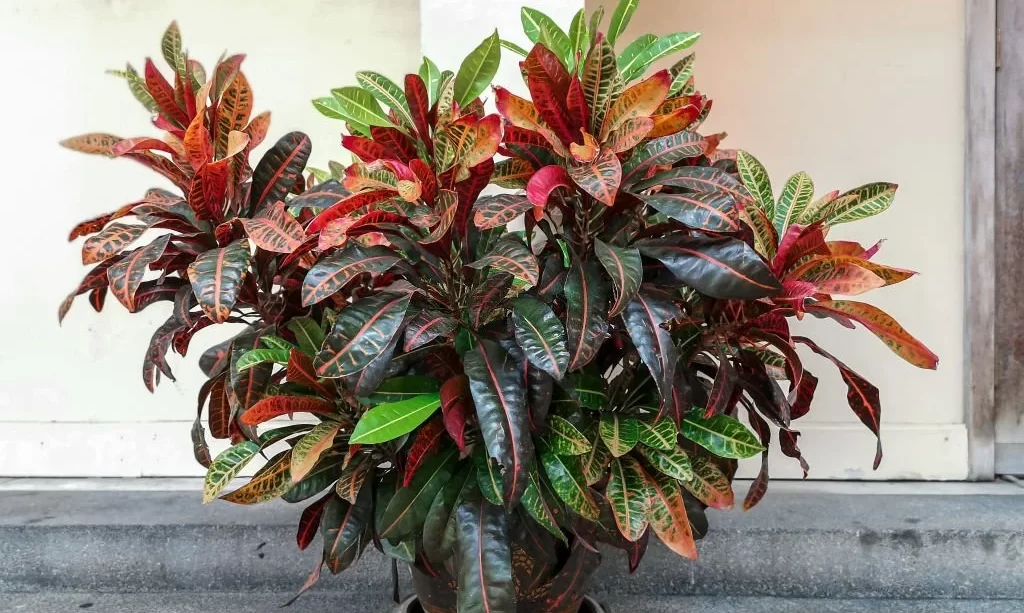
If you’re enchanted by the colorful and lively leaves of croton plants, you’re in for a treat. Imagine creating more of these beauties to brighten up your space or share with friends. The secret? Propagating croton plants! This guide will lead you through the steps, making it a breeze to multiply your croton collection and revel in their striking foliage even more.
- We CAN NOT ship this item to California, Arizona, Hawaii, and Alaska
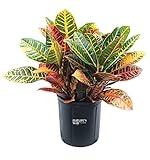
- Popular plant for fall decorating because of its fall-colored leaves
- Crotons are low maintenance, need little water, and adapt to any light condition
- Perfect plant for fall front porch decorating
- Air-purifying plant
Gather Your Materials
Before you embark on your croton propagation journey, let’s get everything ready. Think of it as preparing for a creative project. Here’s what you’ll need:
- Healthy Croton Plant: Like a superstar actor, you’ll need a healthy plant to take cuttings from. Choose a strong and vibrant croton for the best results.
- Sharp Scissors or Pruning Shears: These are your trusty tools for making clean cuts. Think of them as your plant’s hairstylist.
- Clean Container: Your croton cuttings will need a new home. Pick a clean container that’s big enough for the cuttings to grow a bit.
- Well-Draining Potting Mix: Think of this as cozy bedding for your cuttings. It’s where they’ll stretch their roots and grow.
- Plastic Bag or Plastic Wrap: Picture a little greenhouse for your cuttings. It helps create a humid and cozy environment for them to thrive.
Once you’ve got your tools in place, you’re ready to dive into the art of croton propagation!
Choose a Propagation Method
Let’s explore the different ways to make more croton plants. It’s like picking your favorite adventure! One popular method is using stem cuttings. This is like taking a part of your croton and growing it into a new plant. It’s simple and works well, especially for beginners.

- 【Make Pruning Work Easier】Rust-resistant stainless steel blade are sharp and Long-Lasting for easy and smooth cut.Anti-slip and ergonomic handle make the gardener clippers more comfortable in your hand.Easy-open spring action reduces hand fatigue while cutting. you can easily to cut without damaging the vital stems and branches of your plants.
- 【User-friendly Safety Lock】These garden shears have locking mechanisms to keep the sharp blades securely closed when not in use.It is easy to maneuver and can effectively reduce accidental injuries. And the closing mechanism is firmly enough, you don’t need to worry the plant pruning shears will get locked accidentally during use.
- 【Garden Gloves for Hand Protection】One size fits most. This Gardening gloves,made of soft & comfortable cotton fabric,can protect yourself from dirt, skin wounds and nasty splinters when doing yard chores. The grip latex coating provides anti-slip or sure control when grabbing garden & yard tools.
- 【Widely used】This gardening shears set comes with 3 different blades for a variety of general pruning tasks.It is ideal for harvesting or trimming herbs,flowers,house plants, hydroponics,bonsai,cutting stems or light branches,or other cutting needs in the garden. It would also be a perfect gift for a gardening friend.
- 【After Sales Service】 Reliable Customer Support. Please feel free to tell us if you have any questions about our garden shears pruning. Note:Keeping your pruner shears cleaned and well-oiled can extend their lifespan.Please dry and clean it after use.✅Note: The colors of the garden pruners and gloves will be shipped at random.✅
Take the Cuttings
Imagine you’re creating a special piece of a puzzle. Look for a healthy stem on your croton that’s about 4 to 6 inches long. Make sure it has a few leaves on it. Use sharp scissors or pruning shears to make a clean cut just below a leaf. This is where the new roots will grow.
Remove Lower Leaves
Your croton cutting needs some space to grow its roots. Imagine it’s like clearing a path for it. Carefully take off the leaves from the lower part of the stem. This way, the bottom part of the stem will be ready to root in the soil.
Now that you have your cuttings ready, let’s move on to the next steps in our croton-growing journey!
Allow the Cuttings to Dry
Time for a little rest for your croton cuttings! Imagine they’re taking a nap after a busy day. After you’ve taken the cuttings, let them sit in a dry spot for a day or two. It’s like giving them a chance to catch their breath. This helps prevent any moisture from causing problems when you plant them.
- Blended for a wide variety of container plants
- Feeds up to 6 months
- Designed to be less prone to gnats (contains no compost or bark, which are known to shelter fungus gnats)
- Contains coconut coir, which holds and releases water and helps soil easily re-wet
- For use in containers
Plant the Cuttings
Now it’s time for your cuttings to settle into their new home. Think of it as finding the perfect spot to sleep. Get a clean container and fill it with special soil that drains water well. Make a small hole in the soil with your finger or a stick. Gently place the cut end of your croton cutting into the hole. Then, pat the soil around it gently. It’s like tucking it in for a cozy sleep.
Cover with Plastic
Picture a mini house for your croton cutting. This house is made of plastic! Cover the container with a plastic bag or plastic wrap. It’s like giving your cutting a little shelter. This keeps the air around it humid, which helps it grow roots. Put the container in a spot with bright, indirect light – like a happy sunbathing spot.
Now your croton cuttings have their own cozy spot to grow. Keep reading to find out how to take care of them and help them thrive!
Provide Indirect Light
Imagine your croton cuttings are like sunbathers who like a bit of shade. Place them in a spot with bright light, but make sure it’s not too strong. Direct sunlight can be a bit too much for them, like a super bright spotlight. They prefer a cozy spot with filtered or indirect light, like a sunny day with a light breeze.
Care for the Cuttings
Taking care of your croton cuttings is like looking after new friends. They need a bit of attention to grow strong and healthy:
- Check the Humidity: Peek under the plastic covering now and then. If it gets dry inside, give the soil a light mist of water. It’s like giving them a little drink.
- Keep an Eye Out: Watch for any signs of mold or rot. If you see any, remove the plastic covering to let them breathe.
- Be Patient: Growing takes time. In a few weeks, you might start to see new leaves or even roots forming. It’s like they’re saying, “Hello, I’m here!”.
Remember, you’re like a plant parent now, and your croton cuttings are counting on you for a cozy and nurturing environment. With a little love and care, your croton family will start to grow and flourish. Keep up the good work, and soon you’ll have a bunch of colorful croton plants to brighten up your world!
Transplanting
Your croton cuttings have been growing and getting stronger under their cozy plastic house. Now, it’s time for them to stretch their roots in a bigger space. Imagine it’s like moving to a bigger house as you grow up! When you see new growth and roots developing, your cuttings are ready to move. Choose a slightly larger pot with good drainage. Gently remove your cutting from its current pot and place it into the new one. Fill in the gaps with soil and press it down gently. Your croton cuttings are on their way to becoming full-fledged plants!
Conclusion
Congratulations, plant magician! You’ve learned how to create new croton plants from cuttings. From taking cuttings to creating a cozy environment for them to grow, you’ve given your crotons the perfect start in life. Watching your cuttings grow into vibrant and colorful plants is a rewarding experience. Now you’re ready to fill your space with the captivating hues of croton leaves. Keep nurturing your plants and enjoying the beauty they bring to your surroundings!