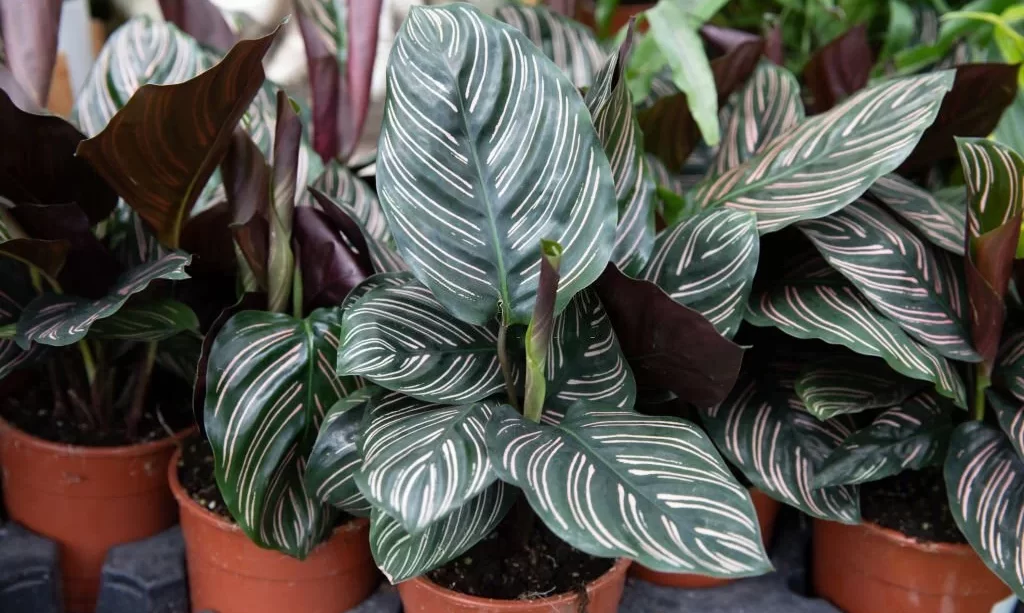
Calathea plants are prized for their stunning foliage and unique patterns, making them a popular choice for indoor plant enthusiasts. If you’re looking to expand your Calathea collection or share the beauty of these plants with friends and family, propagating them can be a rewarding endeavor. With a little patience and the right techniques, you can easily grow new Calathea plants from cuttings. In this guide, we’ll walk you through the process of propagating Calathea step by step, starting with gathering the necessary supplies.
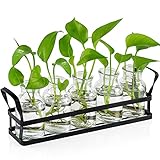
- Air plant propagation stations terrarium with stainless steel waterproof stand is perfect for all lovers of plant breeding, whether you are a professional or non-professional water plant lovers, our glass plant terrarium will be a necessity for you to achieve indoor home and office decoration.
- Plant propagation station stand is made of high quality waterproof stainless steel with 5 sturdy and thick plant glass terrarium. Separate trays and glass pots, which can be moved anywhere and anytime, facilitate you to change water and clean during plant culture without installation, which is especially easy and convenient to use.
- Plant terrarium is suitable for all kinds of water plant culture, you can grow your favorite parsley, onion, Paul, greenery, rosemary, you can also use it to collect a variety of small flower arrangements. Plant terrarium and the structure of the stand design size is not only suitable for indoor home desktop, office desktop decoration use, but also very suitable for home kitchen and other windowsill decoration use.
- Air plant propagation station glass container will be a perfect gardening gift for women. It is also suitable for various holiday decorations such as St. Patrick’s Day, Halloween, Easter, Christmas, Valentine’s Day, Father’s Day, Mother’s Day, Thanksgiving, wedding, birthday, etc. It will be a perfect gift for your friends, family and colleagues around you.
- Stand size: 12” X 2.5” *4.0″(L*W*H), distance between stand handles is 14.1”. Air plant terrarium size: 2.24” X 4”(L*H), glass bottle opening diameter: 1.2”.
Gathering Supplies
Before you embark on your Calathea propagation journey, it’s important to have all the supplies ready. Here’s what you’ll need:
- Healthy Parent Plant: Choose a mature and healthy Calathea plant with strong stems and vibrant foliage. A thriving parent plant will yield better results.
- Clean Scissors or Pruners: Ensure you have clean and sharp scissors or pruners to take precise cuttings without causing damage.
- Small Containers: Prepare small containers or pots for rooting the cuttings. Make sure the containers have drainage holes to prevent overwatering.
- Rooting Medium: You’ll need a suitable rooting medium, such as water or a mix of potting soil and perlite, to encourage root development.
- Spray Bottle: A spray bottle filled with water will help maintain the proper humidity around the cuttings during the rooting process.
- Transparent Plastic Bags or Domes: These will create a mini greenhouse effect and help retain moisture around the cuttings.
- Potting Mix: Have a high-quality potting mix ready for transplanting the rooted cuttings once they are ready to be potted.
- Water: Make sure you have access to clean, room-temperature water for the propagation process.
With these supplies at your disposal, you’ll be well-prepared to start propagating your Calathea plants and nurturing them into thriving new additions to your indoor garden. Let’s move on to the next steps and dive into the fascinating world of Calathea propagation.
Selecting a Healthy Parent Plant: To begin your Calathea propagation journey, it’s essential to choose a robust and thriving parent plant. Look for a Calathea that has lush, unblemished leaves and strong stems. A healthy parent plant is more likely to produce successful cuttings. Avoid plants with signs of disease, pests, or stress.

- 【Make Pruning Work Easier】Rust-resistant stainless steel blade are sharp and Long-Lasting for easy and smooth cut.Anti-slip and ergonomic handle make the gardener clippers more comfortable in your hand.Easy-open spring action reduces hand fatigue while cutting. you can easily to cut without damaging the vital stems and branches of your plants.
- 【User-friendly Safety Lock】These garden shears have locking mechanisms to keep the sharp blades securely closed when not in use.It is easy to maneuver and can effectively reduce accidental injuries. And the closing mechanism is firmly enough, you don’t need to worry the plant pruning shears will get locked accidentally during use.
- 【Garden Gloves for Hand Protection】One size fits most. This Gardening gloves,made of soft & comfortable cotton fabric,can protect yourself from dirt, skin wounds and nasty splinters when doing yard chores. The grip latex coating provides anti-slip or sure control when grabbing garden & yard tools.
- 【Widely used】This gardening shears set comes with 3 different blades for a variety of general pruning tasks.It is ideal for harvesting or trimming herbs,flowers,house plants, hydroponics,bonsai,cutting stems or light branches,or other cutting needs in the garden. It would also be a perfect gift for a gardening friend.
- 【After Sales Service】 Reliable Customer Support. Please feel free to tell us if you have any questions about our garden shears pruning. Note:Keeping your pruner shears cleaned and well-oiled can extend their lifespan.Please dry and clean it after use.✅Note: The colors of the garden pruners and gloves will be shipped at random.✅
Taking Cuttings
- Choose the Right Stem: Select a mature stem from the parent plant that has at least a few leaves. Look for a stem that is neither too young nor too old – a middle-aged stem is ideal.
- Prepare Your Tools: Make sure your scissors or pruners are clean and sharp. This helps ensure a clean and precise cut, which is important for successful rooting.
- Make a Clean Cut: Position your scissors or pruners about an inch or two below a leaf node – the spot where a leaf emerges from the stem. Make a clean, diagonal cut through the stem just below the node.
- Remove Lower Leaves: Gently remove the lower leaves from the cutting, leaving a few leaves at the top intact. This reduces moisture loss and focuses the plant’s energy on root development.
- Optional: Apply Rooting Hormone: While not necessary, you can dip the cut end of the stem in rooting hormone powder to encourage quicker root growth.
With your cuttings prepared, you’re now ready to move on to the next steps of the Calathea propagation process. Properly chosen and prepared cuttings are crucial for the success of your propagation efforts, so take your time to ensure you’re working with healthy plant material.
Preparing the Cuttings
- Trimming Leaves: If the remaining leaves on your cutting are large, you can trim their tips to reduce moisture loss. Leave a few inches of each leaf intact to allow the plant to continue photosynthesis.
- Allow to Callus: After trimming, let the cut ends of the stems dry and callus over. This usually takes a day or two. A callus forms a protective layer that helps prevent rot when the cutting is planted.

Rooting the Cuttings
- Choose a Planting Medium: Calathea cuttings root well in a mix of peat-based potting soil or a blend of peat and perlite. This provides the right balance of moisture retention and aeration.
- Plant the Cuttings: Make a small hole in the planting medium with a pencil or your finger. Insert the cut end of the cutting into the hole, gently pressing the soil around it to hold it in place. Plant multiple cuttings in the same pot, if desired, keeping some space between them.
- Watering: Give the cuttings a light watering to settle the soil around them. Be careful not to overwater – the goal is to keep the soil consistently moist, not soggy.
- Create a Mini Greenhouse: To maintain high humidity around the cuttings, you can place a clear plastic bag or a plastic dome over the pot. This helps prevent excessive moisture loss and promotes successful rooting.
- Provide Indirect Light: Place the pot with the cuttings in a bright but indirect light location. Avoid direct sunlight, as it can lead to overheating and drying out.
Now that your Calathea cuttings are comfortably settled in their new environment, you’re well on your way to propagating new plants. Keep a close eye on the moisture level and ensure they receive the right amount of light as they develop roots. Patience is key during this stage of propagation, as it may take several weeks for the cuttings to establish a strong root system.

- Ultimate potting soil that has everything your plants need in one bag
- Ocean Forest is pH adjusted at 6.3 to 6.8 to allow for optimum fertilizer uptake
- Ocean Forest has a light, aerated texture that’s perfect for indoor and outdoor plants
- Designed for containers and ready to use right out of the bag
- The date imprinted on the bag signifies the product’s manufacturing date
Transplanting Rooted Cuttings
- Check Root Development: After a few weeks, gently tug on the base of the cuttings to ensure they have developed a strong root system. If you feel resistance, it’s a sign that the roots have taken hold.
- Choose Individual Pots: When the roots are established, it’s time to transplant each cutting into its own individual pot. Select pots that are slightly larger than the root ball of the cutting.
- Prepare New Soil: Fill the new pots with a well-draining potting mix. A mix designed for houseplants or tropical plants is a good choice.
- Transplant Carefully: Carefully remove the rooted cutting from the original pot, taking care not to damage the delicate roots. Place the cutting in the center of the new pot and fill in the gaps with soil, gently patting it down around the base.
Providing Care
- Find the Right Spot: Calatheas thrive in bright, indirect light. Choose a spot near a window with filtered sunlight or provide artificial light if needed.
- Maintain Humidity: Calatheas love humidity. You can increase humidity by placing a tray of water near the plant or using a room humidifier. Misting the leaves occasionally can also help.
- Watering: Keep the soil consistently moist but not soggy. Water when the top inch of the soil feels dry to the touch. Calatheas are sensitive to both overwatering and underwatering, so finding the right balance is important.
- Temperature and Drafts: Calatheas prefer warm temperatures between 65-80°F (18-27°C). Avoid exposing them to cold drafts or sudden temperature changes.
- Fertilizing: During the growing season (spring and summer), you can feed your Calathea with a balanced liquid fertilizer every 4-6 weeks. Dilute the fertilizer to half strength to prevent overfeeding.
- Pruning: Remove any yellow or brown leaves regularly to keep the plant looking its best. Pruning also helps improve air circulation around the plant.
- Rotate the Plant: Calatheas have a natural habit of moving their leaves towards the light. To encourage even growth, give the plant a quarter turn every few weeks.
By following these care instructions, your newly propagated Calathea plants should flourish and continue to grace your home with their stunning foliage and unique charm. Remember, each Calathea variety may have slight care differences, so it’s always a good idea to get to know your specific type for the best results.

- Organic Plant Food: Elm Dirt Plant Food is a premium organic fertilizer crafted with utmost care and dedication. It harnesses the power of premium worm castings and high-quality organic nutrients, making it an ideal choice for nourishing a wide range of plants. From house plants to gardens, shrubs, roses, and even hydrangeas.
- Custom-Cultivated Blend: Enriched with over 250 plant probiotics and more than 50 micronutrients, Experience the benefits of our organic fertilizer as it enriches your plants with essential nutrients, promoting lush foliage, vibrant blooms, and improved overall health. This natural and organic formula promotes robust growth, strengthens plants, and enhances their resilience to environmental stressors like drought conditions and soil imbalances.
- Powerful Organic Ingredients: Our plant food is made from high-quality organic ingredients, carefully selected to provide a balanced and potent nutrient profile. It includes a blend of vital elements such as nitrogen, phosphorus, and potassium, along with trace minerals, all crucial for optimal plant growth and flowering.
- Easy Application for Happy Plants: Using Elm Dirt Plant fertilizer is simple and effective. Just dilute the fertilizer with water according to the recommended dosage and apply it to the soil or as a foliar spray. Feed your indoor plants and outdoor garden regularly at the scheduled times and apply the same amount as you do during your regular watering cycle.
- Our story: At Elm Dirt, we take pride in crafting exceptional organic fertilizers that prioritize both plant health and environmental responsibility. Our Plant fertilizers are carefully developed, keeping in mind the diverse needs of various plants. We are committed to sustainability and supporting local production. That’s why Elm Dirt is proudly made in the US, adhering to strict quality standards and eco-friendly practices.
Monitoring Growth
- Observing New Leaves: As your newly propagated Calathea cuttings settle into their new pots, keep an eye out for the emergence of new leaves. These vibrant additions indicate that your plants are establishing themselves and thriving.
- Leaf Unfurling: Watch with excitement as the tightly curled leaves unfurl, revealing their intricate patterns and colors. This unfolding process is not only fascinating to witness but also a sign of healthy growth.
- Size and Fullness: Over time, you’ll notice your Calathea plants growing taller and fuller. The stems will become more robust, and the leaves will become larger, showcasing their captivating patterns.
Conclusion
Successfully propagating Calathea plants from cuttings is a rewarding and fulfilling experience. By carefully selecting healthy parent plants, taking and rooting cuttings, and providing the right care, you can enjoy the satisfaction of nurturing new growth. As your Calathea cuttings transform into thriving plants with stunning foliage, you’ll gain a deeper appreciation for the beauty of nature and the joy of tending to houseplants. Remember that each step of the propagation journey contributes to the overall health and vibrancy of your Calathea collection.