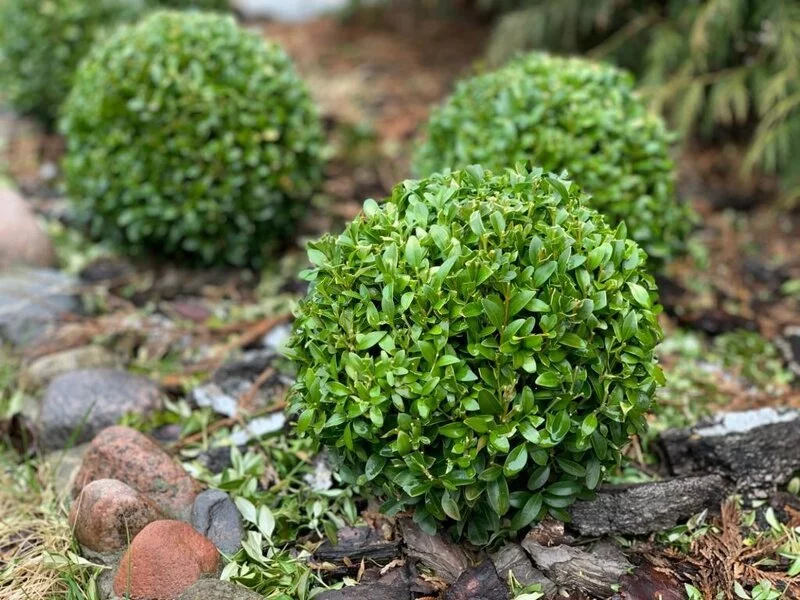
If you’ve ever admired a well-kept garden, chances are you’ve come across the beautiful boxwood. With its dense, lush foliage and ability to withstand pruning, it’s no wonder boxwood is a star player in many landscapes, from complex topiaries to simple shrub borders. But what if we told you that you can multiply this green wonder without a trip to the nursery? In this guide, we’ll show you how to propagate your own boxwood, offering you an affordable and satisfying way to expand your green collection.
- Fortified with phosphorus and iron
- Moisture Control protects against over- or under-watering
- Feeds up to 3 months
- Builds strong roots
- For in-ground use only
Boxwood Propagation
So, what is propagation exactly? Simply put, it’s a method of creating new plants from existing ones. There are several ways to do this, but when it comes to boxwood, one of the most effective methods is stem cutting propagation.
Why propagate boxwood? Well, apart from the joy of seeing new growth from your own handiwork, propagation can help you maintain the uniformity in your garden, as the new plants will be genetically identical to the parent. Additionally, it’s a cost-effective way to increase your plant count, perfect for those who want to achieve a lush garden or a consistent boxwood hedge without breaking the bank.
If you’re ready to dive into the world of propagation with your boxwood, read on as we guide you through the process step by step. Let’s get growing!
When to Propagate Boxwood
Timing is everything, and in the world of boxwood propagation, this statement holds true. The ideal time to propagate boxwood is during the late spring or early summer, when the plant is in active growth but the year’s hottest days are still ahead. At this point, the stems are firm but still flexible, which is perfect for cutting and growing new roots.
Remember, the goal here is to give your new plant enough time to establish itself before the stress of winter or the intense heat of summer. So, mark your calendar and prepare yourself for a bit of gardening fun when the time comes!
- PREVENTS TRANSPLANT SHOCK: Helps prevent transplant shock and reduce stress from nutrient deficiencies and environmental variables. This powerful plant tonic promotes significantly healthier and more resilient plants.
- PROMOTES STRONGER GROWTH: Enhances rooting and stem development while boosting foliage growth. Its concentrated formula supports efficient uptake of water and nutrients, playing a key role in healthy photosynthesis and overall plant vitality.
- SUITABLE FOR ALL GROWING METHODS: Ideal for all plant types, lawns, and gardens, this versatile plant growth stimulator works with hydroponics, and traditional planting. Perfect for accelerating success with any propagation or growing method.
- IMPROVES PLANT HEALTH: Regular use leads to longer-living, more vibrant plants. Hormex encourages faster growth, stronger roots, and healthier foliage, making it an essential tool for gardeners looking to optimize plant health and beauty. Great for cut flowers and Christmas trees too. 1/2 tsp per quart of water.
- CONCENTRATED AND EASY TO USE: This concentrated Vitamin B1 plant growth hormone is simple to use and goes a long way. A small amount—a teaspoon or less—is often enough. Always refer to the label for precise instructions tailored to your growing method.
Tools and Materials Needed for Propagation
Now that you know when to propagate your boxwood, let’s gather the tools and materials you’ll need. Here’s your checklist:
- Sharp Pruning Shears: A clean, sharp cut increases your chances of successful propagation, so make sure your shears are in good shape.
- Pot or Container: This will hold your new plant as it starts its journey. Ensure it has good drainage to prevent waterlogging.
- Potting Soil or Propagation Mix: Your new boxwood cutting needs a nutrient-rich, well-draining medium to develop roots.
- Rooting Hormone: This is not absolutely necessary, but it can significantly increase your chances of success by stimulating root growth.
- Clear Plastic Bag or Dome: This will create a mini greenhouse, maintaining humidity around the cutting, which is critical for root development.
- Water: Of course, no plant propagation would be complete without it!
Once you’ve gathered all your tools and materials, you’re ready to move on to the exciting part – the propagation process.
- 3PCS Garden Shears Set – The professional 3PCS gardening shears set includes different sizes and functions of shears and lopper to help deal with the gardening – 25” – 35” extendable hedge shears, 8.5” Floral Snip shears and 7.5” bypass pruner.
- Wide Application – This 3 piece professional garden clippers set is suitable for fruit tree pruning, potted pruning, landscaping, allowing you to tackle any heavy duty pruning jobs. 3 sizes enables cutting and trimming easier and more enjoyable.
- SK-5 Steel Blade – The blade of this branch cutter are used SK-5 carbon steel,sharper,firmer and longer service life than ordinary blades.Our blades are hardened as a whole, and covered with a layer of anti-rust coating, which further ensures the service life of the blades
- Excellent Cutting Capacity – For hand hedge shears, not only can be used for cutting lower bushes, also works perfectly for tall branches over heads. For the other 2pcs mini precision gardening pruner, not only can cut small indoor plant, also can cut thin but strong branch like bonsai.
- Bonus Garden Gloves – A pair of bonus rubber coated in palm garden gloves will protect your hands when trimming thorny plants to avoid stabbing, also can prevent annoying animals from hurting your hands when doing many types of gardening work.
The Step-by-Step Boxwood Propagation Process
Now for the fun part! Follow these steps to propagate your boxwood:
- Choose a Stem: Look for a healthy, disease-free branch. The ideal cutting is about 6 inches long and comes from this year’s growth.
- Make Your Cut: With your sharp shears, cut the stem at a 45-degree angle. This increases the surface area for roots to develop and allows water to slide off the cut end.
- Prepare the Cutting: Remove leaves from the bottom half of the stem. This reduces moisture loss and makes room for roots to grow.
- Apply Rooting Hormone: Dip the cut end of the stem into the rooting hormone. This step is optional but can help speed up the rooting process.
- Plant the Cutting: Create a hole in your potting mix, then place the cutting in, burying about half of it. Firmly press the soil around the stem to provide support.
- Create a Mini Greenhouse: Cover your pot with a clear plastic bag or place it under a plastic dome to maintain high humidity.
- Place in a Suitable Spot: Choose a warm place with bright, indirect light for your cutting. Avoid direct sunlight, which can scorch your plant or overheat your mini greenhouse.
Aftercare for Boxwood Cuttings
With your boxwood cutting planted and housed in its mini greenhouse, your job now is to care for it until roots develop. Here’s how:
- Keep the Soil Moist: Ensure the potting mix is consistently moist, but not soggy. Overwatering can lead to root rot, which you definitely want to avoid.
- Maintain High Humidity: Keep the plastic covering over your cutting to maintain high humidity, but remove it occasionally to let in fresh air and prevent mold.
- Be Patient: Roots might take anywhere from a few weeks to a few months to form, so patience is key.
- Check for Roots: After about 4-6 weeks, gently tug on the cutting. If it resists, congratulations, you have roots!
- Transplant: Once roots have formed, your new boxwood plant is ready to be transplanted to its permanent location. Be sure to do this gently to avoid damaging the new root system.
That’s it! Now you know how to propagate your own boxwood. But what if you encounter problems along the way? Let’s tackle those next.
Common Mistakes and Troubleshooting in Boxwood Propagation
Propagation isn’t always smooth sailing, but don’t let that discourage you. Here are a few common hiccups you might face and how to fix them:
- Cutting Wilting or Dying: This could be due to too much sunlight or underwatering. Keep your cutting in a bright, but not direct, light location and ensure the soil is consistently moist.
- No Root Development: This might be due to a lack of humidity, an overly dry or waterlogged cutting, or impatience (roots can take a while!). Make sure you’re maintaining high humidity, watering adequately, and giving your cutting enough time.
- Mold Growth: If you see mold, you’re likely keeping the environment too wet or not providing enough fresh air. Remove the mold, let the cutting and soil dry out a bit, and ensure you’re allowing for fresh air exchange.
Remember, practice makes perfect, so don’t give up if your first try doesn’t go as planned. The joy of seeing new growth from your propagation efforts is worth the patience and persistence!
Conclusion
And there you have it – your comprehensive guide to propagating boxwood. With a little patience, care, and love, you can turn one boxwood plant into many and watch as your garden becomes a lush, green paradise. So roll up those sleeves, grab your gardening tools, and let’s make some plant babies!


