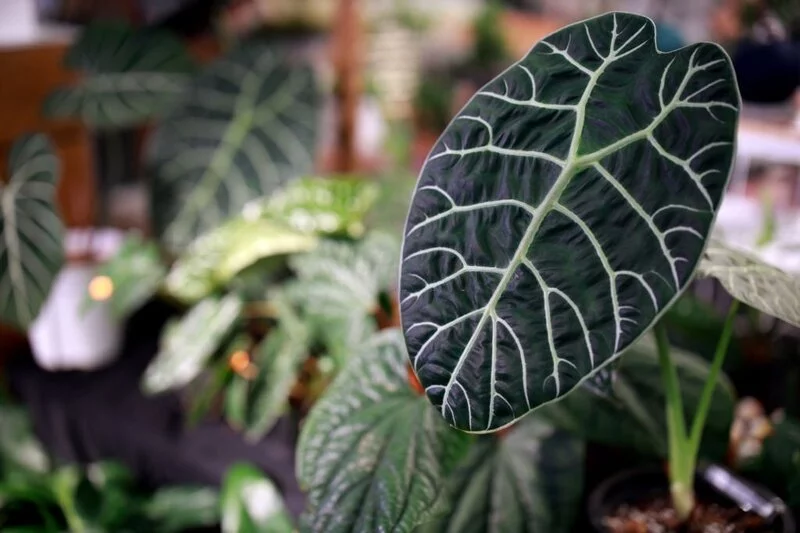
Step into the fascinating world of plant propagation, a journey of life, growth, and discovery. Have you ever marveled at a plant and wondered how to have more of them, exactly the same, without buying a new one from the store? Propagation is your answer! This article will shine a spotlight on Alocasia, a tropical beauty known for its giant, heart-shaped leaves, and explain how you can propagate it at home.
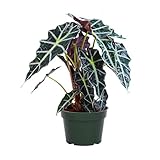
- Exotic Elegance: Elevate your indoor space with the exotic allure of the Alocasia Polly Plant. Its striking, arrow-shaped leaves and glossy, emerald-green hue make it a standout choice for elegant interiors. Bring a touch of the tropics into your home, transforming any room into a sophisticated oasis of natural beauty
- Stunning Focal Points: Alocasia Polly makes an exquisite focal point in any living room, office, or bedroom. Its dramatic leaves and statuesque presence add a touch of drama and sophistication to your decor. Create an eye-catching statement piece that not only captures attention but also infuses your space with a sense of refined charm
- Low Maintenance Luxury: Despite its exotic appearance, the Alocasia Polly is surprisingly easy to care for. With minimal watering and indirect sunlight, this resilient plant thrives indoors. Its low-maintenance nature allows you to enjoy the beauty of tropical foliage without the hassle, making it an ideal choice for busy plant enthusiasts
- Air Purifying Wonder: Alocasia Polly is not just a feast for the eyes; it’s also a natural air purifier. Its large leaves help remove toxins and pollutants from the air, creating a healthier indoor environment for you and your loved ones. Embrace this elegant plant not only for its aesthetics but also for the fresh, clean air it provides
- Handpicked for Perfection: Each Alocasia Polly plant is meticulously selected for its vibrant leaves and healthy growth. Our experts handpick these green jewels to ensure you receive a premium, top-quality plant. Delight in unboxing a fresh, carefully chosen Alocasia Polly, ready to enhance your living space
What is Alocasia? A Quick Overview
Alocasia, popularly known as the Elephant Ear plant, is a charismatic houseplant that’s turned many plant enthusiasts into loyal fans. This plant family is diverse and vast, with over 80 varieties, each having its unique charm and attributes. Originating from the tropical rainforests of Southeast Asia, these plants have adapted themselves to indoor environments splendidly. Their bold, glossy, and often beautifully patterned leaves make them a natural choice for indoor gardeners looking to add a touch of the tropics to their living spaces. Now, let’s see how we can make more of these beauties through propagation!
Why Propagate Alocasia?
You might be asking, “Why should I propagate my Alocasia?” Well, there are quite a few good reasons! Firstly, propagation allows you to have more of these gorgeous plants without spending a dime. It’s a budget-friendly way to expand your green collection! Secondly, you can share the plant love by gifting these propagated plants to your friends or family. Plus, it’s fun and rewarding to see new life sprout from your existing plants. It’s almost like magic!
Different Methods to Propagate Alocasia
When it comes to propagation, Alocasia gives you options. This is because there are a few different ways you can encourage new growth. The method you choose will depend on the type of Alocasia you have and your comfort level with plant propagation. The two main methods are:
- Division: This method involves separating the plant from its roots and is great for Alocasia varieties that grow in clusters.
- Leaf Cuttings: If your Alocasia has large, sturdy leaves, you might be able to propagate it by taking leaf cuttings.
Don’t worry if these methods sound a bit intimidating right now. We’ll walk you through each one in the following paragraphs, so you’ll become an Alocasia propagation pro in no time!
Step-by-Step Guide to Alocasia Propagation
Now that you know why and how to propagate your Alocasia let’s dive into the nitty-gritty. Here’s a simple, step-by-step guide to propagate your plant:
Division Method
- Carefully remove the parent Alocasia from its pot and gently dust off the soil from its roots.
- Locate the bulb-like structures, or “offsets”, attached to the parent plant.
- Using a clean, sharp knife, cut these offsets away from the main plant. Each of these offsets will become a new Alocasia plant.
- Plant each offset in a separate pot filled with a well-draining potting mix.
Leaf Cutting Method
- Choose a healthy, mature leaf from your Alocasia.
- Using a clean, sharp knife, cut a leaf section, making sure to include a portion of the leaf stem.
- Place the cutting in a pot with a well-draining potting mix. The leaf stem should be buried in the soil with the leaf section standing upright.
Remember, patience is key. Propagation takes time and the new plants may take a while to show signs of growth.
Aftercare for Newly Propagated Alocasia Plants
Just like babies, newly propagated Alocasia plants need a bit of extra love and care. Make sure to keep the soil consistently moist but never soggy. They also love warmth and humidity, so maintaining a warm temperature and high humidity around them will help them thrive. In terms of light, keep them in bright, indirect light as direct sunlight can cause leaf burn.
Keep an eye out for signs of new growth. This will usually take the form of a new leaf sprouting from the soil. This is a sign that your propagation has been successful. Congratulate yourself – you’ve just brought new life into the world of plants!
Don’t forget, every plant is unique and may react differently to propagation. If at first you don’t succeed, don’t be disheartened. Try again and remember to enjoy the process. After all, gardening is all about patience, care, and a bit of love.
- WONDERFULLY ORGANIC – Contains premium organic ingredients made with your home and the environment in mind. Working with organics can make a big impact on your plant’s overall vigor. Perfect when paired with compost, worm castings, leaf shine spray, and other natural products.
- ESSENTIAL NUTRIENTS – Premium, urea free balanced mix of macro and micro nutrients that gently feeds all potted household plants. Super vitamin and bloom booster formula helps encourage strong roots, new growth, and beautiful leaves for sustainable long term plant vigor.
- TRULY ALL-PURPOSE – Excellent for both plant care and organic gardening. Use with all common houseplant types (indoor and outdoor) in various potting containers. Ideal to use on live plants around the entire house, apartment, and office.
- GROW WITH CONFIDENCE – Plant care made simple. Easy to understand instructions makes using our solution in watering cans or a spray bottle effortless. Just dilute with water, apply, and watch your plants thrive! Can be applied in a pot containing gravel, moss, pebbles, perlite, pumice, lava rocks, and other soil mixes.
- FOR POPULAR HOUSEPLANTS – Air plant, fiddle leaf fig, snake plant, orchids, bonsai trees, spider, string of pearls, monstera, pothos, zz, bamboo, peace lily, african violet, aloe vera, prayer, hoya, mums, ivy, elephant ear, palm, fern, pilea, philodenron, dracaena, chinese evergreen, succulents, cactus, jasmine, money tree, other hanging and trailing plants, terrarium plants, tropical plants and many more!
Frequently Asked Questions About Alocasia Propagation
Here are a few common questions that folks often have about propagating Alocasia:
How long does Alocasia propagation take?
The process varies from plant to plant. Generally, you should start seeing new growth in about 2 to 3 weeks, but sometimes it can take a bit longer. Don’t worry, though, your patience will be rewarded!
My Alocasia cutting is turning yellow. What did I do wrong?
Yellowing can be a sign of overwatering. Make sure your soil is moist but not soggy. If the yellowing continues, you might need to start over with a new cutting.
Can I propagate Alocasia in water?
Yes, some people prefer to start their Alocasia cuttings in water. Once roots develop, they transfer the plant to soil. Both methods can work, so go with what feels right for you!
Remember, propagation can be a bit of trial and error, so don’t give up if your first try doesn’t go as planned. Keep going, and you’ll get the hang of it!
Conclusion
Propagation is one of the most rewarding aspects of gardening. Not only does it help you expand your plant family without spending a dime, but it also gives you a deeper understanding of your plants’ life cycle. Propagating your Alocasia might seem daunting at first, but with a little bit of knowledge and a lot of patience, you’ll soon be a pro. Happy planting!


