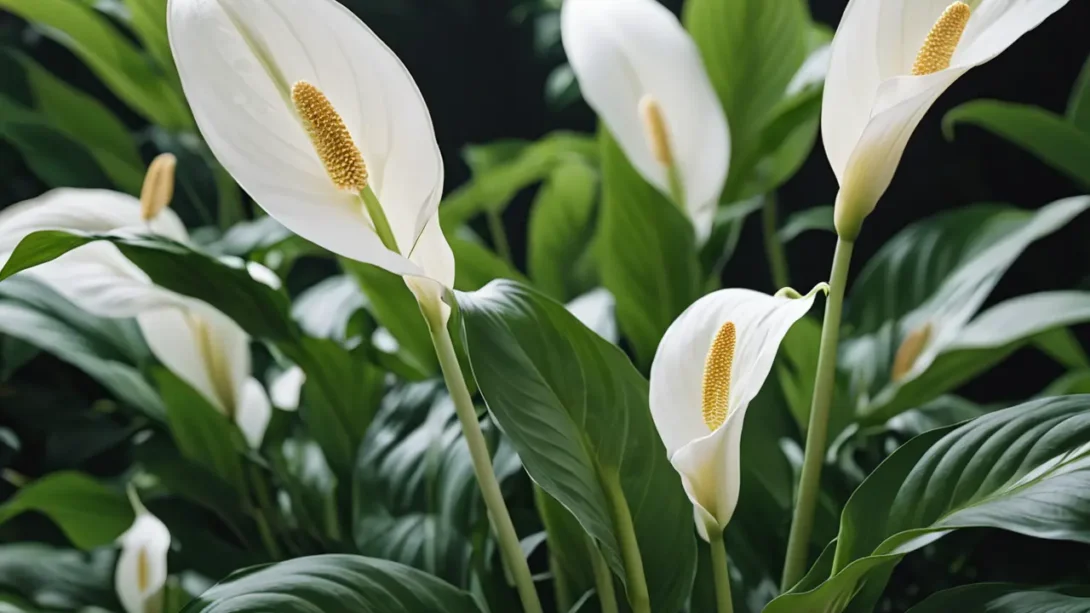
The peace lily (Spathiphyllum) stands out as a beloved houseplant, revered for its elegant white blooms and lush green foliage. Beyond its aesthetic appeal, this plant is celebrated for its air-purifying qualities, making it a healthy addition to any indoor space. Propagation, the process of creating new plants from an existing one, offers a rewarding opportunity to expand your collection of peace lilies or share them with friends and family. This guide will walk you through the essential steps of propagating peace lilies, ensuring even beginners can enjoy success.
Peace Lily Propagation
Peace lilies can be propagated through two main methods: division and seed propagation. Division, the simpler and more common method, involves separating the plant into smaller sections, each of which can grow into a new plant. Seed propagation, while less common due to the patience required for seed collection and germination, presents an alternative for those interested in the challenge. Choosing between these methods depends on your preferences, the resources at your disposal, and the condition of your parent plant.
Tools and Materials Needed
Before beginning the propagation process, gathering the necessary tools and materials is crucial. You will need:
- A sharp pair of pruning shears or a knife for division.
- Gloves to protect your hands during the process.
- Fresh, well-draining potting mix to provide the best start for your new plants.
- New pots with drainage holes for each division or seedling.
- A watering can or spray bottle for gentle watering.
Ensuring you have everything on hand before starting will make the propagation process smoother and more enjoyable.
Preparation for Propagation
Preparation is key to successful propagation. Start by thoroughly watering your peace lily a day before you plan to propagate. This step ensures that the plant is hydrated, making it more resilient during division and easing the separation of the root ball. Additionally, choosing the right time of year is critical; the best period for propagation is in the spring or early summer when peace lilies naturally enter a phase of active growth. This timing gives the new plants the whole growing season to establish themselves.
Propagation by Division
Division is the most efficient way to propagate peace lilies, allowing you to quickly multiply your plant collection. Here’s how to do it:
- Removing the Parent Plant: Begin by carefully removing the peace lily from its pot. Gently tap the pot’s sides and bottom to loosen the soil and root ball. Slowly tilt the plant and ease it out, being careful not to damage the plant or its roots.
- Dividing the Root Ball: Once removed, inspect the root ball for natural divisions—sections where the plant can be separated with minimal damage. Using your hands or a clean, sharp knife, gently separate the root ball into smaller sections. Ensure each new section has at least one shoot or leaf set and a healthy portion of roots.
- Potting New Divisions: Fill new pots with a well-draining potting mix, making a small well in the center of each for the divisions. Place each division in its pot and gently fill in around the roots with more potting mix, firming lightly to support the plant. Water each new plant thoroughly to settle the soil around the roots and eliminate air pockets.
- Aftercare for Divided Plants: Place the newly potted divisions in a location where they will receive bright, indirect light. Avoid direct sunlight, which can stress the young plants. Keep the soil consistently moist but not waterlogged, and avoid fertilizing until the plants have shown signs of new growth, indicating that they have started to establish.
Propagation by Seeds (Optional)
While less common due to the slower process, propagating peace lilies from seeds is an exciting challenge for those interested in seeing the life cycle from the very beginning. Here’s how you can propagate peace lilies using seeds:
- Collecting Seeds: Peace lily seeds can be harvested from the plant’s spathe once pollination has occurred. After the flower fades and the seed pod matures, collect the seeds by carefully opening the pod. This process requires patience and timing, as seeds must be collected when they are ripe but before they are dispersed.
- Sowing Seeds: Prepare a seed-starting mix in a shallow tray or pot. Sow the peace lily seeds on the surface of the moistened mix, lightly pressing them into the soil. Do not cover the seeds with soil, as they need light to germinate.
- Germination Conditions: Cover the tray or pot with clear plastic to maintain humidity and place it in a warm, bright spot without direct sunlight. The ideal germination temperature is between 70°F and 75°F (21°C to 24°C). Keep the soil consistently moist but not waterlogged.
- Transplanting Seedlings: Once the seedlings have developed a couple of true leaves and are large enough to handle, gently transplant them into individual pots filled with a well-draining potting mix. Continue to keep them in bright, indirect light and maintain soil moisture.
Propagating peace lilies from seeds is a longer process, with germination taking a few weeks and several months required before the seedlings grow into sizeable plants. However, it can be a rewarding endeavor for those interested in the complete cycle of plant growth.
Caring for New Peace Lily Plants
After propagation, whether by division or seeds, the care your new peace lily plants receive is crucial to their development and future flowering. Here are some care tips to ensure your newly propagated peace lilies thrive:
- Light: Place your new plants in an area that receives bright, indirect sunlight. Too much direct sunlight can scorch their leaves, while too little light can inhibit growth and flowering.
- Watering: Keep the soil of your new peace lily plants consistently moist. They are sensitive to both over and under-watering, so aim for a happy medium where the soil is neither soggy nor dry. Using room-temperature water can help prevent shock to the sensitive roots.
- Humidity: Peace lilies enjoy a humid environment, which can be achieved by misting the plants regularly, using a pebble tray, or placing a humidifier nearby.
- Feeding: Once your plants have established themselves and show signs of new growth, you can start feeding them with a balanced, water-soluble fertilizer every 4-6 weeks during the growing season. Reduce feeding in the fall and winter months.
By providing the right conditions and care, your newly propagated peace lilies will gradually acclimate to their new environment and begin a healthy growth cycle, eventually flowering and adding beauty and purification to your indoor spaces.
Troubleshooting Common Propagation Issues
Even with careful attention to detail, propagating peace lilies can sometimes present challenges. Here are some common issues and their solutions to help ensure the success of your propagation efforts:
- Root Rot in Newly Potted Divisions: If you notice your new plants are wilting, yellowing, or showing signs of distress, root rot could be the culprit, often due to overwatering. Ensure the pots have good drainage and let the top inch of soil dry out slightly between waterings. If root rot is suspected, you may need to repot the plant in fresh, dry soil and trim away any blackened roots.
- Slow or No Growth: New plants may sometimes take a while to show signs of growth, especially if they are still establishing their root systems. Patience is key. However, if growth seems exceptionally slow, verify that they are not in too dark a location and that they are being watered appropriately. A light dose of fertilizer can also encourage growth, but avoid over-fertilizing, which can harm young plants.
- Leaf Yellowing: If the leaves of your newly propagated peace lilies start turning yellow, it could be a sign of overwatering, under-watering, or a nutrient imbalance. Evaluate your watering schedule and adjust as needed. A balanced, diluted fertilizer can help address nutrient deficiencies.
Ensuring Successful Propagation
To maximize the chances of successful propagation, keep these additional tips in mind:
- Monitor Environment Conditions: Keep a close eye on temperature, humidity, and light, as these play significant roles in the health and growth of peace lilies. Adjustments to the plant’s environment can often correct minor issues before they become major problems.
- Be Patient: Propagation, especially from seeds, is a process that requires time. Some plants may take several weeks to show new growth or recover from the stress of division. Allow your plants time to adjust and heal.
- Regular Observation: Check your propagated plants regularly for signs of pests or disease, which can spread quickly among indoor plants. Early detection makes treatment easier and more effective.
Conclusion
Propagating peace lilies is a rewarding endeavor that can significantly expand your indoor garden. Whether dividing mature plants or starting from seeds, the process offers a hands-on way to engage with these beautiful, air-purifying specimens. By following the step-by-step guidance provided, from preparation through to aftercare, even novice gardeners can successfully propagate peace lilies.
Remember, the key to successful propagation lies in careful planning, patience, and attentive care. Each new plant is an opportunity to refine your gardening skills and deepen your connection with the natural world. As your confidence grows, so too will your collection of thriving peace lilies, enhancing your home with their serene beauty and health benefits.