Squash, with its myriad of shapes, sizes, and colors, holds a cherished spot in both the garden and kitchen. Its versatility extends beyond culinary uses, enriching gardens with vibrant foliage and blossoms. This guide embarks on a journey through the process of planting squash seeds, offering insights into the cultivation of both summer and winter varieties. Whether you’re drawn to the tender zucchini or the hearty butternut, understanding the nuances of squash gardening can lead to a rewarding harvest.
Squash Varieties
Before diving into the planting process, it’s crucial to distinguish between the two main categories of squash: summer and winter. Summer squash, harvested while the skin is still soft and edible, includes varieties like zucchini, yellow squash, and pattypan. In contrast, winter squash is left on the vine to mature fully, developing a hard shell that contributes to its longer storage life. Examples include butternut, acorn, and spaghetti squash. Each type brings its own set of requirements and rewards to the garden, influencing planting decisions such as timing and space allocation.
Selecting the Right Squash Seeds
Choosing the right seeds is the first step toward a successful squash garden. Look for seeds that are suited to your climate and the length of your growing season. Disease-resistant varieties can offer an added layer of protection against common garden ailments. Additionally, consider the space available in your garden, as some squash plants, particularly vining winter varieties, require more room to spread. Checking seed viability and germination rates, often indicated on the seed packet, can also guide your selection, ensuring you start with the best potential for a healthy crop.
Preparing Your Garden for Squash
Squash plants thrive in environments that mimic their native conditions—warm, well-drained soil rich in organic matter. A soil pH between 6.0 and 6.8 is ideal, promoting nutrient absorption and healthy growth. To prepare your garden:
- Soil Preparation: Work the soil to a depth of about 12 inches, incorporating compost or well-rotted manure to enhance fertility and structure. A balanced 10-10-10 fertilizer can be mixed in at this stage to provide a good nutrient base for the young plants.
- Location: Choose a sunny spot where plants will receive at least six hours of direct sunlight daily. Squash plants are sun lovers and need plenty of light to produce their fruits.
- Spacing: Consider the mature size of the squash variety you’re planting. Bush varieties can be spaced closer together, while vining types require more room to sprawl. Proper spacing is crucial for air circulation, which helps prevent fungal diseases.
When to Plant Squash Seeds
Timing is critical for planting squash seeds. They should be sown after the danger of frost has passed and the soil has warmed to at least 60°F (15°C)—a temperature conducive to germination. Summer squash typically matures faster than winter squash, so if you’re growing both types, plan your planting schedule accordingly. In most regions, this means planting summer squash in late spring and early summer, with winter squash following shortly after, ensuring a harvest before the first fall frosts.
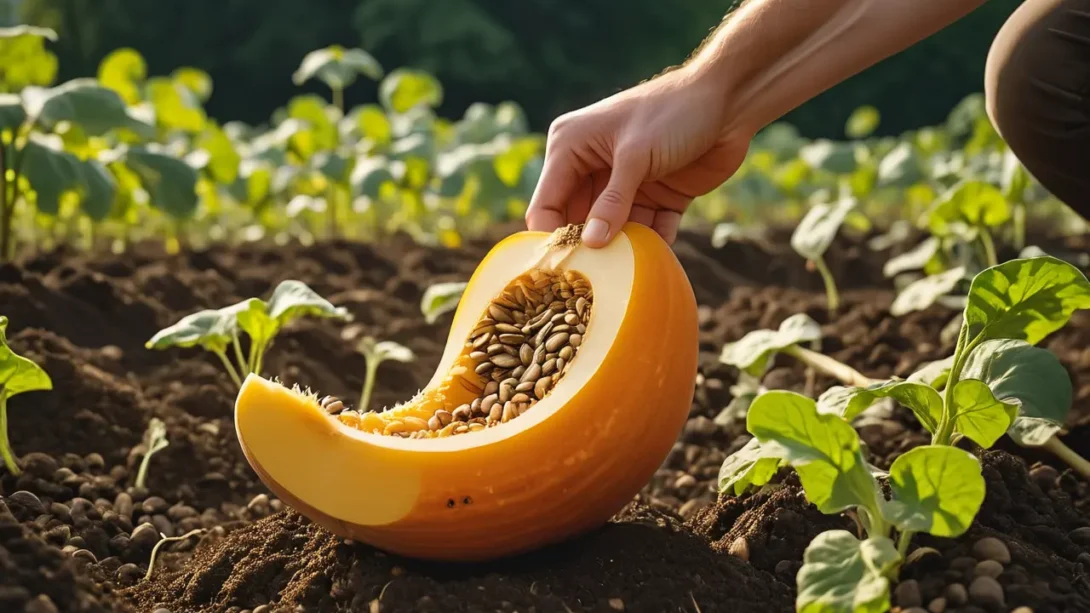
Planting Squash Seeds
Planting squash seeds directly in the garden is a straightforward process that begins with the creation of an ideal environment for seed germination and growth. Here’s how to plant squash seeds effectively:
- Creating Hills or Rows: For vining squash varieties, planting in mounded hills helps improve soil drainage and warms the soil faster, a boon for germination. Form hills about 2 feet in diameter and 6 inches high, spacing them 4 to 6 feet apart. For bush varieties, rows can be more efficient, allowing for easier maintenance and harvesting.
- Sowing the Seeds: Plant 2-3 seeds per hill, pushing them 1 inch deep into the soil. If planting in rows, space the seeds 18-24 inches apart in rows that are 3-4 feet apart. This spacing gives plants room to spread, ensuring they receive ample sunlight and air circulation.
- Watering After Planting: Water the planted seeds gently but thoroughly to moisten the soil without washing the seeds away. Maintaining consistent moisture is critical for germination, which should occur within 7-10 days under optimal conditions.
For gardeners in cooler climates or those seeking an early start to the season, starting squash seeds indoors is a viable option. Sow seeds in peat pots 2-4 weeks before the last frost date. The biodegradable pots can be planted directly into the garden, minimizing root disturbance.
Caring for Squash Plants
After germination, squash plants require regular care to ensure vigorous growth and bountiful harvests:
- Watering: Squash plants need 1-2 inches of water per week, depending on weather conditions. Water deeply at the base of the plants to encourage deep root growth and reduce moisture on the leaves, which can lead to disease.
- Fertilizing: About a month after planting, apply a side dressing of a balanced fertilizer to give plants a nutrient boost. This is particularly important as they start to flower and set fruit.
- Mulching: Applying a layer of organic mulch around the plants helps retain soil moisture, suppress weeds, and keep the soil cool. Straw, grass clippings, or shredded leaves are excellent mulch choices for squash.
- Thinning Seedlings: If multiple seeds germinate in a single hill, thin the seedlings to leave only the strongest plant. This reduces competition for light, water, and nutrients, allowing the chosen plant to thrive.
Pest and Disease Management
Squash plants can fall victim to a variety of pests and diseases that can hinder their growth and productivity:
- Common Pests: Squash bugs, vine borers, and cucumber beetles are notorious for damaging squash plants. Physical removal, floating row covers, and appropriate insecticides can manage these pests.
- Disease Control: Powdery mildew, downy mildew, and bacterial wilt are common afflictions. Preventative measures include proper spacing, avoiding overhead watering, and using fungicides when necessary.
Regular inspections of your squash plants can help you identify and address issues before they become serious problems. Implementing integrated pest management (IPM) practices, such as attracting beneficial insects and crop rotation, can further enhance your garden’s health and productivity.
Supporting Squash Plants
Some varieties of squash, particularly those that vine, benefit significantly from support. This can save garden space, improve air circulation around the plants, and reduce the risk of soil-borne diseases:
- Using Trellises: Installing trellises for vining squash varieties can help manage plant growth and facilitate a healthier crop. Ensure the structure is sturdy enough to support the weight of mature squash.
- Training Plants: Gently guide young vines onto trellises or supports, securing them loosely with ties if necessary. This helps the plant grow upward, making maintenance and harvesting easier.
Harvesting Squash
The timing and method of harvesting squash can greatly impact the quality and storage life of your produce:
- Summer Squash: Harvest when they are young and tender, usually when they’re 6 to 8 inches long, depending on the variety. Regular harvesting encourages the plant to produce more fruit.
- Winter Squash: Wait until the squash has matured and the rind is hard. The stem should be dry and brown. Cut, don’t pull, the squash from the vine, leaving 2-3 inches of stem attached to improve storage life.
Use a sharp knife or pruning shears to harvest squash, being careful not to damage the plant or the fruit. Handling squash gently can prevent bruising and extend its shelf life.
Storing Squash
Proper storage is key to enjoying your squash long after the growing season ends:
- Summer Squash: Store in the refrigerator, where they can last for 1-2 weeks. Keep them in a plastic bag to retain moisture.
- Winter Squash: Can be stored in a cool, dry place for several months. Ensure they are not touching each other to promote air circulation and reduce the risk of rot.
Common Challenges and Solutions
Squash gardening can present challenges, but most are manageable with the right knowledge and techniques:
- Poor Germination: Ensure you’re planting viable seeds in warm, well-drained soil. If soil temperature is an issue, consider using black plastic mulch to warm the soil before planting.
- Blossom Drop: This can be caused by too much or too little water, extreme temperatures, or lack of pollination. Ensure consistent watering and consider hand-pollinating flowers if necessary.
- Fruit Rot: Prevent fruit rot by using mulch to keep the fruit off the damp ground and ensuring good air circulation around the plants.
Implementing crop rotation and practicing good garden hygiene by removing plant debris at the end of the season can also help prevent many common diseases and pests.
Conclusion
From the vibrant, tender zucchini of summer to the hearty, storage-friendly butternut of winter, squash is a rewarding and versatile crop for gardeners. By following the comprehensive guidelines provided—from selecting the right seeds and preparing your garden to caring for your plants and harvesting the fruits of your labor—you’re well-equipped to enjoy a successful squash growing season. Remember, gardening is a learning process filled with trials, errors, and successes. Each season brings new opportunities to refine your skills, experiment with different varieties, and enjoy the plentiful bounty your garden offers.