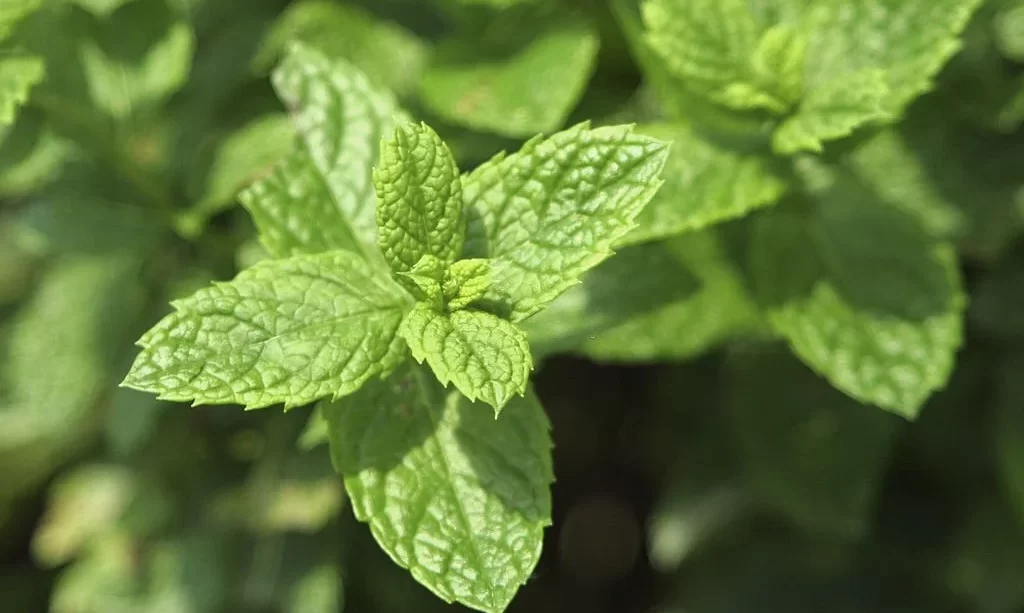
Imagine having a garden that not only adds a burst of fresh greenery but also fills the air with its delightful fragrance. Mint, with its invigorating scent and versatile uses, can bring this experience to life. Whether you’re a seasoned gardener or a beginner with a green thumb, growing mint from seeds is a rewarding journey you’ll cherish. In this step-by-step guide, we’ll explore the fascinating world of mint cultivation, starting with the crucial first step: selecting the right mint seeds. Get ready to embark on a fragrant adventure into the world of mint gardening!

- QUALITY – All seeds packaged by Seed Needs are intended for the current and the following growing seasons. All seeds are stored in a temperature controlled facility that is free of significant amounts of moisture.
- QUANTITY – Seed packets by Seed Needs offer generous quantities. You can share with friends and family, or save your extra seeds until the next season, if properly stored.
- PACKETS – This packet displays a beautiful illustration of the variety to be grown, as well as detailed seed sowing information on the reverse side as well. Measures 3.25” wide by 4.50” tall.
- PROMISE – Seed Needs will never knowingly supply GMO based seed products. The vast majority of our seeds are open pollinated & heirloom, with the exception of a few hybrids.
- GERMINATION – Seed Needs packets contain some of the freshest seed available. Direct from the growers. If sown correctly, you will begin seeing results in only a matter of days.
Selecting Mint Seeds
Choosing the right mint seeds is the first and essential step in your mint-growing journey. Here’s how to make the best selection:
- Variety Matters: Mint comes in various flavors and scents, such as spearmint, peppermint, chocolate mint, and more. Consider your preferences and the intended use of your mint when selecting seeds. Each variety has its unique aroma and flavor, making it suitable for different culinary and medicinal purposes.
- Source Matters: Opt for mint seeds from a reputable source. Look for trusted seed suppliers or nurseries known for their quality products. High-quality seeds increase the likelihood of successful germination and healthy plant growth.
- Freshness Counts: Check the seed packaging for the date of harvest or packaging. Fresher seeds tend to have higher germination rates, so aim for recently harvested or packaged seeds.
By choosing the right mint seeds, you’ll set the stage for a vibrant and aromatic mint garden that will fill your space with a refreshing, herbal fragrance and enhance your culinary and wellness endeavors.
Choosing the Right Container
When it comes to growing mint from seeds, selecting the right container is crucial, especially since mint has a tendency to spread vigorously. Here’s how to choose the perfect container for your mint garden:
- Consider the Size: Mint plants need space to grow and spread. Opt for a container that’s at least 12 inches deep and wide. If you’re growing multiple mint plants, consider a larger container to accommodate their growth.
- Material Matters: Choose a container made of durable materials like plastic, clay, or wood. Ensure it has drainage holes at the bottom to prevent waterlogging, which can be detrimental to mint plants.
- Controlled Environment: Since mint can be invasive in garden beds, growing it in a container provides control. You can place the container on a patio, balcony, or any location where the plant’s vigorous growth won’t become a nuisance.
- Consider Vertical Space: If you have limited horizontal space, consider a vertical planter or a hanging basket for your mint. This allows you to maximize your space while keeping mint growth in check.
Choosing the right container sets the stage for successful mint cultivation, keeping the plant contained and manageable.
- Water Retention
- Plant Protection
- Soil Enrichment
Preparing the Soil
Preparing the soil is a crucial step in growing healthy mint from seeds. Follow these steps to create an ideal growing environment for your mint:
- Well-Draining Soil: Mint thrives in well-draining soil. Choose a high-quality potting mix designed for herbs or create your mix by combining garden soil with compost or perlite to enhance drainage.
- Soil pH: Mint prefers slightly acidic to neutral soil with a pH range of 6.0 to 7.0. You can check the pH of your soil using a pH testing kit and adjust it if needed.
- Container Preparation: Fill your chosen container with the prepared soil mix, leaving a couple of inches of space from the top to prevent soil from spilling over when you water.
- Compost Boost: Adding compost to your soil mix provides essential nutrients and promotes healthy root development. Mix in compost at a ratio of one part compost to three parts soil.
- Watering: Moisten the soil in the container before planting your mint seeds. Ensure the soil is evenly damp but not soggy.
By preparing the soil properly, you create the ideal foundation for your mint seeds to germinate and thrive. This ensures your mint plants will have the nutrients and drainage they need for healthy growth and abundant fragrance.
Planting Mint Seeds
Now that you have your container and soil ready, it’s time to plant your mint seeds. Follow these steps to get your mint garden started:
- Seed Spacing: Mint seeds are tiny, so you can sprinkle them evenly over the soil surface. You don’t need to bury them too deep.
- Press Lightly: Gently press the seeds into the soil with your fingertips or a small piece of cardboard. This helps ensure good seed-to-soil contact, which is essential for germination.
- Cover Lightly: Mint seeds don’t require deep burial. Cover them lightly with a thin layer of soil, about 1/4 inch deep.
- Water Carefully: After planting, water the container gently to settle the seeds and moisten the soil. Be careful not to wash the seeds away.
- Provide Ventilation: Mint seeds need oxygen to germinate, so make sure there’s some airflow around the container.
- Label Your Container: Don’t forget to label your container with the mint variety and planting date for easy identification.
With these steps, you’ll give your mint seeds the best chance to germinate and start their journey toward becoming lush, fragrant mint plants.

- HERB GROWING KIT: Package comes with 5 types of herb seeds, 5 jute bags, 5 plant markers, 5 soil disks, 1 mini shears, and 1 planting guide. This herb growing kit is super easy to start, and perfect for gardening beginners.
- INDOOR HERB GARDENING: We provide seeds that grow into Basil, Parsley, Rosemary, Thyme, and Mint. All these herbs seeded on your own would be safer and greener to eat, and especially suitable to be put on the kitchen’s windowsill so that you can get and cook with the freshly plucked.
- 5 JUTE BAGS: 5 durable jute bags with unique beautiful prints are supposed to hold soil and seeds. As the jute material is not waterproof, you’d better to use with a tray for water. Simple and stylish appearance is suitable for balcony, windowsill and shelf decoration, practical and beautiful, making your room full of vitality. Please transparent the seedlings to larger pots when they grow into 2-3 inch for more space.
- 5 SOIL DISKS: Our herb soil contains coconut coir, which is good to seeds germination and can promote the growth of seedling. It is compressed into soil discs (1.5″ in thickness, each soil disc weighs 2oz) for easy package and can expand into 10 times as large as what it was after absorbing the water. 5 soil discs are sufficient enough for the beginning of the plant growing.
- PERFECT GIFT: This herb growing starter kit comes with a beautiful box, which makes it a decent gift presenting to your families and friends for housewarming party, Father’s Day, Mother’s Day gifts and other important occasions. Herb growing can well free them from tired life, relieve their stress, and bring new vigor.
Watering and Sunlight
Proper watering and sunlight are essential for the health of your mint plants. Here’s how to provide the right conditions:
- Watering: Mint likes consistently moist soil, so check the soil regularly and water when the top inch feels dry to the touch. Water at the base of the plants to avoid wetting the leaves, as this can lead to fungal issues.
- Sunlight: Mint thrives in partial to full sunlight. Ensure your container receives at least 4-6 hours of sunlight per day. If you’re growing mint indoors, place it near a sunny window or provide supplemental grow lights.
- Avoid Overwatering: While mint likes moisture, it doesn’t like to sit in waterlogged soil. Make sure your container has good drainage, and don’t let excess water accumulate in the saucer beneath the pot.
- Fertilizing: Mint doesn’t require heavy fertilization. You can apply a balanced, diluted liquid fertilizer every 4-6 weeks during the growing season to promote healthy growth.
By providing the right amount of water and sunlight, you’ll ensure your mint plants thrive and produce those aromatic leaves that are perfect for culinary creations and herbal teas.

- Package contains 16 Pounds organic all purpose plant fertilizer grains and is produced to avoid wasteful runoff, mess, hazards and smells
- Plant fertilizer is formulated with a 4-4-4 NPK to provide vegetables, plants, and flowers nutrients they need for a high yield and vibrant foliage
- Jobe’s organic fertilizer contains no synthetic chemicals and are OMRI listed for organic gardening by the USDA
- Application is simple and should be done every 2-3 weeks or as needed during the growing season
- Jobe’s organic fertilizer is easily measured to provide the right amount of nutrients for vegetables, flowers, and plants without over fertilizing
Germination and Transplanting
As your mint seeds start to sprout, it’s important to monitor their growth and be prepared for transplanting when the time is right. Here’s what to do:
- Germination Period: Mint seeds typically germinate within 7-14 days, but it can vary. Be patient and keep the soil consistently moist during this period.
- Thinning: When your mint seedlings have developed a couple of true leaves, it’s time to thin them. Remove weaker or overcrowded seedlings, leaving only the healthiest ones. This ensures adequate space for each plant to grow.
- Transplanting: Once your mint seedlings are 2-3 inches tall and have a few sets of leaves, they’re ready for transplanting. Gently lift them from the container, taking care not to damage the roots. Plant them in their permanent containers or in the garden bed, ensuring the same soil depth as before.
- Spacing: If transplanting into a larger container or garden bed, maintain the recommended spacing of 18-24 inches between mint plants to prevent overcrowding.
Transplanting your mint seedlings at the right time and with care sets the stage for robust, mature plants.
Caring for Mature Mint Plants
Now that your mint plants are growing, it’s time to provide ongoing care to ensure their health and productivity:
- Watering: Continue to water your mint plants regularly to keep the soil consistently moist. Mint can tolerate some drought, but it thrives with steady moisture.
- Mulching: Applying a layer of mulch around your mint plants helps retain soil moisture and prevents weeds from competing with your mint.
- Pruning: Prune your mint plants regularly to encourage bushy growth and prevent them from becoming too leggy. Pinch off the tips of the stems to promote branching.
- Harvesting: Harvest your mint leaves regularly for culinary or medicinal use. Snip leaves from the top, leaving a few sets of leaves on each stem for continued growth.
- Pest and Disease Management: Keep an eye out for common pests like aphids or fungal diseases. Address any issues promptly with natural remedies or pesticides if necessary.
- Fertilizing: Mint generally doesn’t require heavy fertilization. You can apply a balanced, diluted liquid fertilizer sparingly during the growing season if growth seems slow.
By caring for your mature mint plants with attention to watering, pruning, and pest management, you’ll ensure a thriving mint garden that provides fresh, aromatic leaves for your culinary creations and herbal delights.
Harvesting and Using Mint
Harvesting mint leaves is one of the most rewarding aspects of growing this aromatic herb. Here’s how to do it right:
- Timing: You can start harvesting mint leaves once the plants are well-established and have several sets of leaves, usually about 8-10 weeks after planting. Harvest in the morning when the oils are most concentrated for the best flavor.
- Harvest Method: Use scissors or gardening shears to snip off the top few inches of the mint stems. This encourages bushy growth and ensures a continuous supply of fresh leaves. Leave a few sets of leaves on each stem to support regrowth.
- Storage: Store freshly harvested mint leaves in a plastic bag or container in the refrigerator for up to a week. Alternatively, you can preserve mint leaves by drying them or freezing them in ice cube trays with water for longer-term use.
- Culinary Uses: Mint leaves are incredibly versatile. Use them to add a burst of freshness to salads, drinks (like minty iced tea or mojitos), desserts, and savory dishes. Mint also pairs well with lamb and is a key ingredient in classic dishes like tzatziki and mint chutney.
- Medicinal Uses: Mint has a long history of medicinal use for its soothing properties. Brew fresh or dried mint leaves into a tea to relieve digestive issues, alleviate headaches, or ease congestion.
Conclusion
Congratulations! You’ve embarked on a journey to grow mint from seeds and have successfully nurtured these fragrant and flavorful plants. From selecting the right seeds to providing the perfect growing conditions, you’ve cultivated a garden filled with the delightful aroma and taste of mint.
As you continue to care for your mint plants, remember the joy of harvesting fresh leaves for culinary creations, refreshing beverages, and herbal remedies. Growing mint not only enhances your garden but also adds a touch of natural goodness to your everyday life.
So, whether you’re savoring a minty cup of tea, garnishing a summer salad, or simply enjoying the invigorating scent in your garden, your efforts in growing mint from seeds have truly paid off. May your mint garden continue to thrive and bring you endless moments of delight!