Coneflowers, with their vibrant blooms and their ability to attract pollinators, are cherished additions to gardens. If you’re eager to expand your garden or share these beautiful plants with others, learning how to harvest coneflower seeds is a valuable skill. In this comprehensive guide, we’ll walk you through the process step by step, starting with crucial considerations for timing and preparation. By understanding when and how to prepare for seed harvesting, you’ll set the stage for a successful propagation journey in your garden.

Timing and Preparation
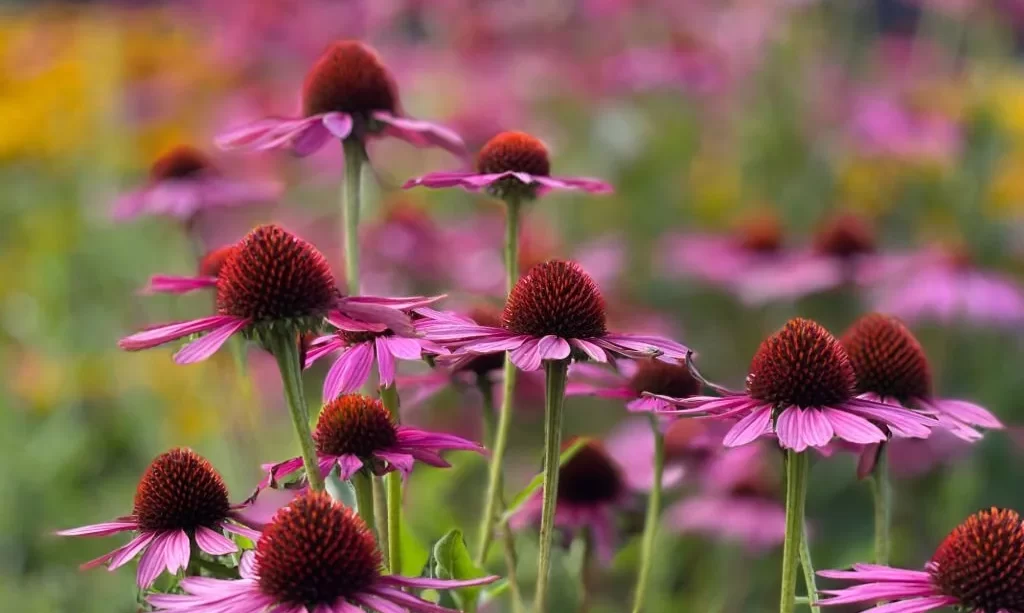
- Best Harvest Time: The ideal time to harvest coneflower seeds is typically in late summer to early fall. At this point, the coneflower blooms have faded, and the seed heads are mature. Look for coneflowers with dried, brown petals and dark brown center cones.
- Selecting Healthy Plants: Begin by selecting healthy coneflower plants with robust seed heads. Choose those that appear disease-free and have produced plentiful seeds. Healthy parent plants are more likely to yield viable seeds for propagation.
- Materials and Tools: Before you start harvesting, gather the necessary materials and tools. You’ll need garden shears or scissors for cutting seed heads, a paper bag to collect the seeds, and labels to identify the collected seeds.
- Labeling: Consider labeling the plants you plan to harvest if you have different coneflower varieties in your garden. Proper labeling helps you keep track of the specific seeds you collect, making it easier to plan your garden.
- Timing Considerations: Keep in mind that coneflower seeds can be a valuable resource for preserving plant diversity and sharing with fellow gardeners. Planning your seed harvest ahead of time allows you to maximize your collection and propagate these lovely flowers effectively.
By understanding the best timing for harvesting coneflower seeds and preparing the necessary tools and materials, you’ll be well-prepared to embark on the rewarding journey of collecting and propagating these charming garden favorites.
Identifying Ripe Seed Heads
Before you begin harvesting coneflower seeds, it’s essential to recognize the signs of ripe seed heads. This ensures that you collect seeds at the peak of their quality and viability. Here’s how to identify ripe coneflower seed heads:
- Petal Color: Look for coneflowers with faded or brown petals. This indicates that the flowers have completed their blooming cycle and are transitioning into the seed-producing stage.
- Center Cone: Examine the center cone of the coneflower. Ripe seed heads will have a dark brown color, and the cone may appear slightly dried. This indicates that the seeds inside are maturing.
- Seed Release: Gently touch the seed head. If seeds are starting to loosen or fall easily, it’s a good indicator that the seeds are ready for harvest. Avoid seed heads where the seeds are firmly attached.
- Overall Appearance: A ripe seed head may appear a bit weathered but still intact. It should look like it has finished its flowering stage and is in the process of seed development.
- Timing: Keep in mind the timing mentioned in the introduction—late summer to early fall is generally the prime time for harvesting coneflower seeds. This is when most seed heads will be ripe and ready for collection.

- Abundant Supply: Contains over 2,300 Purple Coneflower (Echinacea) seeds; ideal for creating vibrant, pollinator-friendly garden spaces
- High Germination Rates: Carefully selected flower seeds for high germination; ensures a healthy and flourishing garden
- Attracts Pollinators: Grows beautiful purple coneflowers that attract bees, butterflies, and other beneficial pollinators to your garden
- Drought-Tolerant Perennial: Echinacea is a hardy, drought-tolerant perennial; perfect for low-maintenance, year-after-year blooms
- Versatile Planting: Ideal for borders, wildflower gardens, and cut flower arrangements; adds color and beauty to any garden space
Harvesting Coneflower Seeds
Now that you can identify ripe seed heads, it’s time to proceed with the actual harvesting process. Follow these steps for effective seed collection:
- Tools: Use garden shears or sharp scissors to cut the seed heads from the coneflower plant. Ensure that your cutting tools are clean and sharp to make precise cuts.
- Cutting Technique: Approach the plant and cut the seed head from the stem, leaving a short section of stem attached to the seed head. This stem section will serve as a handle for easier handling and seed removal later.
- Collection Bag: Place the cut seed heads into a paper bag. A paper bag is an excellent choice because it allows for airflow and prevents moisture buildup, which can lead to mold. Do not use plastic bags, as they can trap moisture.
- Labeling: If you’re collecting seeds from different coneflower varieties or want to keep track of specific plants, label the paper bag with the plant’s name or variety. This ensures that you’ll know the origin of each batch of seeds.
- Quantity: Continue harvesting seed heads until you have collected as many as you desire. Be mindful not to over-harvest from a single plant, as leaving some seed heads behind benefits the plant’s natural reseeding and wildlife.
By identifying ripe seed heads and following proper harvesting techniques, you’ll ensure that you collect high-quality coneflower seeds ready for propagation in your garden or to share with fellow gardening enthusiasts.
Drying Coneflower Seeds
After successfully harvesting coneflower seeds, it’s essential to dry them properly. Proper drying ensures that the seeds are free from excess moisture, which can lead to mold and reduced viability. Here’s how to dry coneflower seeds effectively:
- Prepare a Workspace: Find a well-ventilated, dry area for seed drying. Avoid direct sunlight and humid locations, as they can hinder the drying process.
- Use Paper Plates or Trays: Place the harvested seed heads on paper plates or trays. Avoid overcrowding to allow for adequate air circulation around each seed head.
- Air Drying: Leave the seed heads in the chosen location for about 1-2 weeks to air dry. During this time, the seeds inside will continue to mature and dry out.
- Check for Dryness: To determine if the seeds are thoroughly dried, touch them gently. They should feel hard and not show any signs of moisture or pliability.
- Shake to Release Seeds: Periodically shake the seed heads gently to encourage the release of any remaining seeds. This step helps ensure that you collect all viable seeds.
- Store Dry Seeds: Once the seeds are completely dry, you can proceed to store them for future use. Ensure that the seeds are entirely moisture-free to prevent mold during storage.
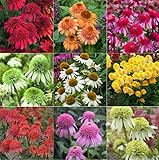
- 50 Mix Double Coneflower Seeds Echinacea Flower Seeds Perennial Garden
Separating and Cleaning Seeds
Before storing the coneflower seeds, it’s essential to separate them from the seed heads and remove any remaining plant material. Here’s how to separate and clean coneflower seeds effectively:
- Remove Seeds: Hold each dried seed head over a clean, dry container or bowl. Use your fingers or gentle tapping to release the seeds from the seed head. Continue until all seeds are collected.
- Check for Chaff: After seed extraction, you may notice some small pieces of chaff or plant material mixed in with the seeds. Carefully inspect the seeds and remove any remaining debris.
- Fine Sieve or Screen: For a thorough cleaning, you can use a fine sieve or screen with holes smaller than the seeds. Pour the seeds through the sieve, gently shaking to separate seeds from smaller debris.
- Winnowing: Another method is to perform a winnowing process. Stand outdoors on a breezy day and pour the seeds slowly from one container to another while allowing the wind to carry away lightweight chaff and debris. This technique is useful for larger seed batches.
- Final Inspection: After cleaning, visually inspect the seeds one last time to ensure they are free from any contaminants or chaff.
- Label and Store: Label the storage container with the date of harvesting and the coneflower variety or specific plant. Store the cleaned, dry seeds in an airtight container, such as a small jar or a sealed plastic bag, in a cool, dry place away from direct sunlight.
By following these steps for drying coneflower seeds and separating and cleaning them, you’ll prepare high-quality seeds that are ready for storage and future propagation in your garden or for sharing with fellow gardeners.
Storing Coneflower Seeds
Once you’ve successfully harvested, dried, and cleaned your coneflower seeds, it’s essential to store them properly to maintain their viability. Proper storage ensures that the seeds remain healthy and ready for future planting. Here’s how to store coneflower seeds effectively:
- Airtight Container: Transfer the cleaned, dry seeds into an airtight container. Small glass jars with tightly sealed lids or resealable plastic bags work well for seed storage.
- Labeling: Label the container with essential information, including the date of harvesting and the specific coneflower variety or plant. Proper labeling helps you keep track of your seeds and their origin.
- Cool and Dry Location: Store the seed container in a cool, dry place. A temperature-controlled room or a refrigerator with a stable temperature around 40°F (4°C) is ideal. Avoid freezing temperatures, as extreme cold can damage seeds.
- Dark Environment: Protect the seeds from exposure to direct sunlight. Keep them in a dark or opaque container to prevent light from reaching the seeds, which can adversely affect their germination rate.
- Humidity Control: Ensure that the storage environment has low humidity. Moisture can lead to mold and decrease seed viability. You can add silica gel packets to help absorb any excess moisture within the storage container.
- Regular Monitoring: Periodically check the stored seeds, especially in the first few months. Look for any signs of moisture or mold and remove any affected seeds promptly to prevent contamination.
- Viability Testing: Over time, it’s a good practice to test the viability of stored coneflower seeds by performing a germination test. This ensures that the seeds remain viable and suitable for planting.

- Upgraded Seed Organizer Storage Box: includes 1 funnel,1 Seed organizer storage box and 60 label stickers. Fully meet your daily needs, store seeds safely and keep them clean and dry.
- Mutiple Protection: The sponge card slot design of the Seed organizer ensures that all seed sorting boxes are firmly fixed in the sponge holes to avoid collisions between boxes and prevent damage. High quality seed storage can provide Photoprotection to keep seed alive longer.
- Neat And Easy To Idetify: Garden seed organizer storage box includes 60 label stickers,Clear organizing boxes and label markings can help you quickly and easily identify the seeds inside.
- Wideiy Used: The seed organizer is a perfect gift for plant enthusiasts and an ideal choice for garden plants, vegetables, flowers, seeds, clover, and basic tomato seeds. It can also store other small items such as beads, rhinestones, necklaces, earrings, etc.
- Easy To Place: The entrance of each garden seed packet organizer storage box is large enough, and the accompanying funnel can easily place seeds. The lid with a rotating sealing design ensures that it does not pop out, and seeds do not scatter everywhere. The zipper design of the seed organizer storage box accidentally opens or overflows.
Propagating with Harvested Seeds
Once you’ve stored your coneflower seeds correctly, you can use them for propagation in your garden or share them with fellow gardeners. Here’s a brief overview of how to propagate coneflowers using harvested seeds:
- Planting Time: In the spring, when the danger of frost has passed, it’s time to plant your coneflower seeds. Choose a suitable location in your garden.
- Soil Preparation: Prepare the soil by loosening it and removing any debris or weeds. Ensure good drainage and amend the soil with organic matter if necessary.
- Sowing Seeds: Sow the coneflower seeds directly into the prepared garden bed or in containers. Plant them at the recommended depth, which is usually about 1/4 inch deep.
- Spacing: Follow the specific spacing recommendations for your coneflower variety. Typically, you’ll want to space the seeds or seedlings according to their mature size.
- Watering: Keep the soil consistently moist until the coneflower seedlings emerge and establish themselves. Avoid overwatering, which can lead to root rot.
- Transplanting: When the seedlings are large enough and have a few sets of true leaves, you can transplant them to their permanent locations in the garden.
- Care and Maintenance: Continue to care for your coneflower plants as they grow, providing them with appropriate watering and occasional fertilization. Be on the lookout for pests or diseases and address them promptly.
Conclusion
Congratulations on mastering the art of harvesting, preparing, and storing coneflower seeds. By following these steps, you’ve gained the knowledge and skills needed to propagate these beautiful plants successfully. Whether you’re expanding your garden or sharing coneflower seeds with others, you’re contributing to the growth and beauty of gardens everywhere. Enjoy the vibrant blooms and the sense of accomplishment that comes with growing coneflowers from your harvested seeds.