Spinach, with its vibrant green leaves and remarkable nutritional value, has long been a favorite among vegetable enthusiasts. While it’s readily available at grocery stores, there’s a special satisfaction in growing your own spinach indoors. Whether you have limited outdoor space or simply want a convenient source of fresh greens year-round, indoor spinach cultivation is an excellent choice.
In this guide, we will walk you through the steps to successfully grow spinach indoors. From choosing the right variety to providing optimal care and harvesting your homegrown greens, you’ll discover that cultivating spinach indoors can be a rewarding and delicious endeavor. So, let’s get started on your journey to enjoying a constant supply of this nutrient-packed leafy vegetable right from your own home.

- Longevity spinach, also known as Gynura procumbens, is growing in popularity thanks to its benefits as green, leafy spinach!
- Longevity spinach, also known as the longevity green, is a veggie plant famous worldwide but primarily found in Africa, China, and Southeast Asia. It would thrive in areas that have tropical climates, being native in terrestrial, warm locations and habitats.
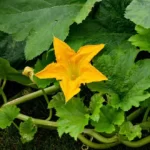
- Longevity spinach grows to a maximum height of 12 inches, with a minimum height of 6 inches. Come spring season, the plant would grow flowers, showing orange inflorescences on its axillary stem.
- The leaves of the longevity spinach are fleshy and smooth, rounder in shape to ovate, with greenish on the upper side, while it is purplish underneath. The leaves have a width of 1.3 inches and a length of 3 inches.
- When growing longevity spinach indoors or outdoors, you should know that they are hardy, growing well in indoor and outdoor environments. When you grow them outdoors and spread them, they trail up or cover the ground. You can also trim them to grow more like bushes. If they grow in a pot, you can clip them.
Choosing the Right Spinach Variety
The journey of growing spinach indoors begins with selecting the right variety. Different spinach varieties offer unique characteristics, making it essential to choose one that suits your preferences and growing conditions. Here’s what you need to know:
- Variety Options: Spinach varieties can range from traditional savoyed (crinkled) leaves to smooth, flat-leaf types. Some popular choices for indoor cultivation include “Baby Leaf,” “Space,” and “Tyee”.
- Leaf Texture and Taste: Consider whether you prefer the crinkled texture of savoyed spinach or the smoother leaves of flat-leaf varieties. Taste preferences can also vary, so it’s a good idea to sample different types to find your favorite.
- Growth Habit: Spinach can be classified as either determinate or indeterminate. Determinate varieties grow as compact rosettes, while indeterminate types produce more sprawling leaves. The choice depends on the available indoor space and your cultivation goals.
- Days to Maturity: Different spinach varieties have varying maturation times. Some are ready for harvest in as little as 30 days, while others take longer. Consider your patience and desired harvesting schedule.
- Climate Adaptation: Some spinach varieties are bred for specific climate conditions, so choose one that aligns with your indoor environment, whether it’s a sunny windowsill or a dedicated grow light setup.
By carefully selecting the right spinach variety, you’ll set the foundation for a successful indoor garden. In the following sections, we’ll delve into the steps to prepare your indoor growing space, plant spinach seeds, and provide the necessary care for your homegrown greens.
Preparing Indoor Growing Space
Creating the perfect environment for your indoor spinach garden is crucial for success. Here’s how to prepare your indoor growing space:
- Lighting: Spinach requires ample sunlight to thrive. Choose a location with access to at least 6-8 hours of direct sunlight daily. If natural light is limited, consider using full-spectrum grow lights, positioning them 6-8 inches above the plants to mimic natural sunlight.
- Containers: Select suitable containers for your indoor spinach. Options include pots, grow bags, or vertical planters. Ensure that the containers have adequate drainage holes to prevent overwatering.
- Soil Mix: Use a high-quality potting mix that is well-draining and rich in organic matter. You can also add a handful of compost for added nutrients. Fill your chosen containers with the potting mix, leaving a few inches of space at the top.
- Location: Place your containers near a south-facing window if possible, as this direction typically receives the most sunlight. Ensure there is good air circulation around the plants to prevent humidity-related issues.

- 🌳 PROFESSIONALLY MIXED IN THE USA – Each bag is hand blended on our small family farm with premium horticultural grade ingredients: Coco Coir, Canadian Peat Moss, Perlite, Worm Castings- 2 QUART BAG
- ✅ PROMOTES RAPID ROOT DEVELOPMENT: With extra perlite and low-salt coconut coir, GARDENERA soil promotes rapid root development .
- 💧 SUPER MOISTURE DRAINAGE- Protects roots by quickly draining away excess water but keeping dirt moist for nutrient retention, best mimics their natural outdoor environment.
- ✅ APPROVED FOR ORGANIC GROWING: All Gardenera Organics premium potting soils are made in the USA 🇺🇸 and contain no additives, proving them great for use in organic growing.
- 🌱 DEVELOPED BY PLANT PARENTS FOR PLANT PARENTS – Crafted specifically to support the growth of Spinach. This high quality hand crafted mix is great for Spinach. It will allow your plant to grow and become large and healthy.
Planting Spinach Seeds
Now that your indoor growing space is ready, it’s time to plant your spinach seeds:
- Seed Spacing: Space spinach seeds about 1 inch apart in rows or scatter them evenly if you’re growing in a container. Plant them at a depth of approximately 1/2 inch.
- Watering: After planting, water the soil thoroughly to ensure the seeds have adequate moisture for germination. Maintain even moisture levels throughout the growing process, avoiding both waterlogged and dry soil.
- Germination: Spinach seeds typically germinate within 7-14 days. During this period, it’s essential to keep the soil consistently moist but not saturated.

- Spinach Oleracea: These finest quality, non-GMO, USDA Organic Bloomsdale Spinach Seeds will produce a generous crop with glossy, dark green leaves perfect for a wide variety of culinary uses from salads to soufflés.
- Enjoy Baby Spinach & A Plentiful Harvest: Plant new seeds every 2 weeks to ensure a continuing supply of fresh spinach in the spring and fall. When seedlings are 2-3 inches tall harvest every other plant and you’ll be able to enjoy a nice helping of baby spinach while giving the remaining plants more room to grow and flourish.
- Freshly Packed: These seeds are packed for the current growing season and will provide high germination rates next year as well.
- Certified Organic: All Purely Organic Seeds are open pollinated, non-GMO (not genetically modified), heirloom, organic seeds. Each Purely Organic Seed Packet carries the USDA Organic Seal signifying that is has passed rigorous standards and been certified organic by a USDA Accredited agency.
- Premium Packaging: All seeds from Purely Organic Products are packaged in individually styled packets ideal for gifts, storage or immediate use. Each packet displays the plant variety on the front with instructions and plant facts on the back.
Caring for Indoor Spinach
To ensure your indoor spinach plants thrive, follow these care guidelines:
- Temperature: Spinach prefers cooler temperatures. Aim to keep your indoor environment around 50-75°F (10-24°C) to promote healthy growth. Be cautious of temperature extremes, as spinach can bolt (produce flowers prematurely) in response to heat stress.
- Lighting: If natural light isn’t sufficient, use grow lights to provide the necessary illumination. Keep the lights on for 12-16 hours a day to simulate daylight hours.
- Watering: Maintain consistent soil moisture by watering when the top inch of soil feels dry. Avoid overhead watering to prevent fungal issues, and water directly at the soil level.
- Fertilization: Feed your indoor spinach with a balanced, water-soluble fertilizer every 2-4 weeks. Ensure that the fertilizer includes essential nutrients like nitrogen, phosphorus, and potassium.
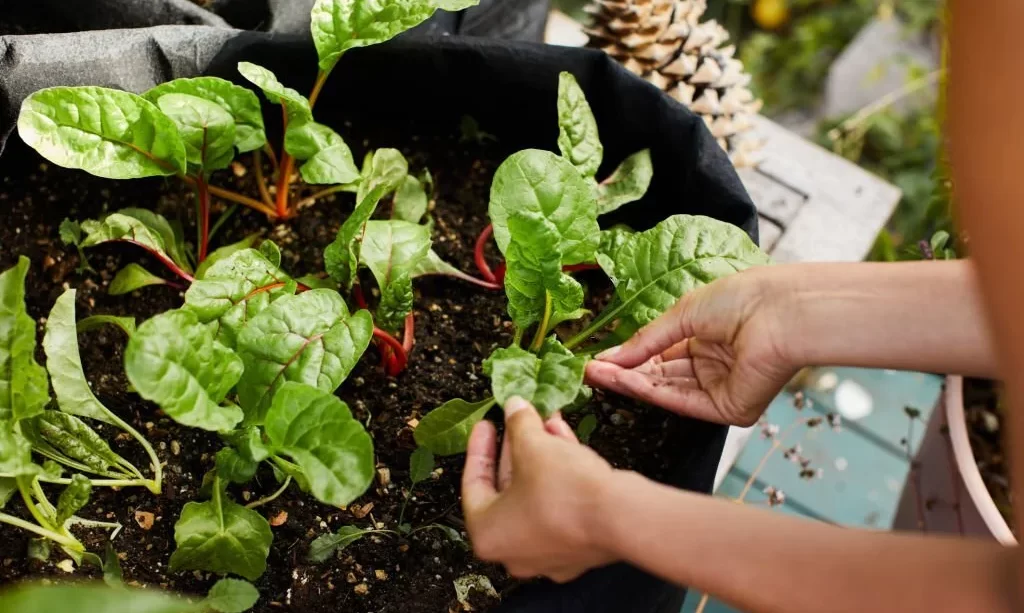
- Thinning: Once your spinach seedlings have developed their first true leaves, thin them to ensure proper spacing. Space the strongest seedlings at least 3-4 inches apart to allow room for growth.
- Pest and Disease Management: Keep an eye out for common indoor pests like aphids or spider mites. Use natural pest control methods like neem oil or insecticidal soap if necessary. Good air circulation and proper spacing can also help prevent disease issues.
By following these care instructions, you’ll create an ideal environment for your indoor spinach to thrive. In the subsequent sections, we’ll explore fertilization, common challenges, and how to harvest your homegrown spinach for the freshest, most flavorful results.

Fertilizing and Nutrient Requirements
Growing healthy spinach indoors requires proper fertilization and attention to nutrient needs:
- Balanced Fertilizer: Use a balanced, water-soluble fertilizer with equal parts of nitrogen, phosphorus, and potassium (e.g., 10-10-10). This provides essential nutrients for leafy growth and overall plant health.
- Fertilization Schedule: Apply the fertilizer every 2-4 weeks during the growing season. Be cautious not to over-fertilize, as excessive nutrients can lead to leafy growth with less flavor.
- Organic Options: Consider using organic fertilizers or compost tea to enrich the soil naturally. These options provide nutrients without the risk of chemical buildup.
Dealing with Common Indoor Growing Challenges
Indoor spinach cultivation can face specific challenges, but they can be managed with these strategies:
- Pest Control: Watch for common indoor pests like aphids, spider mites, or whiteflies. Use neem oil or insecticidal soap to address infestations while minimizing harm to your plants.
- Disease Prevention: Maintain proper air circulation by using fans or opening windows periodically to prevent fungal diseases. Avoid overwatering, and keep the area around your plants clean and free of debris.
- Bolting Prevention: To prevent spinach from bolting (producing flowers prematurely), maintain consistent temperatures and avoid extreme heat. Harvest regularly to encourage leaf growth.
- Overcrowding: If plants become overcrowded, thin them out to allow for better airflow and prevent disease. Maintain proper spacing to ensure each plant has room to grow.
Harvesting Indoor Spinach
One of the joys of indoor spinach cultivation is harvesting fresh greens when you need them. Here’s how to do it:
- Harvest Timing: Start harvesting spinach leaves when they reach a size of 3-4 inches. This typically occurs within 4-6 weeks of planting, depending on the variety and growing conditions.
- Leaf-Picking: Gently pinch or cut individual leaves at the base, leaving the plant’s center intact to continue producing more leaves. Harvesting in this manner allows for a continuous supply of fresh spinach.
- Avoid Bolting: To prevent bolting, harvest promptly when the leaves are tender and before they show signs of flowering.
- Regular Harvests: Continue to harvest spinach regularly, taking care not to remove more than one-third of the plant at a time. This practice encourages the plant to keep producing new leaves.
- Use Fresh: Use your freshly harvested spinach immediately in salads, sandwiches, smoothies, or cooked dishes to enjoy its crisp texture and maximum flavor.
With proper fertilization, effective pest management, and a good harvest routine, you’ll ensure a bountiful supply of homegrown spinach, providing you with fresh and delicious greens throughout the year. In the following sections, we’ll explore how to utilize your homegrown spinach in various culinary delights and offer troubleshooting tips to address any challenges that may arise during your indoor spinach-growing journey.
Using Your Homegrown Spinach
Enjoy the fruits of your labor by incorporating your homegrown spinach into a variety of dishes:
- Salads: Fresh spinach leaves make a fantastic base for salads. Combine them with other vegetables, nuts, seeds, and your favorite dressing for a nutritious and flavorful meal.
- Smoothies: Add a handful of fresh spinach to your morning smoothie for an extra boost of vitamins and minerals. Its mild flavor blends well with fruits and other greens.
- Sandwiches and Wraps: Layer spinach leaves in sandwiches, wraps, or burgers for a burst of freshness and added nutrition.
- Cooked Dishes: Sauté spinach with garlic and olive oil, or steam it as a side dish. You can also add spinach to pasta, soups, omelets, and quiches for a healthy twist.
- Freezing: If you have excess spinach, consider blanching and freezing it for later use in cooked dishes. This ensures you can enjoy your homegrown spinach all year round.
Troubleshooting Indoor Spinach Growth
Addressing common issues promptly will help ensure a successful indoor spinach garden:
- Yellowing Leaves: Yellowing leaves may indicate nutrient deficiencies. Adjust your fertilization schedule or switch to a balanced fertilizer.
- Leggy Growth: Leggy, elongated growth can result from insufficient light. Increase the duration or intensity of light to encourage compact, healthy growth.
- Pests: If you notice aphids, spider mites, or other pests, use natural remedies like neem oil or insecticidal soap. Isolate affected plants if necessary to prevent the issue from spreading.
- Bolting: Bolting occurs due to high temperatures or extended daylight hours. Maintain consistent temperature and harvest promptly to prevent this issue.
- Disease: Prevent fungal diseases by ensuring good air circulation and avoiding overwatering. Remove and dispose of infected leaves to contain the problem.
Conclusion
Growing spinach indoors is not only a rewarding endeavor but also a convenient way to enjoy fresh, nutritious greens year-round. With the right spinach variety, proper care, and attention to potential challenges, you can cultivate a thriving indoor spinach garden in any space.
From planting your seeds to harvesting lush, green leaves, the journey of indoor spinach cultivation offers not only a delightful visual experience but also a culinary adventure. Whether you’re crafting vibrant salads, blending healthy smoothies, or adding a touch of green to your favorite dishes, homegrown spinach brings a burst of flavor and nutrition to your table.
By following the steps outlined in this guide and using your newfound knowledge, you’ll be well-equipped to embark on your indoor spinach-growing journey. So, roll up your sleeves, nurture your spinach plants with care, and savor the satisfaction of enjoying your very own homegrown greens, right from your indoor garden.