Garlic, with its aromatic and savory flavor, is a kitchen essential that elevates the taste of countless dishes. Growing garlic from a single clove in water is not only a fascinating experiment but also a practical way to enjoy fresh garlic from your own home. In this easy-to-follow guide, we’ll walk you through the step-by-step process of growing garlic using nothing more than a clove and water. Whether you’re a seasoned gardener or a novice, this method allows you to cultivate this flavorful herb effortlessly.
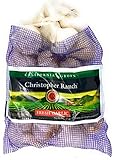
- arlic has the ability to make a good dish great, but all garlic is not created equal.
- Zesty flavorful. The taste of health. Simply the Best Garlic! Product of USA.
- The distintive taste of garlic can be expressed in many ways. Mince garlic and mix it with some basil and olive oil for a pungent explosion of flavor. Slowly roast whole bulbs to create a savory spread for bread and other foods. or simply add cloves to your favorite recipes, to impart that great garlic taste as you cook. No matter how much of a garlic afficionado you are, there are great ways to enjoy garlic’s taste!
- Product Label will vary due to seasonal production
- Approximately 20 heads per 2 pound bag, shipped in a box for your protection.
Gather Your Supplies
Before you embark on your garlic-growing journey, it’s essential to assemble the necessary supplies. Fortunately, you won’t need a vast array of gardening tools for this project. Here’s what you’ll need:
- A single garlic clove (opt for organic if possible)
- A small glass or jar
- Clean, fresh water
With these basic items in hand, you’re ready to kickstart your garlic-growing adventure. Let’s delve into the details of each step to ensure your success in growing garlic from a single clove in water.
Select a Healthy Clove
To begin your garlic-growing project successfully, it’s crucial to choose a healthy garlic clove as your starting point. Look for a clove that exhibits the following characteristics:
- Plump and firm: Select a garlic clove that feels plump and firm to the touch. Avoid cloves that appear shriveled or have soft spots, as these may not sprout as well.
- Unbroken skin: Inspect the clove’s outer layer. It should have unbroken skin without any tears or damage. A intact skin helps protect the inner cloves and promotes healthy growth.
- Firm cloves: Check that the individual cloves within the garlic bulb are firm and well-formed. Avoid cloves with visible mold or discoloration.
Choosing a healthy garlic clove sets the stage for successful growth and ensures that you’re starting with the best possible foundation.
Preparing the Clove
Once you’ve selected a suitable garlic clove, the next step is to prepare it for planting. Follow these simple steps:
- Gently remove loose layers: Garlic bulbs are encased in papery layers. Carefully remove any loose, papery layers from the outside of the clove. You don’t need to peel the clove entirely; just remove the loose outermost layers.
- Leave the skin on individual cloves: Each garlic bulb consists of several cloves. When planting garlic in water, you’ll plant the entire clove, including the skin. There’s no need to separate the individual cloves at this stage.
With your garlic clove prepared, you’re ready to move on to the next steps of growing garlic in water. These simple preparations pave the way for successful germination and growth.
Place the Clove in Water
Now that you have your prepared garlic clove, it’s time to give it a watery home. Follow these steps:
- Fill a small glass or jar with enough water to submerge the bottom of the garlic clove. The water level should be just high enough to touch the base of the clove without covering it entirely.
- Carefully place the garlic clove in the glass or jar with the pointed end facing upward. The base of the clove, where the roots will grow, should be in contact with the water.
- Ensure that the garlic clove is stable in the water, so it doesn’t tip over or become fully submerged. A stable position will allow the clove to absorb water properly.
By placing the garlic clove in water, you create the ideal environment for it to sprout and develop into a garlic plant.
Find a Sunny Spot
Garlic loves sunlight, and providing adequate light is crucial for its growth. Here’s what you need to do:
- Place the glass or jar containing the garlic clove in a sunny location. A windowsill that receives plenty of sunlight is an excellent choice.
- Ensure that the garlic clove is exposed to natural light for a significant portion of the day. Sunlight provides the energy needed for the clove to sprout and grow.
- Regularly check the garlic clove to ensure it receives ample sunlight. Rotate the container if necessary to ensure even exposure to sunlight on all sides.
Finding a sunny spot for your garlic clove is essential for successful growth. With proper light, your garlic will begin to sprout and develop into a healthy plant.
Change the Water
Maintaining clean and fresh water for your growing garlic clove is essential to its development. Here’s what you need to do:
- Every few days, change the water in the glass or jar to ensure it stays clean and oxygenated. This step helps prevent the water from becoming stagnant, which can inhibit garlic growth.
- When changing the water, be gentle with the garlic clove to avoid damaging the emerging roots or shoots.
- Use room temperature or lukewarm water when refilling the container. Cold water can shock the plant.
By changing the water regularly, you provide your growing garlic clove with the optimal conditions it needs to thrive.
Watch for Shoots
As days pass, your garlic clove will undergo a transformation. Here’s what to look for:
- After about a week or so, you should start to see green shoots emerging from the top of the garlic clove. These shoots will eventually develop into garlic leaves.
- Keep a close eye on the growth progress. The shoots will continue to elongate and develop over time.
- The appearance of shoots is a promising sign that your garlic clove is germinating successfully.
Watching for shoots is an exciting phase of your garlic-growing project. It marks the beginning of your garlic’s journey from a clove to a full-grown plant.
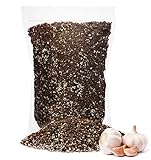
- 🌳 PROFESSIONALLY MIXED IN THE USA – Each bag is hand blended on our small family farm with premium horticultural grade ingredients: Coco Coir, Canadian Peat Moss, Perlite, Worm Castings- 5 QUART BAG
- ✅ PROMOTES RAPID ROOT DEVELOPMENT: With extra perlite and low-salt coconut coir, GARDENERA soil promotes rapid root development .
- 💧 SUPER MOISTURE DRAINAGE- Protects roots by quickly draining away excess water but keeping dirt moist for nutrient retention, best mimics their natural outdoor environment.
- ✅ APPROVED FOR ORGANIC GROWING: All Gardenera Organics premium potting soils are made in the USA 🇺🇸 and contain no additives, proving them great for use in organic growing.
- 🌱 DEVELOPED BY PLANT PARENTS FOR PLANT PARENTS – Crafted specifically to support the growth of Garlic. This high quality hand crafted mix is great for Garlic. It will allow your plant to grow and become large and healthy.
Transplant to Soil (Optional)
If you wish to continue growing your garlic into a mature plant, you can transplant it into soil. Here’s how to do it:
- Select a well-draining pot or a suitable spot in your garden for transplanting.
- Prepare the soil by adding organic matter or compost to enrich it and improve drainage.
- Plant the sprouted garlic clove in the soil, leaving the green shoots above the surface.
- Water the newly transplanted garlic gently but thoroughly.
- Provide your garlic with plenty of sunlight, ideally at least six hours of direct sunlight each day.
Transplanting your garlic allows it to grow into a mature plant, and you can enjoy a full garlic bulb at harvest time.
Continue Care
Whether you’ve chosen to keep your garlic in water or transplanted it into soil, ongoing care is essential. Here’s what you need to do:
- Water your garlic as needed to keep the soil or water consistently moist but not waterlogged.
- Continue to provide adequate sunlight. If your garlic is indoors, ensure it gets enough natural light or use grow lights.
- Regularly monitor the health of your garlic, watching for signs of stress, pests, or disease.
- As your garlic grows, it may benefit from occasional fertilization with a balanced, all-purpose fertilizer.
With continued care, your garlic will continue to flourish, and you’ll be well on your way to enjoying the satisfaction of homegrown garlic. Whether you decide to grow it in water or transplant it into soil, your efforts will yield flavorful garlic for your culinary creations.

- BENEFITS: Makes 6400 applications for house plants. (Makes 50 gallons; Each gallon makes 128 applications) It’s like a full ecosystem in a bottle that is a concentrated formula for watering your plants it’s easy: 1. 2. 3. and you’re ready to go. Great for all soil and growing media, hydroponics, semi-hydro, leca, vivarium with reptiles, terrariums, water gardens, fish tanks, flowers, and so much more. Good For Roots, Stems, Leaves, Blooms, Foliage, and overall plant health.
- WHAT IS IT? Fully Digested Elemental, Nutrient Supplement System for all plants. All vitamins and minerals with the microbial index are essential to a plant’s life. Complete Micro-fungi mycorrhizae and rhizobacteria strains in a pH Balanced formula.
- HOW LIQUI-DIRT IS MADE: Our Zymology process breaks down the 18 ingredients into thousands of separate, fully digested, and readily absorbable elements. This full nutrition can take over 5 years to complete before we bottle it up for you.
- WHATS IN IT: 18 Balanced Super Nutrients For Plants Including Poultry Litter, Rabbit Manure, Bat Guano, Cricket Fras, Humic Shale, Worm Castings, Oyster Shell, Mycorrhizae, Dolomite limes, Kelp Meal, Gypsum, Alfalfa meal, Concentrated Fulvic Acid, Blood meal, Proprietary mineral blend from the best sources.
- HOW LONG DOES IT LAST: This product does not expire in any dilution or concentrated form. Liqui-Dirt is made to dissolve immediately in the water you add to grow happy, healthy plants. Don’t be fooled by other liquids that promise and under deliver, Our full concentrate puts you in command of how much to use for each plant without concern of harming your plants.
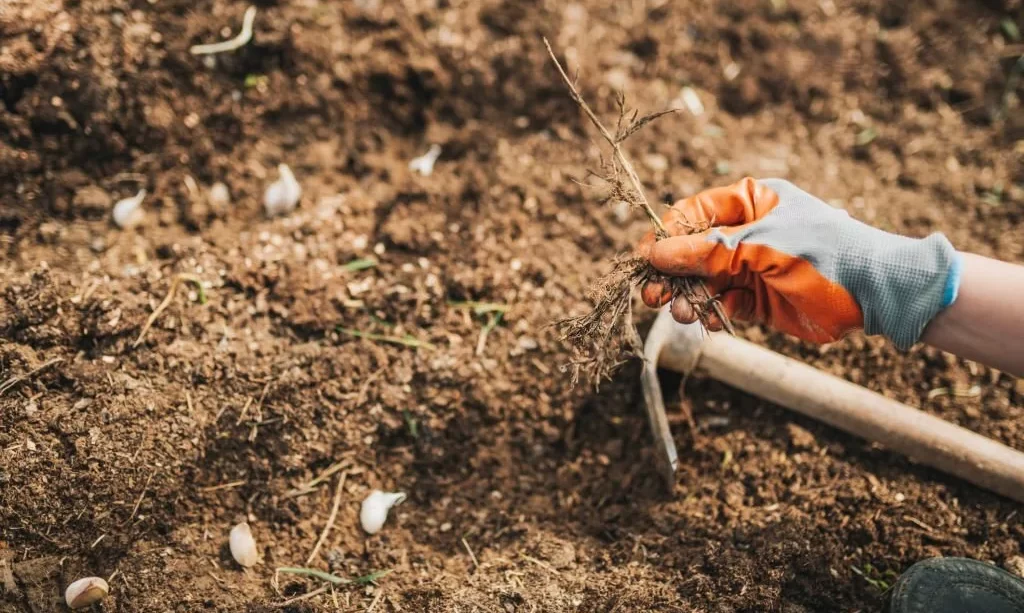
Harvest Your Garlic
After patiently nurturing your garlic, it will be time to harvest the flavorful rewards. Here’s how to do it:
- Garlic is typically ready for harvest when the green leaves, also known as garlic scapes, have turned brown and dried out. This process usually takes several months.
- Carefully dig up the garlic bulb, taking care not to damage it. Use a garden spade or fork to loosen the soil around the bulb, and then gently lift it from the ground.
- Shake off excess soil and remove any loose, papery layers from the bulb.
- To preserve your garlic, allow it to dry further in a well-ventilated area. Hanging the garlic in a cool, dry place for a few weeks is a common method.
Conclusion
Growing garlic from a single clove in water is a satisfying and educational experience that brings the flavors of your garden straight to your kitchen. With patience, sunlight, and a bit of care, you can nurture a single clove into a thriving garlic plant, ready to enhance your culinary creations with its aromatic and savory taste. Whether you choose to grow your garlic in water as an engaging experiment or transplant it into soil for a full bulb harvest, the joy of homegrown garlic awaits you.