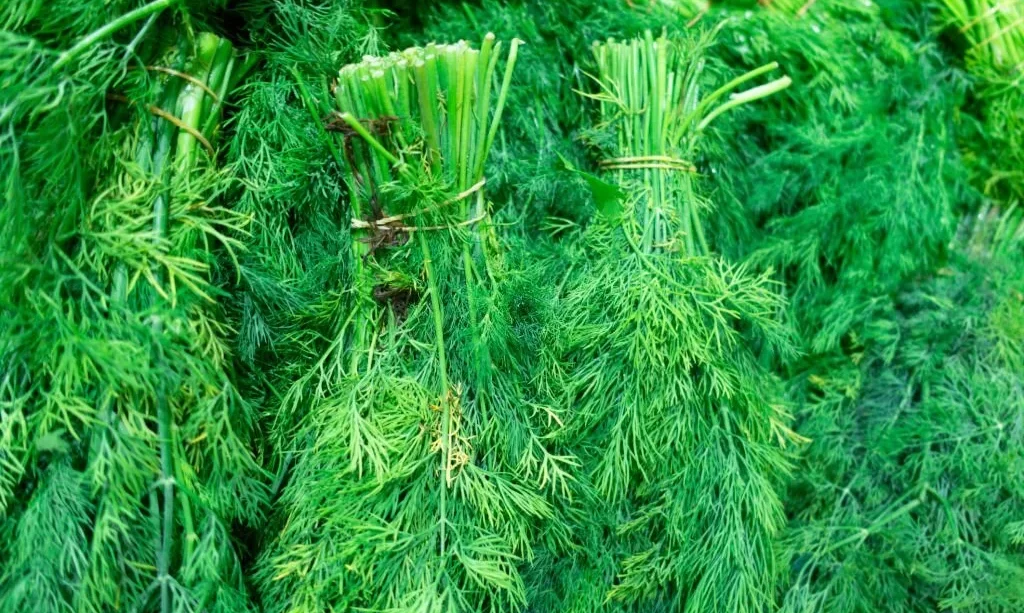
Dill, with its distinctive aroma and versatile flavor, is a delightful herb that holds a special place in the culinary world. Growing dill from cuttings is a straightforward and efficient way to expand your dill collection and enjoy its delightful attributes. In this uncomplicated guide, we’ll take you through the steps of successfully propagating dill from cuttings, so you can have a fresh supply of this fragrant herb right at your fingertips.
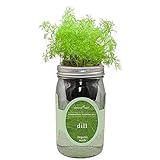
- Kit Includes: One net pot(with wick), one preseeded grow plug and one mason jar. Plant food is not included in this kit due to regulations. Recommend liquid plant food for vegetables available on Amazon.
- Start Growing: First remove the band and the net pot from the mason jar. Then add 2 cups(16oz) of water to the mason jar, and then place the net pot and the band back to the mason jar. Last, remove the plug cover in 7 days or when the seeds begin to sprout.
- Low Maintenance: This self-watering growing kit requires very low daily maintenance. The wick will pull water from the jar to the plant root which ensures the plants take enough water as they need, thus you will not need to water frequently. Just refill the jar when there is not much water left.
- Beautiful and Safe Home Decor: This artistic herb mason jar can lighten up any home. You can put it on your windowsill, your kitchen counter or anywhere you like. All the seeds are heirloom, non-GMO organic seeds. Certified organic by CCOF. We promise you can buy with confidence for you and your family!
- Fresh Herbs Every Day: Planting your favoriate herbs at home with this kit. Nothing is more exciting than having your own home grown fresh herbs every day. These delicious herbs will surely add richer taste to your dishes.
Selecting Healthy Cuttings
The journey of growing dill from cuttings begins with selecting the right ones. Here’s how to make the best choices:
- Choose Well-Established Plants: Look for dill plants that are robust and thriving. Opt for those that have healthy, vibrant leaves and show no signs of disease or pests. Healthy parent plants are more likely to produce successful cuttings.
- Timing Matters: It’s best to take cuttings during the active growing season of the dill plant. This period, usually in spring or early summer, ensures that the plant is in a state of growth and can recover more effectively from the cutting process.
- Look for Vigorous Branches: Select branches that are sturdy and have multiple sets of leaves. These branches are more likely to develop into strong, independent plants.
By starting with healthy cuttings, you’re setting the foundation for successful propagation and a flourishing supply of fresh dill. As we proceed, you’ll learn how to prepare and nurture these cuttings to transform them into vibrant dill plants ready to grace your garden or kitchen.
Preparing the Cuttings
Once you’ve chosen your healthy dill parent plant, it’s time to prepare the cuttings for propagation:
- Gather Clean and Sharp Tools: Equip yourself with clean and sharp gardening shears or scissors. This ensures clean cuts that minimize damage to the plant.
- Select the Right Length: Cut a section of the dill plant that is around 4 to 6 inches in length. This size provides a good balance between having enough material to root and making sure the cutting is manageable.
- Trim the Leaves: Carefully remove the lower sets of leaves from the cutting, leaving a few sets of leaves at the top. This step helps direct the plant’s energy towards root development.
Rooting in Water
With your cuttings prepared, it’s time to initiate the rooting process using water:
- Place in a Glass of Water: Place the trimmed end of the dill cutting in a glass of water, making sure that the nodes where the leaves were attached are submerged. These nodes are where roots will start to form.
- Choose a Suitable Location: Find a spot with indirect sunlight to place the glass. Avoid direct sunlight, as it can heat up the water and potentially harm the cutting.
- Change the Water: Change the water every few days to prevent the growth of mold or bacteria. Keeping the water fresh and oxygenated enhances the chances of successful rooting.
- Be Patient: After a week or two, you’ll notice tiny roots starting to emerge from the nodes. Once these roots are about an inch long, your cuttings are ready for the next step.
By carefully preparing your cuttings and allowing them to root in water, you’re embarking on a journey to create new, thriving dill plants. As we move forward, you’ll learn how to transplant these rooted cuttings into soil and provide them with the care they need to flourish. Stay with us as we explore the next phases of this rewarding process.
Transplanting to Soil
Once your dill cuttings have developed sufficient roots in water, it’s time to transplant them into soil to encourage further growth:
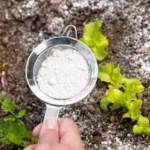
- Prepare Well-Draining Soil: Choose a pot with well-draining potting soil. Dill prefers soil that allows excess water to escape easily, preventing the risk of root rot.
- Create a Hole: Gently create a hole in the soil using your finger or a pencil. Make sure the hole is deep enough to accommodate the length of the roots on your dill cutting.
- Plant with Care: Insert the rooted dill cutting into the hole and carefully pat the soil around it to secure it in place. The roots should be well-covered, and the cutting should stand upright.

- 🌳 SUPPORT YOUR INDOOR HERB’S GROWTH – Give your plants the nourishing environment it needs to thrive! This premixed, ready to use soil blend is made up of premium non-organic all-purpose soil.
- 🌳 FIT FOR ALL INDOOR HERB PLANT VARIETIES – Basil, Thyme, Rosemary, Oregano, Mint, Parsley, Sage. Our premium soil won’t disappoint. It maximizes fertilizer absorption and provides excellent aeration to the roots.
- 🌳 PROMOTES OPTIMUM DRAINAGE – Our soil mix holds an adequate amount of moisture to meet the plant’s needs, yet still allows the water to drain well. This helps prevent over-watering.
- 🌳 GET MORE FOR YOUR MONEY – With 2.2 quarts in every bag, our soil offers you great value compared to many other options on the market. It also comes in a sturdy, resealable bag.
- 🌳 BUY WITH CONFIDENCE – Our soil blend is MADE IN THE USA. If you are not satisfied with what you receive, let us know and we’ll arrange a refund or replacement immediately.
Caring for New Plants
With your dill cuttings now in soil, it’s important to provide them with the right care to ensure their successful establishment:
- Light Requirements: Place your potted dill cuttings in a location that receives bright but indirect sunlight. Dill enjoys plenty of light, but direct sunlight can be too intense, especially for new plants.
- Watering: Keep the soil consistently moist but not waterlogged. Allow the top inch of soil to dry out before watering again. Overwatering can lead to root issues, so finding the right balance is key.
- Temperature and Humidity: Dill prefers moderate temperatures. Avoid exposing your new plants to extreme cold or heat. Providing a humid environment can also help encourage healthy growth.
- Regular Observation: Keep an eye on your newly transplanted dill cuttings. Watch for any signs of stress, wilting, or pests. Address issues promptly to ensure the health of your plants.
As your dill cuttings continue to grow and thrive, you’ll soon be able to enjoy the fresh aroma and flavor of this versatile herb. The journey from cuttings to flourishing plants requires attention and care, but the rewards are well worth it. From selecting healthy cuttings to nurturing them in soil, you’re fostering a connection with the natural world and adding a delightful element to your culinary endeavors.

- KITCHEN HERB CARE: Especially designed for culinary herbs such as oregano, basil, thyme, mint and parsley
- WINDOWSILL PERFECT: Do you like to keep potted herbs above your kitchen sink? This is an ideal potting mix for growing and repotting your favorite seasonings.
- CONTAINER GARDENING: Formulated for a balance of aeration, moisture control, drainage, and lightweight
- INGREDIENTS: A balance of peat moss, perlite, worm castings and lime, all natural, no chemicals
- SIZE: 2 quarts (enough for three 5-inch pots or 2 6-inch pots)
Harvesting Your Dill
As your newly transplanted dill cuttings grow into mature plants, you’ll have the pleasure of harvesting your own fresh dill leaves:
- Timing is Key: Dill leaves are most flavorful and aromatic just before the plant flowers. Harvest the leaves as needed, but avoid taking more than one-third of the plant’s foliage at a time.
- Harvest from the Top: When harvesting, start from the top of the plant and work your way down. This encourages the plant to continue producing new leaves from the bottom, leading to a bushier growth.
- Use Pruning Shears or Scissors: Use clean pruning shears or scissors to snip off the leaves. Make clean cuts just above a set of leaves or nodes. Avoid tearing the leaves, as this can damage the plant.
- Enjoy Fresh or Preserve: Use the freshly harvested dill leaves in your culinary creations. If you have more dill than you can use immediately, consider preserving the leaves by drying or freezing them for later use.
Conclusion
Growing dill from cuttings is a satisfying and accessible way to bring this aromatic herb into your life. From selecting healthy cuttings to watching them root and grow, and finally harvesting the fragrant leaves, every step of the process is a journey of connection with nature.
As you savor the flavors and aromas of your homegrown dill in various dishes, you’ll appreciate the simple joy of nurturing a plant from its beginnings. Whether you’re using dill to add a delightful twist to your meals or to infuse your space with its refreshing scent, you’re participating in a time-honored tradition of cultivating herbs for both pleasure and practicality. With your newfound knowledge, you’re well-equipped to embark on the delightful journey of growing dill from cuttings and enjoying the bounty of this wonderful herb.