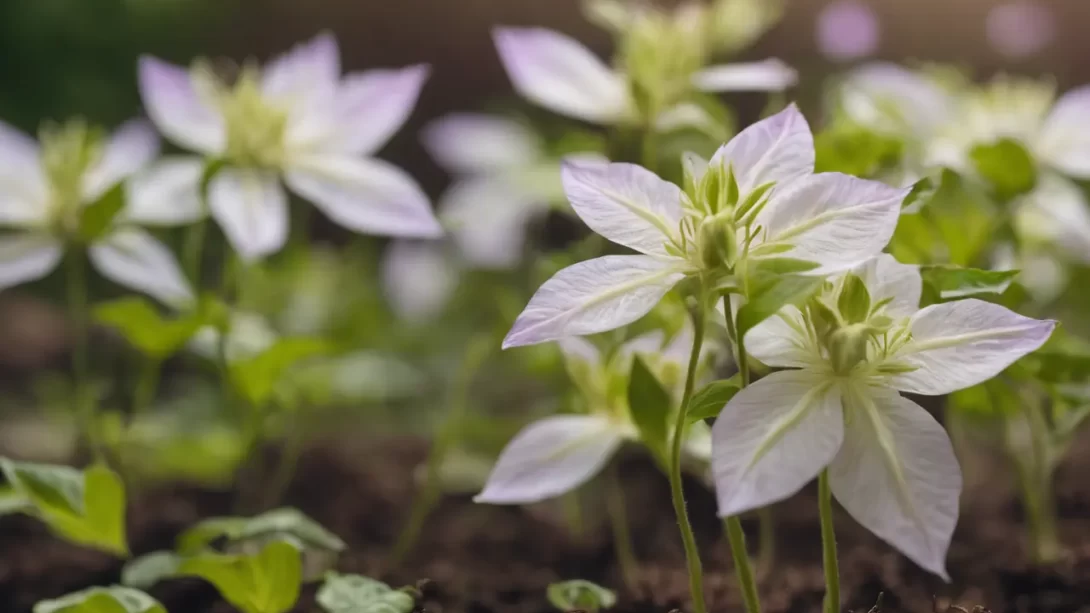
Clematis, known for its vibrant and diverse flowers, is a climbing plant that can add a touch of elegance to any garden. Growing clematis from seed can be a challenging yet rewarding endeavor. This process allows gardeners to experience the full lifecycle of these beautiful plants, often leading to unique and surprising blooms.
Clematis Seeds
Clematis seeds are distinctive in their appearance and germination process. They typically have long, feathery appendages, which aid in their natural dispersal. Gardeners can choose from a wide variety of clematis species for seed propagation. However, it’s important to note that hybrid varieties may not reproduce true to type from seed. Popular choices for seed propagation include Clematis viticella and Clematis montana.
Seed Collection and Preparation
The first step in growing clematis from seed is to collect seeds from a mature plant. Wait until the seed heads are fully dry and brown before collecting. This usually occurs in late summer or early autumn. Gently remove the seeds from the seed heads, taking care not to damage the feathery tails.
After collection, clean the seeds by carefully removing any attached plant material. This step is crucial to prevent mold or disease during stratification and germination. Store the cleaned seeds in a cool, dry place until you are ready for the stratification process.
Stratification Process
Clematis seeds require a period of cold stratification to break dormancy and encourage germination. This mimics the natural cycle of spending a winter in the ground. To stratify the seeds, mix them with slightly moistened sand or vermiculite and place them in a sealed container or plastic bag. Then, store them in a refrigerator for about 10 to 12 weeks. Check periodically to ensure the medium remains moist but not wet. This cold treatment prepares the seeds for planting and increases the chances of successful germination.
Sowing Clematis Seeds
Once the stratification period is complete, it’s time to sow the clematis seeds. Select a well-draining soil mix, ideally one formulated for seed starting. Fill shallow containers or seed trays with the soil mix, leaving some space at the top.
Sow the seeds by lightly pressing them into the soil. Clematis seeds vary in size, and some may require a thin covering of soil, while others should be left uncovered. The feathery tail can be either buried or left on the surface. Water gently to moisten the soil without disturbing the seeds. Covering the container with plastic wrap or a clear lid can help maintain humidity.
Germination and Care
Clematis seed germination can be slow and erratic, sometimes taking several weeks to several months. Patience is key. Keep the soil consistently moist but not waterlogged. Provide the seeds with indirect light and maintain a steady temperature, ideally between 70-75°F (21-24°C).
Once seedlings emerge, remove any covering and ensure they receive adequate light. This might require moving them to a brighter location or using grow lights. Continue to keep the soil moist and provide gentle ventilation to prevent fungal diseases.
Seedling Care and Transplantation
As the clematis seedlings grow, they will need careful attention. When they develop their first true leaves, it’s time to consider transplanting them into individual pots. This allows more room for growth and root development.
Use a well-draining potting mix and handle the delicate seedlings with care to avoid damaging the roots. After transplanting, continue to water the seedlings regularly, allowing the soil to dry slightly between waterings.
Gradually acclimate the young clematis plants to outdoor conditions. This process, known as hardening off, involves exposing the plants to outside conditions for a few hours each day, gradually increasing the time over a week or two. Once acclimated, the clematis can be planted in their permanent location in the garden.
Choose a planting spot with well-drained soil and access to adequate sunlight. Clematis thrives in locations where their roots are shaded but their vines and flowers can grow towards the sun. A north-facing location is often ideal, allowing the roots to remain cool and shaded while the upper part of the plant enjoys ample sunlight.
Training Young Clematis Plants
Training is a crucial step in cultivating clematis. These climbing plants require support to grow upwards and showcase their beauty. Install trellises, wires, or a pergola near the planting site for this purpose. Gently tie the young plants to the support structure, guiding them as they grow. Be mindful of their delicate stems and avoid bending them too sharply.
Pruning is also important for clematis, particularly in their early years. Pruning encourages a robust root system and fuller growth. The pruning method varies depending on the clematis variety. Some flower on new growth, while others bloom on old wood. Research the specific needs of your clematis variety to determine the appropriate pruning regimen.
Common Challenges and Solutions
Growing clematis from seed can present several challenges. One common issue is damping off, a fungal disease that affects seedlings. Ensure good air circulation, avoid overwatering, and consider using a fungicide if necessary.
Pests like aphids and spider mites can also be problematic. Regular inspection and prompt treatment with appropriate insecticides or natural remedies can keep these pests at bay.
Conclusion
Growing clematis from seed requires patience and dedication, but the rewards are plentiful. Not only does this process deepen your understanding of plant life cycles, but it also allows you to cultivate unique and beautiful clematis varieties in your garden. With proper care, these climbers will adorn your garden with their stunning flowers for many seasons to come. Remember, every successful clematis plant started as a tiny seed, so give your seeds the care they need to thrive.