Elderberries, those small, deep purple berries, have been a beloved natural remedy for centuries. They’re packed with antioxidants and vitamins that can boost your immune system, tame inflammation, lessen stress, and even help protect your heart. But did you know that you can extend their shelf life and enjoy their benefits all year round by drying them? In this article, we’ll walk you through the process of drying elderberries, from the picking to the storing, so you can have a jar of these tiny health bombs at your fingertips any time.
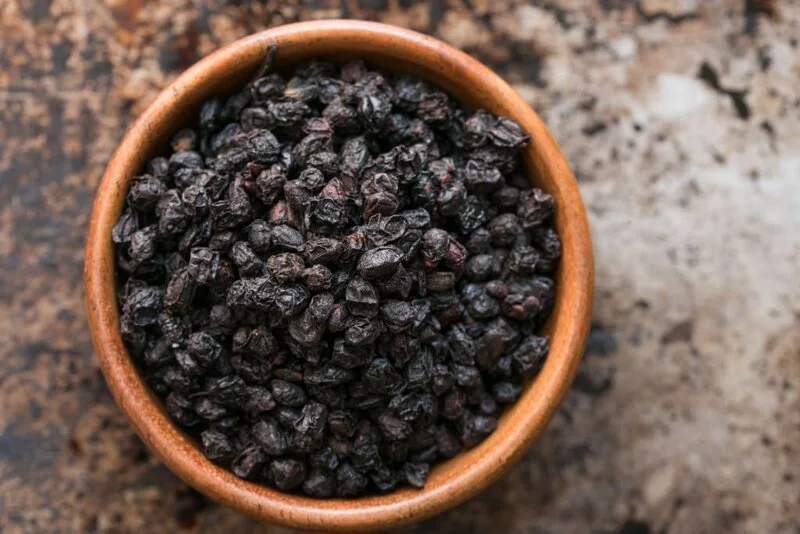
- 1 LB DRIED ELDERBERRIES: Frontier Co-op Elderberries are used to make elderberry tea, jams, syrups, juices, elderberry powder, and are traditionally used to support a healthy immune system.
- FLAVORFUL, VERSATILE BERRIES: Elder berries can be used for many culinary needs, like sweet syrups and desserts. This dark, purple berry also complements teas and warming winter cordials.
- ROBUST & TANGY: European elderberries are not the sweetest variety of berries, but tart or bitter depending on their use. The elderberry dried fruit’s flavor develops when mixed in foods or drinks.
- SUSTAINABLY SOURCED IN BULGARIA: Harvested at peak flavor to maintain the fresh elderberries’ moisture, Frontier Co-op Elderberries are 100% kosher certified with no artificial additives or chemicals.
- ABOUT US: Frontier Co-op has been a member-owned cooperative since 1976. We’re committed to the health and welfare of the environment, supporting natural living with products that never irradiated.
Picking and Preparing Elderberries for Drying
Choosing the right elderberries for drying is the first step in the process. Elderberries are ripe for picking when they have a deep, almost black color, and a slightly sweet and tart flavor. Avoid berries that are unripe (green or red) as they can be toxic.
Once you’ve picked your elderberries, preparing them for drying is a straightforward process. Start by gently removing the berries from their stems — a fork can be quite handy for this task. Next, wash the berries thoroughly to remove any dirt, bugs, or residue. Be sure to discard any berries that are discolored, squashed, or shriveled. After washing, pat them dry with a clean towel.
Finally, spread the elderberries out in a single layer on a flat surface and let them air dry. This step is to remove any excess water before the actual drying process begins, helping the berries to dry faster and more evenly later. Now, your elderberries are ready for drying!
Methods of Drying Elderberries
There are several methods you can use to dry elderberries, each with its own benefits.
- Sun Drying: This is the oldest and simplest method. Spread the elderberries out on a clean, dry cloth or baking sheet and place them under the sun. It’s a slow process and can take several days, but the wait is worth it. Make sure to cover the berries with a mesh cloth to protect them from insects.
- Oven Drying: Spread the berries out on a baking sheet lined with parchment paper. Set your oven to its lowest temperature setting, usually around 50°C (120°F), and place the tray inside. Leave the oven door slightly ajar to allow moisture to escape. It can take 10-12 hours for the berries to dry completely.
- Using a Dehydrator: If you have a dehydrator, it’s a fantastic tool to dry elderberries. Simply spread the berries out on the trays and set the dehydrator to a low setting, around 52°C (125°F). The berries typically dry in 8-10 hours in a dehydrator.
Remember to check the berries periodically during drying. They should be hard and dry to the touch when done, with no visible moisture.
Storing Dried Elderberries
Once the elderberries are thoroughly dried, it’s time to store them. Place the dried berries in an airtight container, such as a glass jar with a tight lid. Store the container in a cool, dark, and dry place, like a pantry or a kitchen cupboard. Properly stored, dried elderberries can keep their quality for up to a year. Before using them, always check for any signs of moisture or mold, as these can spoil the berries and make them unsafe to consume.
Storing dried elderberries properly ensures you have a ready supply of these nutritious berries to use in teas, syrups, baking, or even homemade wines throughout the year!
Using Dried Elderberries
Dried elderberries are incredibly versatile and can be used in a multitude of ways. Their rich, fruity flavor can add depth to many recipes. Try adding them to muffins, pies, or other baked goods. You can also rehydrate them in water and use them in jams, syrups, or sauces.
One of the most popular uses of dried elderberries is in herbal tea. Just steep a tablespoon of dried elderberries in hot water for a comforting, immune-boosting drink. Elderberries are often combined with other herbs like echinacea and ginger for a powerful wellness tea.
Remember, while elderberries are generally safe to consume, they should always be cooked or dried before eating. Raw elderberries contain substances that can cause stomach upset.
Conclusion
In conclusion, drying elderberries is a simple, effective way to preserve these nutritious fruits so you can enjoy their benefits throughout the year. Whether sun-dried, oven-dried, or dehydrated, the result is a versatile ingredient that can boost the flavor and nutritional profile of many recipes. So next time you have a bounty of elderberries, consider drying them. Your future self will thank you for the sweet, wholesome treat that can liven up your meals and teas any time of the year.


