Zinnias, with their dazzling array of colors and cheerful blooms, are a garden favorite that can brighten up any outdoor space. These vibrant flowers not only add a burst of color but also provide an excellent opportunity for gardeners to collect seeds for future planting. Whether you’re looking to save money on buying new zinnia seeds, preserve the characteristics of your favorite varieties, or share the joy of zinnia gardening with others, learning how to collect zinnia seeds is a valuable skill. In this comprehensive guide, we’ll walk you through the steps to effectively collect zinnia seeds, ensuring that your garden continues to bloom with these beautiful flowers season after season.
Selecting Zinnia Plants for Seed Collection
Before you embark on the journey of collecting zinnia seeds, it’s crucial to select the right zinnia plants to ensure the best seed quality. Here are some key considerations:
- Health and Vigor: Choose zinnia plants that are healthy and vigorous. Look for plants with strong stems, vibrant foliage, and vibrant flowers. Healthy plants are more likely to produce robust seeds.
- Desirable Characteristics: If you have specific zinnia varieties you adore or wish to preserve, select plants with the desired characteristics. This could include unique colors, petal shapes, or growth habits that you want to see in future generations of zinnias.
- Maturity: Opt for zinnia plants that have reached full maturity. Seeds from mature zinnia flowers are more likely to be fully developed and viable for planting.
- Disease-Free: Ensure that the chosen zinnia plants are free from diseases or pests. Collecting seeds from healthy plants reduces the risk of carrying over any issues to the next generation.
By carefully selecting the zinnia plants for seed collection, you lay the foundation for a successful and vibrant zinnia garden in the future. In the following sections, we will delve into the timing of seed collection, tools and materials needed, and the step-by-step process of harvesting, drying, and storing zinnia seeds.
Timing for Zinnia Seed Collection
Timing is critical when it comes to collecting zinnia seeds. To ensure that your seeds are mature and viable, follow these guidelines for the ideal timing:
Zinnia seeds are typically ready for collection towards the end of the growing season, which is usually late summer to early fall. Here’s what to look for:
- Fully Mature Flowers: Wait until the zinnia flowers have fully matured and begun to fade. At this stage, the petals will start to wither and dry.
- Seed Head Formation: Examine the center of the flower, where you’ll find a raised, cone-like structure called the seed head. This is where the zinnia seeds are developing.
- Brown and Dried Appearance: The seed head should appear brown and dried, and you may notice small cracks or openings. This indicates that the seeds are ready for collection.
By waiting for these signs, you ensure that the zinnia seeds have reached their maximum maturity and are more likely to produce healthy plants in the next growing season.
Preparing Tools and Materials
Before embarking on the process of zinnia seed collection, it’s essential to gather the necessary tools and materials. Here’s what you’ll need:
- Scissors or Pruning Shears: Sharp and clean scissors or pruning shears are essential for snipping off zinnia flower heads without damaging the seeds.
- Paper Bags or Envelopes: Choose paper bags or envelopes to collect the harvested flower heads. These materials allow for air circulation and prevent moisture buildup.
- Labels: Prepare labels to identify the zinnia variety or any other information you’d like to note for future reference.
Having these tools and materials at hand will streamline the seed collection process and help ensure the safe storage of your zinnia seeds.

- Make Pruning Work Easier: Rust-resistant stainless steel blade are sharp and durable for easy and smooth cut.Anti-slip and ergonomic handle make the gardener clippers more comfortable in your hand.Easy-open spring action reduces hand fatigue while cutting. you can easily to cut without damaging the vital stems and branches of your plants
- User-friendly Safety Lock: These garden shears have locking mechanisms to keep the sharp blades securely closed when not in use.It is easy to maneuver and can effectively reduce accidental injuries. And the closing mechanism is firmly enough, you don’t need to worry the plant pruning shears will get locked accidentally during use
- Garden Gloves for Hand Protection: One size fits most. This Gardening gloves,made of soft & comfortable cotton fabric,can protect yourself from dirt, skin wounds and nasty splinters when doing yard chores. The grip latex coating provides anti-slip or sure control when grabbing garden & yard tools
- Widely Used: This gardening shears set comes with 3 different blades for a variety of general pruning tasks.It is ideal for harvesting or trimming herbs,flowers,house plants, hydroponics,bonsai,cutting stems or light branches,or other cutting needs in the garden. It would also be a perfect gift for a gardening friend
- Customer support: Please feel free to tell us if you have any questions about our garden shears pruning. Note:Keeping your pruner shears cleaned and well-oiled can extend their lifespan. Please dry and clean it after use. Note: The colors of the garden pruners and gloves will be shipped at random
Harvesting Zinnia Seeds
Once you have your tools and materials ready, you can start the process of harvesting zinnia seeds. Follow these steps for successful seed collection:
- Select Mature Flowers: Identify zinnia flowers that have reached full maturity, as mentioned in Section 2. These flowers should exhibit withered and drying petals.
- Snip Flower Heads: Use your scissors or pruning shears to snip off the dried zinnia flower heads. Make the cut just below the base of the flower head, ensuring you capture the entire seed head.
- Collect in Paper Bags or Envelopes: Place the harvested zinnia flower heads in paper bags or envelopes. These containers will catch any seeds that may naturally fall out during the drying process.
- Label and Date: Label each container with the zinnia variety name (if known) and the date of collection. This information is essential for keeping track of your seed collection.
With your zinnia flower heads safely collected, you’re now ready to move on to the drying process, which is crucial for preserving the quality of the seeds. Sections 5 and 6 will guide you through the steps of drying and separating the seeds from the chaff.
Drying Zinnia Seeds
Drying zinnia seeds is a crucial step to ensure their longevity and prevent mold or fungal growth. Here’s how to effectively dry your collected zinnia seeds:
- Spread Seed Heads: Lay out the paper bags or envelopes containing the zinnia flower heads in a dry and well-ventilated area. Choose a spot where the air can circulate freely around the containers.
- Avoid Direct Sunlight: While drying, it’s essential to keep the seeds out of direct sunlight, as excessive heat can damage their viability.
- Patience is Key: Allow the zinnia flower heads to dry naturally over several weeks. During this time, the seeds will continue to mature and dry within the seed heads.
- Check for Dryness: After a few weeks, check the seed heads by gently shaking them. If you hear a rattling sound and the seeds easily separate from the flower heads, they are likely fully dry and ready for the next step.
Separating Zinnia Seeds from Chaff
Once your zinnia seeds are fully dry, it’s time to separate them from the chaff (the dried flower debris). Here’s how to do it:
- Prepare a Work Area: Find a clean, dry workspace with good lighting. You may want to lay down a clean sheet of paper or a tray to catch any falling seeds.
- Gently Shake the Seed Heads: Take each dried zinnia flower head and gently shake it over your work area. Most of the seeds should easily fall out.
- Inspect and Remove Remaining Chaff: After shaking, inspect the seeds for any remaining chaff or debris. You can pick out the chaff by hand or use a small sieve or strainer with fine mesh to sift the seeds. The fine mesh will allow the seeds to pass through while retaining the larger chaff pieces.
- Transfer Cleaned Seeds: Transfer the cleaned zinnia seeds to a clean, dry container. You can use small glass jars, seed envelopes, or airtight containers for storage.
Storing Zinnia Seeds
Proper storage is essential to maintain the viability of your zinnia seeds. Follow these guidelines to store them effectively:
- Airtight Containers: Place the cleaned zinnia seeds in airtight containers, such as small glass jars, seed envelopes, or resealable plastic bags. Ensure that the containers are clean and dry.
- Label and Date: Label each container with the zinnia variety name (if known) and the date of collection. This information helps you keep track of your seed inventory.
- Cool, Dry, and Dark: Store the sealed containers in a cool, dry, and dark location. A consistently cool and dry environment helps preserve seed viability.
By following these steps, you’ll ensure that your zinnia seeds remain in excellent condition for future planting seasons. Collecting and storing zinnia seeds allows you to enjoy these vibrant flowers year after year while preserving your favorite varieties and sharing the beauty of zinnias with fellow gardeners.
Testing Seed Viability
While testing seed viability is an optional step, it can provide valuable information about the germination potential of your zinnia seeds. Here’s how to perform a simple germination test:
- Prepare a Damp Paper Towel: Moisten a paper towel without soaking it. It should be damp but not dripping wet.
- Place Seeds on the Towel: Lay a few zinnia seeds on the damp paper towel, leaving some space between them.
- Fold and Enclose: Fold the paper towel gently over the seeds to cover them.
- Seal in a Plastic Bag: Place the folded paper towel with the seeds inside a resealable plastic bag. Seal the bag but leave some air inside for oxygen.
- Wait and Observe: Keep the bag in a warm and bright location, such as on a windowsill. Check the seeds regularly over the next week or two for signs of germination.
- Interpret Results: If the majority of the seeds sprout and produce tiny seedlings, it indicates good seed viability. If very few or none sprout, it may be an indication that the seeds have lower viability.

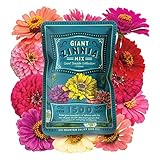
- Earth Science products combine innovative technologies with earth-friendly ingredients
- Includes a beautiful mixture of Zinnia colors.
- Easy planting
- Designed to bloom throughout the season with minimal care or maintenance.
- Water Right technology helps tell you when to water.
Conclusion
Congratulations! You’ve successfully learned how to collect zinnia seeds, ensuring that you can enjoy these vibrant and beautiful flowers year after year. Collecting and storing zinnia seeds not only saves you money but also allows you to preserve the characteristics of your favorite zinnia varieties and share the joy of gardening with others.
By following the steps outlined in this guide, from selecting healthy plants to harvesting, drying, and storing the seeds, you’ve equipped yourself with the knowledge to keep your zinnia garden thriving. Whether you’re a seasoned gardener or just starting your horticultural journey, collecting and sowing zinnia seeds can be a rewarding experience that brings color and life to your outdoor spaces.
So, as you admire your zinnia blooms in the present, remember that you’re also sowing the seeds of future beauty and joy in your garden.