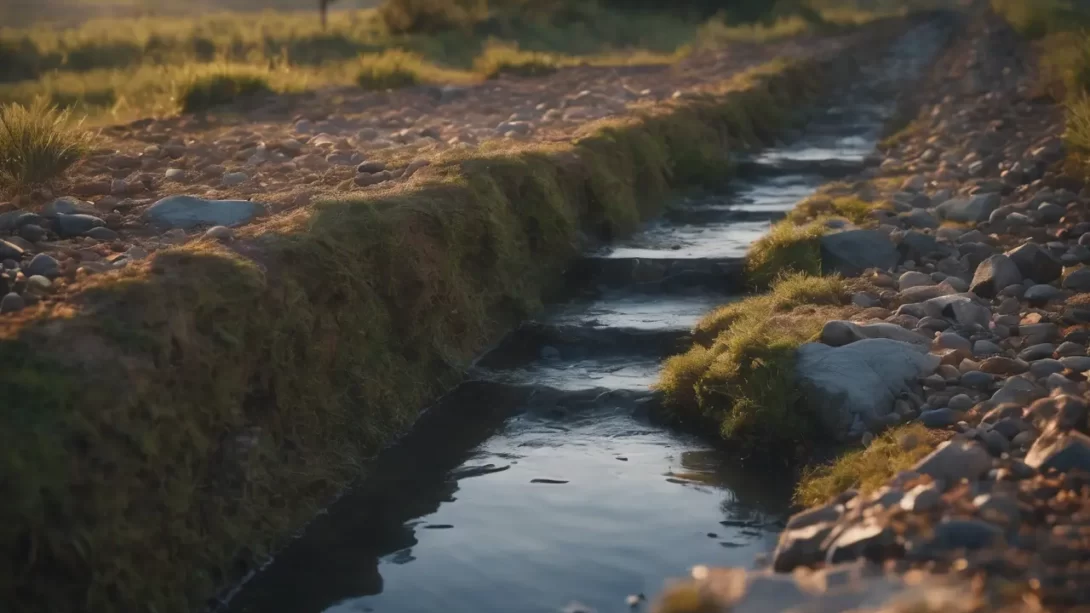
Effective drainage is a crucial aspect of landscaping, especially in areas prone to heavy rainfall or water accumulation. A rock drainage ditch is an efficient and aesthetically pleasing way to manage water flow and prevent soil erosion in such landscapes. This article will guide you through the process of building a rock drainage ditch, ensuring proper water diversion and landscape protection.
Planning Your Rock Drainage Ditch
Before you start digging, careful planning is essential to ensure the effectiveness of your rock drainage ditch. Consider the following factors:
- Location: Identify areas with water accumulation or where you want to redirect water flow. The ditch should ideally be placed on a natural slope for better water movement.
- Size and Slope: Determine the appropriate size and depth of your ditch based on the volume of water you need to manage. The slope of the ditch should be consistent to facilitate water flow, typically aiming for a gradient of about 1% to 2%.
- Overall Drainage Needs: Assess the drainage needs of your entire landscape to integrate the ditch effectively with other drainage solutions, if necessary.
Materials and Tools Needed
To build a rock drainage ditch, you will need the following materials and tools:
- Rocks: Choose durable rocks like river rock or crushed stone. The size can vary, but medium-sized rocks are generally a good choice for stability and effectiveness.
- Landscape Fabric: To prevent weeds from growing through your rocks and clogging the ditch.
- Shovel: For digging the ditch.
- Wheelbarrow: To move rocks and soil.
- Rake: For leveling and spreading rocks.
- Gloves and Safety Gear: To protect your hands and ensure safety during the work.
Step-by-Step Guide to Building a Rock Drainage Ditch
- Marking the Area: Use stakes and string to mark the exact course of your ditch. This step ensures that your ditch follows the planned path and slope.
- Excavating the Ditch: Start digging along the marked lines. The width and depth will depend on your specific needs, but a general guideline is to make the ditch about 18 inches wide and 8 to 12 inches deep.
Laying the Foundation
After excavating the ditch, it’s important to lay a foundation that will support the rocks and facilitate effective drainage.
- Prepare the Base: Compact the bottom of the ditch using a hand tamper to create a stable base.
- Add a Layer of Gravel: Before placing the larger rocks, add a layer of smaller gravel or crushed stone. This layer, about 2-3 inches deep, will aid in drainage and help to keep the larger rocks stable.
Installing Landscape Fabric
Landscape fabric is crucial in preventing weed growth and minimizing soil mixing with the rocks.
- Measure and Cut: Measure the length of your ditch and cut a piece of landscape fabric to cover the entire length and width.
- Lay the Fabric: Place the fabric along the length of the ditch, ensuring it extends up the sides. Secure the edges with landscape staples to keep it in place.
Placing the Rocks
With the foundation set and the fabric laid, it’s time to add the rocks.
- Start with Larger Rocks: Begin by placing the larger rocks along the bottom of the ditch. These serve as the primary layer for water flow.
- Fill with Smaller Rocks: Fill in the gaps and cover the larger rocks with smaller ones. This step ensures a more even and stable surface, and also contributes to the aesthetic appeal.
Tips for Effective Water Flow
To ensure your rock drainage ditch functions effectively:
- Maintain a Consistent Slope: Recheck the slope as you work to ensure water will flow properly.
- Avoid Obstructions: Keep the ditch clear of large obstructions that might impede water flow.
Maintenance and Upkeep
A rock drainage ditch requires occasional maintenance to keep it functioning effectively and looking its best. Here are some tips for upkeep:
- Regular Inspections: Periodically inspect the ditch, especially after heavy rains, to ensure it remains clear of debris and functioning properly.
- Clear Debris and Sediment: Remove leaves, twigs, and any sediment that may have accumulated in the ditch to prevent clogging and ensure smooth water flow.
- Check for Erosion: Over time, water flow may cause erosion around the edges of the ditch. Reinforce these areas as needed to maintain the integrity of the ditch.
- Weed Control: Although landscape fabric helps reduce weed growth, some maintenance may be required. Gently remove any weeds that appear, being careful not to disrupt the rock layers.
Long-Term Considerations
Over the years, environmental factors and natural wear may necessitate some additional work:
- Replenishing Rocks: The rocks in the ditch may settle or shift over time. Add additional rocks as needed to maintain the effectiveness and appearance of the drainage system.
- Fabric Replacement: Landscape fabric may deteriorate over time. If you notice significant wear or reduced weed control, consider replacing the fabric.
Conclusion
Building a rock drainage ditch is a practical and aesthetically pleasing way to manage water flow and prevent erosion in your landscape. By following these steps – planning, excavation, foundation preparation, landscape fabric installation, and rock placement – you can create an effective drainage solution. Regular maintenance is key to ensuring the long-term functionality and appearance of the ditch. With proper care, your rock drainage ditch will continue to enhance the beauty and health of your landscape for years to come, proving to be an invaluable addition to your outdoor space.