Braiding onions is an age-old technique that combines practicality with tradition, offering an effective way to store onions while enhancing their shelf life. This method not only facilitates better air circulation around the onions but also serves as a testament to the cultural heritage of preserving harvests across generations. Beyond its practical benefits, braiding onions can be a decorative element in kitchens, adding a rustic charm to the culinary space. This guide will introduce you to the art of onion braiding, from selecting the right onions to preparing them for the braiding process.
Selecting Onions for Braiding
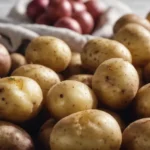
The success of an onion braid starts with choosing the right onions. Ideal candidates for braiding are varieties known for their long shelf life and robust flavor, such as Yellow Storage, Red Wing, or Spanish types. When selecting onions for braiding, consider the following criteria:
- Variety: Opt for varieties that are known to store well and have sturdy necks suitable for braiding.
- Size: Medium to large onions are preferable, as they provide a substantial base for the braid and ensure a visually appealing and practical outcome.
- Dryness: Only use onions that have been properly cured and are completely dry to the touch. Moisture is the enemy of long-term storage, leading to mold and spoilage.
Preparing Onions for Braiding
Before you start braiding, it’s essential to prepare the onions to ensure they are in the best condition for storage. This preparation includes curing, cleaning, and sorting the onions:
Curing Onions
- Curing Process: Lay the onions out in a single layer in a dry, well-ventilated area away from direct sunlight. The curing process can take 2-4 weeks, depending on humidity and air circulation. The goal is to allow the outer layers to dry out and the necks to tighten.
- Conditions: Ideal curing conditions include good air circulation, low humidity, and temperatures ranging from 60-75°F (15-24°C).
Trimming and Cleaning
- Trimming Roots: Once cured, trim the roots close to the bulb without damaging it. This step helps prevent dirt from getting into the braid and gives it a cleaner appearance.
- Cleaning Onions: Gently remove any loose or peeling outer layers from the onions. Be careful not to remove too many layers, as the outer skins help protect the onion during storage.
Sorting
- By Size and Condition: Sort the onions by size to help plan the layout of your braid. It’s also important to inspect each onion for signs of damage or disease, as only healthy onions should be included in the braid.
Braiding Techniques
Mastering the art of onion braiding requires patience and practice. There are various techniques, but we’ll focus on the basic three-strand braid and a traditional method for a more intricate and robust braid. Both techniques ensure that your onions are not only stored efficiently but also displayed beautifully.
Basic Braiding Technique
The three-strand braid is an excellent starting point for beginners. It’s similar to braiding hair and provides a simple yet effective way to store onions.
- Starting the Braid: Begin with three onions, tying their stems together close to the bulbs using a strong twine. This will form the base of your braid.
- Incorporating Additional Onions: As you braid the stems, add new onions one at a time to each outer strand before folding it into the center. This process gradually increases the length and volume of the braid.
- Maintaining Tension: It’s crucial to keep a firm tension on the braid to ensure the onions are secure and the braid is tight. However, be careful not to break the stems.
Traditional Braiding Technique
For those looking for a more traditional and decorative braid, this method involves a larger number of onions and creates a thicker, more intricate braid.
- Preparation: Start with a larger bundle of onions than the basic technique, usually 5-7, and tie them together at the stems.
- Weaving the Stems: Instead of a simple three-strand braid, this method involves more complex weaving, incorporating additional onions into the braid in a way that evenly distributes their weight and creates an aesthetically pleasing pattern.
- Skill and Patience: This technique may require some practice to master, especially in maintaining even tension and ensuring the onions are securely fastened within the braid.
Adding Onions to the Braid
Regardless of the technique, adding onions to the braid is a critical step that determines the braid’s overall appearance and stability.
- Secure Incorporation: When adding each new onion, ensure it is placed tightly against the braid and that its stem is woven in securely. This prevents the onions from slipping out and helps maintain the braid’s integrity.
- Size Considerations: Incorporate larger onions at the base and gradually use smaller ones as you work towards the end of the braid. This creates a natural tapering effect and contributes to the braid’s aesthetic appeal.
Finishing and Storing the Braid
Completing your onion braid involves securely finishing the end and choosing an optimal storage location.
- Tying Off the End: Once you reach the desired length, or run out of onions, tie off the end of the braid using twine or a rubber band. Ensure it’s tight enough to hold the braid together but not so tight as to damage the stems.
- Storage Location: Hang the braid in a cool, dry, and well-ventilated area away from direct sunlight. A pantry, cellar, or even a kitchen, provided it meets these conditions, is ideal.
Additional Tips and Tricks
While the basic and traditional braiding techniques provide a strong foundation, refining your skill can elevate the functionality and aesthetic appeal of your onion braids. Here are some extra tips and tricks to enhance your braiding experience:
- Decorating Your Braid: Consider weaving in some decorative elements such as dried flowers, herbs, or colorful ribbons into your onion braid. Not only does this add a touch of charm, but herbs like lavender or rosemary can also help repel pests naturally.
- Handling Brittle Stems: If you find the onion stems are breaking easily, you can dampen them slightly before braiding to increase their flexibility. Be cautious not to wet them too much, as excessive moisture can lead to mold.
- Even Distribution: As you add onions to the braid, pay attention to distributing them evenly on both sides. This balance prevents the braid from twisting or bending, ensuring it hangs straight when displayed.
Solutions for Common Challenges
Braiding onions can sometimes present challenges, especially for beginners. Here are solutions to some common issues:
- Uneven Sizes: If your onions vary significantly in size, start with the larger ones at the base and graduate to smaller ones towards the top. This not only creates a visually pleasing taper but also ensures the braid is balanced.
- Brittle Stems: For onions with particularly brittle stems, consider using twine to reinforce the braid. Wrap the twine around each addition to secure the onions without relying solely on the stems.
- Storage Concerns: If you notice any signs of spoilage or mold on an onion in the braid, remove it immediately to prevent it from affecting the others. Regularly inspect your braids throughout their storage life.
Using Braided Onions in Cooking
Braided onions are not just decorative; they’re also a practical way to store onions for cooking. Here’s how to use them:
- Removing Onions: When you need an onion for cooking, carefully cut the stem above the bulb you wish to use, leaving the rest of the braid intact. This allows you to continue storing the remaining onions properly.
- Preserving the Braid’s Integrity: Always remove onions from the bottom of the braid to maintain its balance and aesthetic.
Conclusion
Braiding onions is a rewarding endeavor that marries tradition with practicality. It’s a method that not only extends the shelf life of your onions but also transforms them into a decorative piece that adds a rustic charm to your kitchen. With patience and practice, the techniques of onion braiding can be mastered by anyone, enhancing both the functionality and beauty of your harvest storage. Remember, each braid you create is a reflection of the care and effort you put into your gardening and culinary practices, celebrating the bounty of the earth in a uniquely beautiful way. As you become more proficient, you’ll find that onion braiding is not just about preservation but also about creating a tangible connection to the cycles of nature and the joys of homegrown produce.